HAProxy is a reliable open source tool to implement reverse proxy server and load balancers. Most of well know load balancers, AWS LB for example, are based on HAProxy modified source code. Let's see how to setup a custom load balancer using HAProxy.
Prerequsites
To deploy load balancer, prepare the following:
- a couple of servers with WCS installed and configured (cloud or hardware)
- a dedicated server to be enrty point for clients incoming connections
- a domain name and SSL certificate
If WCS servers supposed to be in CDN, CDN setup should be done before. For example, if the goal is to balance publishers to a number of Origin servers, or subscribers to a number of Edges, all those instances should be configured before deploying the load balancer.
WCS servers setup
1. Incoming connections ports
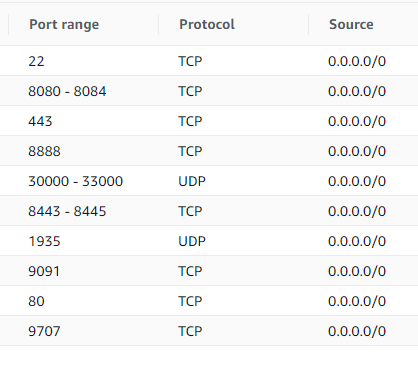
Open all the necessary ports for incoming connections on every WCS server (if this is not already done). Look at the minimal ports setup example for AWS EC2 instance
Note that TCP port 9707 should be added. This port will be used by HAProxy to check a current server state.
Media traffic ports (30000-33000 in the example above) should be available from outside networks if server is behind a NAT, because HAProxy may proxy Websocket connectinos only, but not WebRTC.
2. WCS setup
Add the following parameters to flashphoner.properties file to use a real client IP addresses in session identifiers
ws.map_custom_headers=true
ws.ip_forward_header=X-Client-IP
If servers load supposed to be balanced depenfing on channel bandwidth, add the following setting too
global_bandwidth_check_enabled=true
Then restart WCS
sudo systemctl restart webcallserver
3. HAProxy agent setup
3.1. Install all the necessary dependencies to the server
yum install jq bc xinetd telnet
3.2. Copy the scripts haproxy-agent-check.sh and haproxy-agent-check-launch.sh to /usr/local/bin folder and allow execution
sudo cp haproxy-agent-check* /usr/local/bin/
sudo chmod +x /usr/local/bin/haproxy-agent-check*
The haproxy-agent-check.sh is used to check server state according to system information and WCS statistics. If any of thresholds passed to the script is reached, the script will return down state. HAProxy, in its turn, will not dispatch a new connections to the server until the agent script returns up .
The following tresholds are supported:
- cpu - maximum CPU load average in percents, 90 by default
- publishers - maximum publishers count per server, including WebRTC, RTMP, RTSP streams, 100 by default
- subscribers - maximum subscribers count per server, including WebRTC, RTMP, RTSP players, 100 by default
- hls - maximum HLS streams count per server, 100 by default
- band-in - maximum incoming channel bandwidth occupied, 100 Mbps by default
- band-out - maximum outgoing channel bandwidth occupied, 100 Mbps by default
For example, to check if CPU LA is below 70%, the script sholud be launched as
/usr/local/bin/haproxy-agent-check.sh cpu 70
3.3. Add the following string to /etc/services file
haproxy-agent-check 9707/tcp # haproxy-agent-check
3.4. Add the file haproxy-agent-check with the following content to the folder /etc/xinetd.d
# default: on
# description: haproxy-agent-check
service haproxy-agent-check
{
        disable         = no
        flags           = REUSE
        socket_type     = stream
        port            = 9707
        wait            = no
        user            = nobody
        server          = /usr/local/bin/haproxy-agent-check-launch.sh
        log_on_failure  += USERID
        only_from       = 172.31.42.154 127.0.0.1
        per_source      = UNLIMITED
}
The helper script haproxy-agent-check-launch.sh is used because xinetd does not support any command line keys in server parameter
The only_from parameters allows connections to the port 9707 only from load balancer server where HAProxy will be installed, and from localhost for testing purposes.
3.5. Allow haproxy-agent-check execution
sudo chmod +x /etc/xinetd/haproxy-agent-check
3.6. Restart xinetd
sudo systemctl restart xinetd
3.7. Test the agent work
telnet localhost 9707
Load balancer setup
1. Configure nginx to serve example applications (or any other frontend task)
1.1. Install nginx
sudo yum install nginx
1.2. Change default port in /etc/nginx/nginx.conf file, and set the server name as localhost
    server {
        listen       8180;
        listen       [::]:8180;
        server_name  localhost;
        root         /usr/share/nginx/html;

        # Load configuration files for the default server block.
        include /etc/nginx/default.d/*.conf;

        error_page 404 /404.html;
        location = /404.html {
        }

        error_page 500 502 503 504 /50x.html;
        location = /50x.html {
        }
    }
nginx will be available only locally because HAProxy will provide an entry point for clients.
1.3. Restart nginx
sudo systemctl restart nginx
1.4. Download WebSDK actual build bundle
wget https://flashphoner.com/downloads/builds/flashphoner_client/wcs_api-2.0/flashphoner-api-2.0.206-7d9863ae4de631a59ff8793ddecd104ca2fd4a22.tar.gz
and unpack it to the /usr/share/nginx/html/wcs folder
sudo mkdir /usr/share/nginx/html/wcs
cd /usr/share/nginx/html/wcs
sudo tar -xzf ~/flashphoner-api-2.0.206-7d9863ae4de631a59ff8793ddecd104ca2fd4a22.tar.gz --strip-components=2
2. SSL certificates setup for HAProxy
2.1. Create a full certificate file in PEM format (must include all the certificates and a private key) and copy to a folder whele certificate file should be available
cat cert.crt ca.crt cert.key >> cert.pem
sudo mkdir -p /etc/pki/tls/mydomain.com
sudo cp cert.pem /etc/pki/tls/mydomain.com
3. HAProxy configuration
3.1. Install HAProxy
sudo yum install haproxy
3.2. Edit the file /etc/haproxy/haproxy.cfg
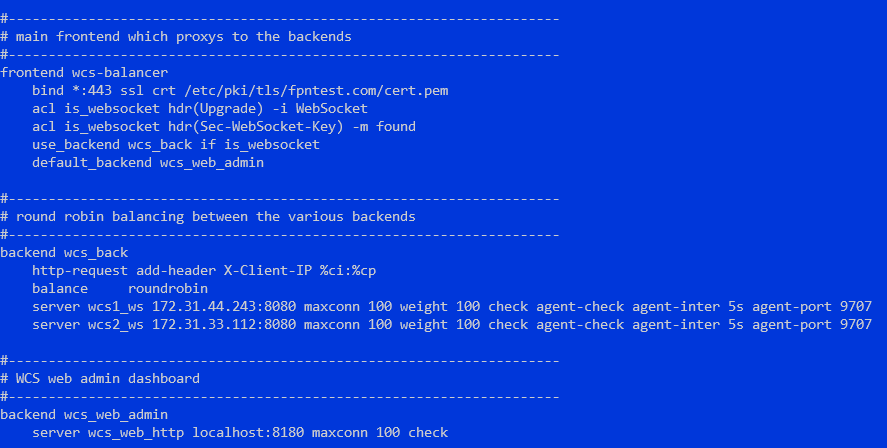
All the parameters in global and defaults sections may be left by default. Configure frontend
frontend wcs-balancer
    bind *:443 ssl crt /etc/pki/tls/mydomain.com/cert.pem
    acl is_websocket hdr(Upgrade) -i WebSocket
    acl is_websocket hdr(Sec-WebSocket-Key) -m found
    use_backend wcs_back if is_websocket
    default_backend wcs_web_admin
Set nginx with WebSDK examples as default backend
backend wcs_web_admin
    server wcs_web_http localhost:8180 maxconn 100 check
Backen to balance a load between two instances (IP addresses are private and shown for example only)
backend wcs_back
    http-request add-header X-Client-IP %ci:%cp
    balance     roundrobin
    server wcs1_ws 172.31.44.243:8080 maxconn 100 weight 100 check agent-check agent-inter 5s agent-port 9707
    server wcs2_ws 172.31.33.112:8080 maxconn 100 weight 100 check agent-check agent-inter 5s agent-port 9707
Session stickiness may be set up as follows
backend wcs_back
    http-request add-header X-Client-IP %ci:%cp
    balance     roundrobin
    cookie SERVERID insert indirect nocache
    server wcs1_ws 172.31.44.243:8080 maxconn 100 weight 100 check agent-check agent-inter 5s agent-port 9707 cookie wcs1_ws
    server wcs2_ws 172.31.33.112:8080 maxconn 100 weight 100 check agent-check agent-inter 5s agent-port 9707 cookie wcs1_ws
In this case, all the connections from a certain client will be redirected to the same server unless it returns down state
Load balancing by maximum client connections to the server may be configured as follows
backend wcs_back
    http-request add-header X-Client-IP %ci:%cp
    balance     leastconn
    server wcs1_ws 172.31.44.243:8080 maxconn 100 weight 100 check agent-check agent-inter 5s agent-port 9707
    server wcs2_ws 172.31.33.112:8080 maxconn 100 weight 100 check agent-check agent-inter 5s agent-port 9707
In this case all the clients will be redirected to the first server until either maxconn is reached or or server returns down state
3.3. Restart HAProxy
sudo systemctl restart haproxy
Testing
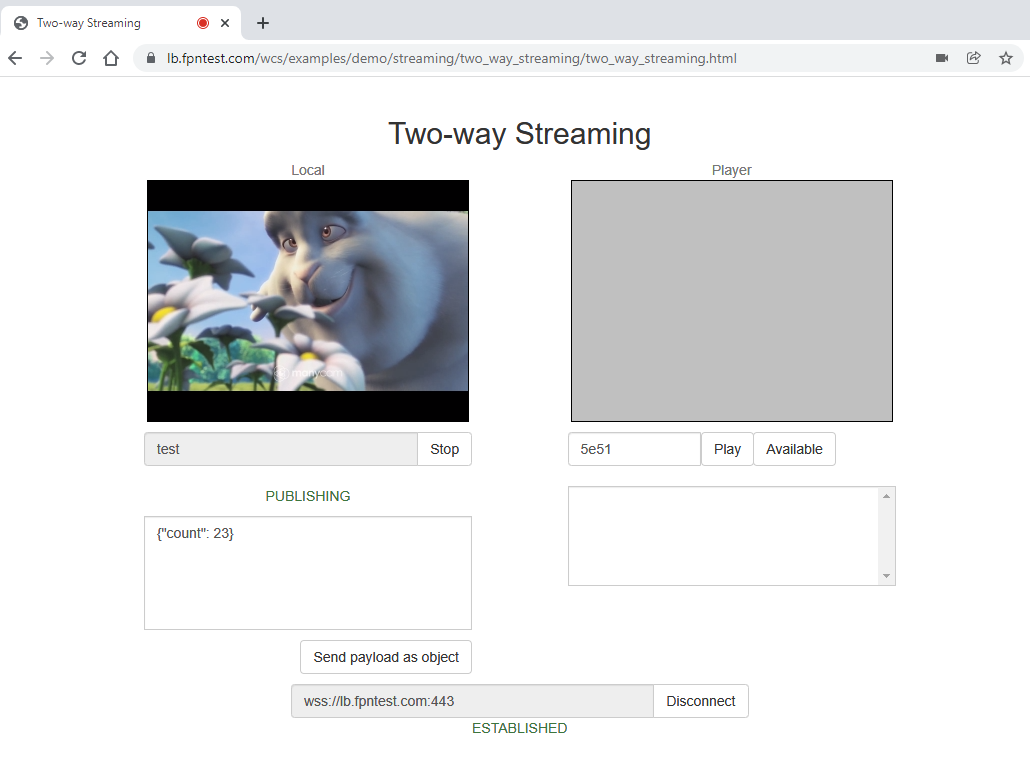
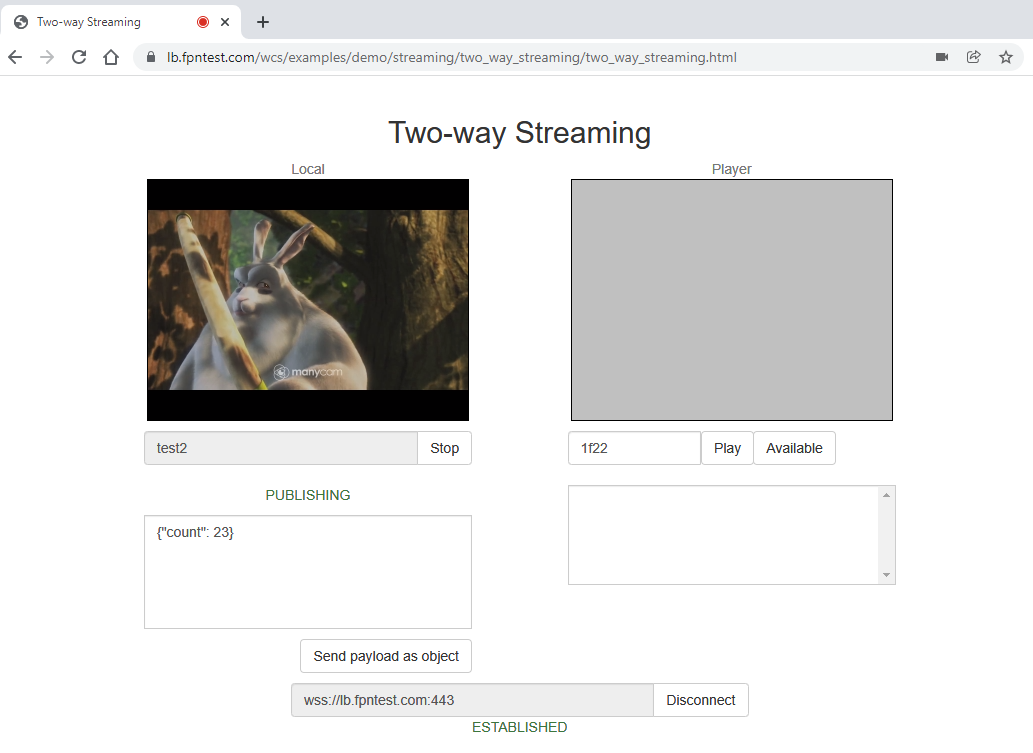
1. Open Two Way Streaming example, set port 443 in Websocket URL input field and publish a stream
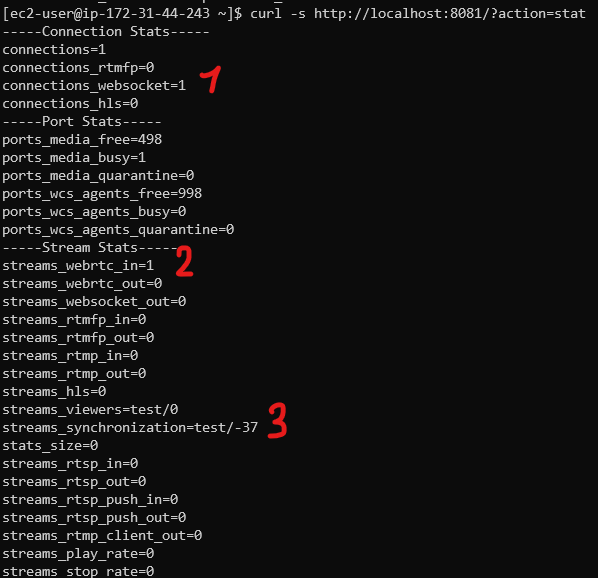
2. Check the statistics page on the first WCS server
One Websocket connection (1), one incoming stream (2) named test (3) are displayed
3. Check session Id
Client IP address and port are used in session Id.
4. Open Two Way Streaming example in another browser window, set port 443 in Websocket URL input field and publish a second stream
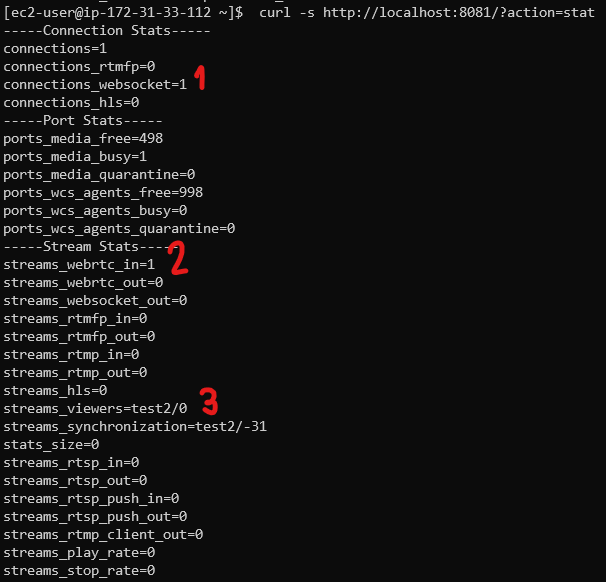
5. Check the statistics page on the second WCS server
One Websocket connection (1), one incoming stream (2) named test2 (3) are displayed
