Java Mission Control is a powerful monitoring and debugging tool for a Java-machine. JMC is shipped with JDK and is launched on the user's (administrator) computer.
1. Start Java Mission Control, select the 'File > Connect' menu. Enter the name of the WCS server you want to connect to, then specify the port number (by default, 50999):
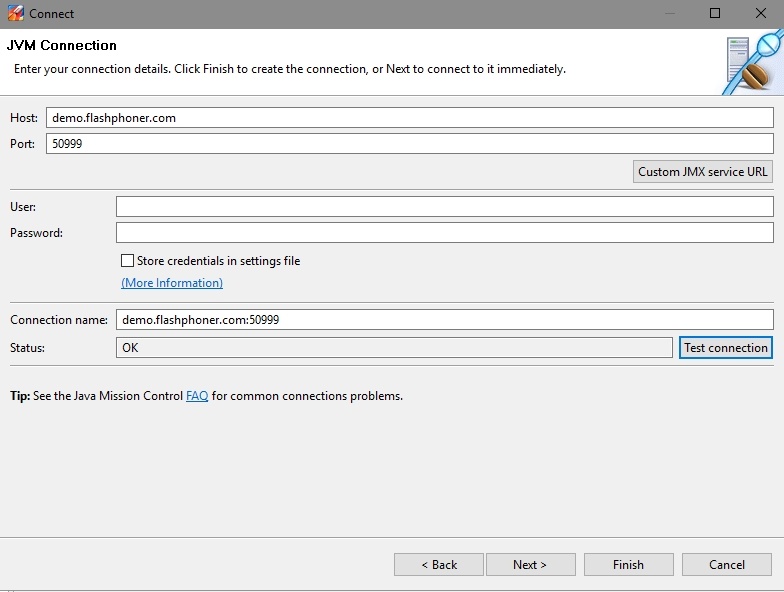
2. Click Test connection to test connection with the server:

If the connection status is OK, click the Finish button. Otherwise, make sure the settings file wcs-core.properties has proper connection settings for monitoring, including the network address where the server is running, or the name of the node assigned to this address. Also, make sure non-local connections are allowed:
-Dcom.sun.management.jmxremote=true
-Dcom.sun.management.jmxremote.local.only=false
-Dcom.sun.management.jmxremote.ssl=false
-Dcom.sun.management.jmxremote.authenticate=false
-Dcom.sun.management.jmxremote.port=50999
-Djava.rmi.server.hostname=demo.flashphoner.com
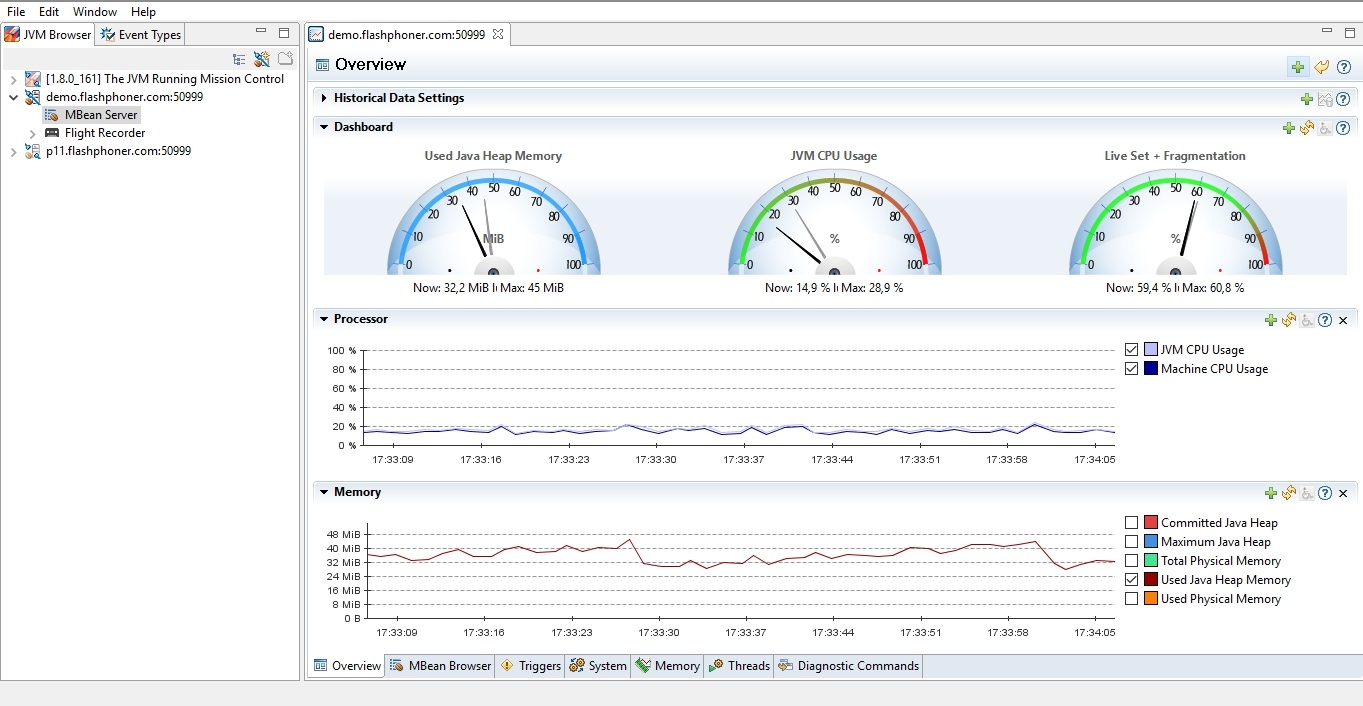
3. In the left part of the JMC window select the just created connection, right-click it and select the 'Start JMX console' menu. As soon as connection is established and data are loaded, the overview of the Java-machine is displayed: