WCS server can be deployed in Amazon Elastic Compute Cloud (EC2) by the following ways:
Setting up Linux virtual machine and installing WCS from the scratch
This way is useful if you need fine OS tuning, additional modules installation and so on. Launch a Linux virtual machine by this AWS manual, set it up on your need, then install WCS by quick or detailed installation manual.
WCS automatic deployment from Amazon AWS Marketplace
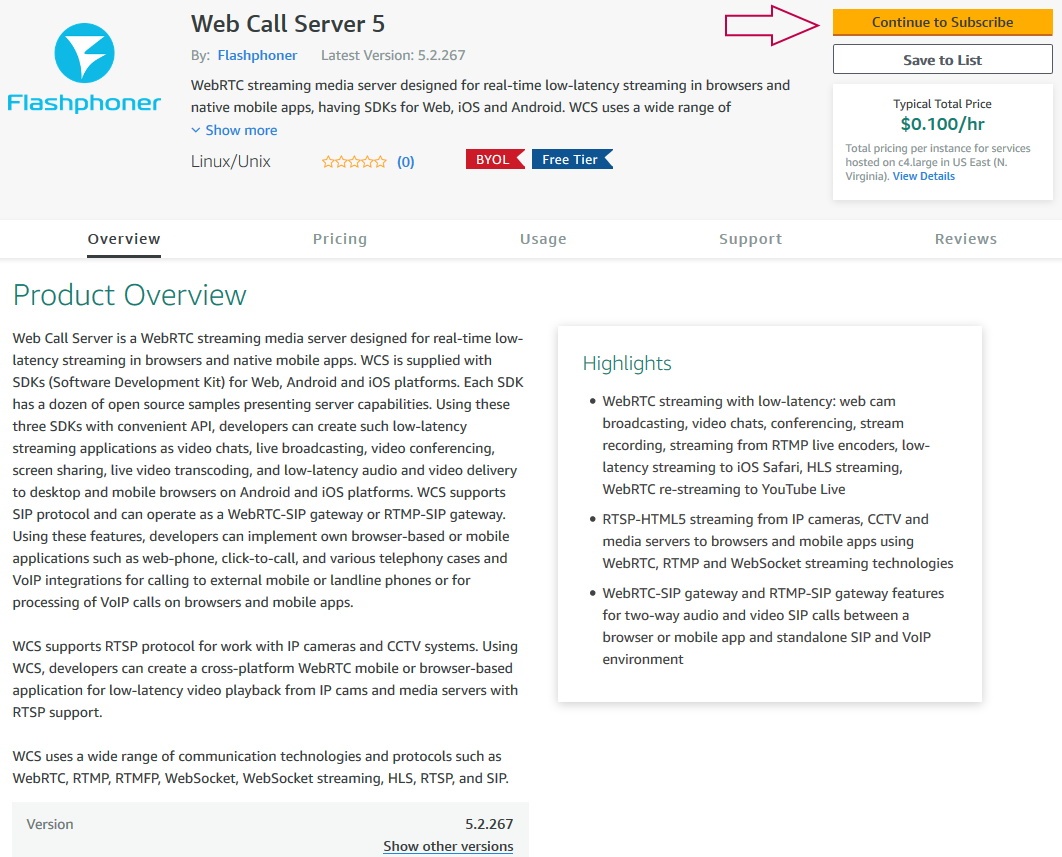
1. Open Web Call Server page on Amazon AWS Marketplace and click 'Continue to Subscribe':
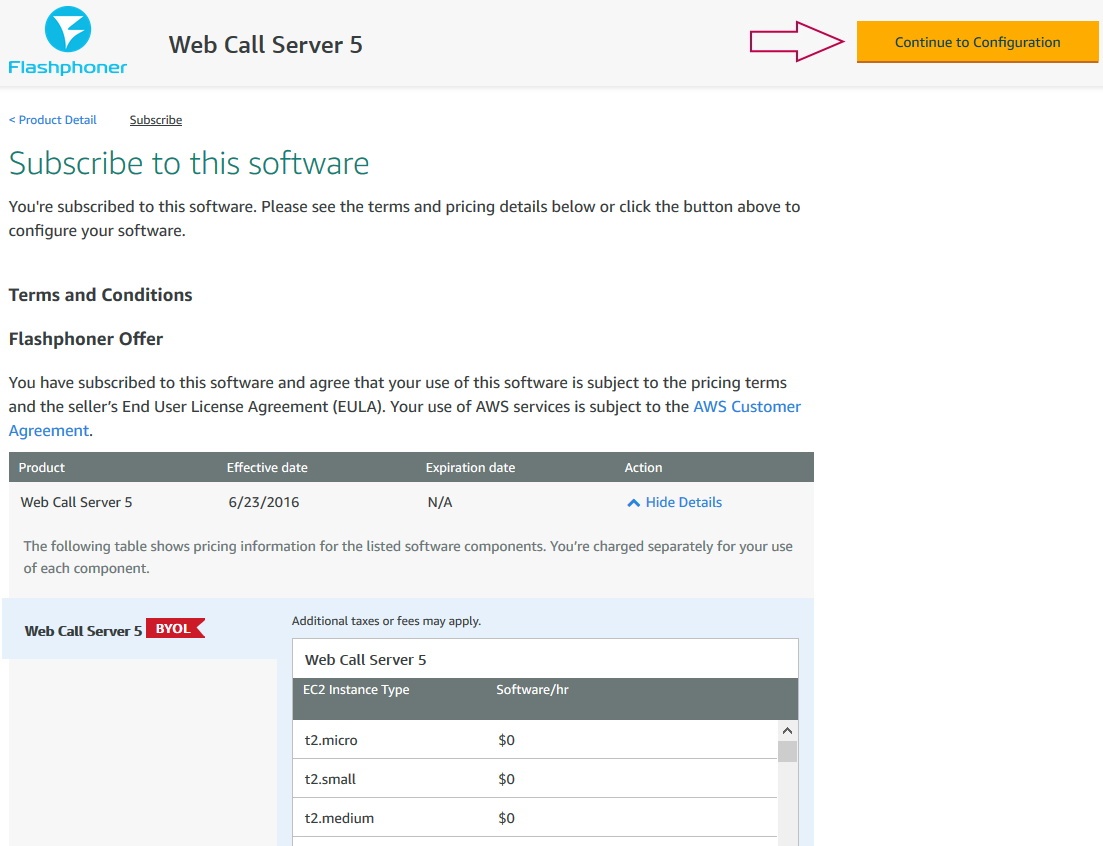
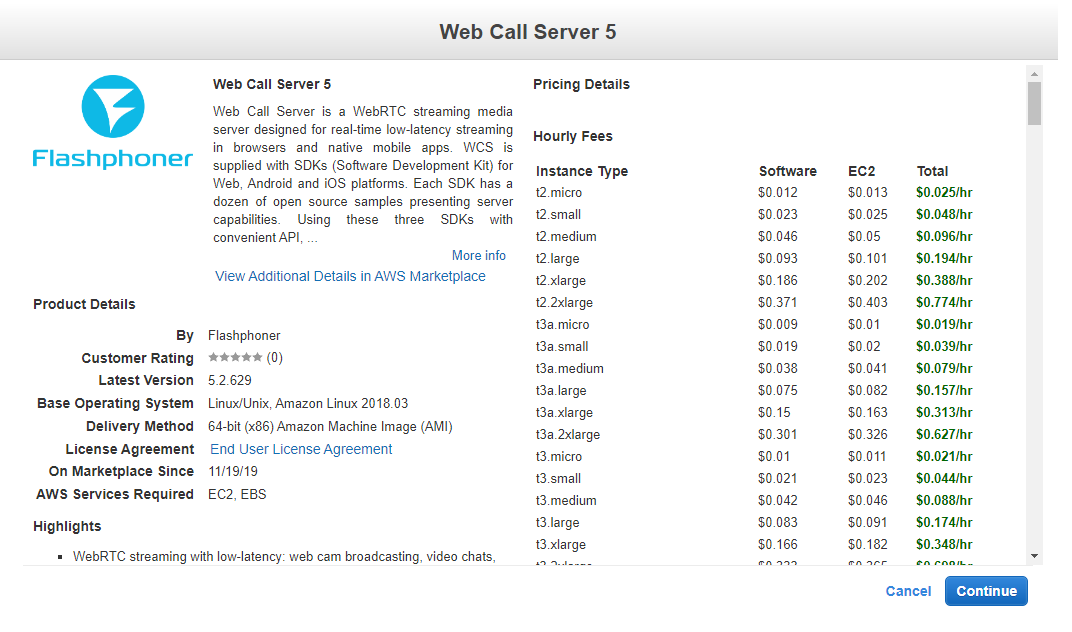
2. Product description page with hourly pricing depending on selected instance will be shown. Click 'Continue to Configuration':
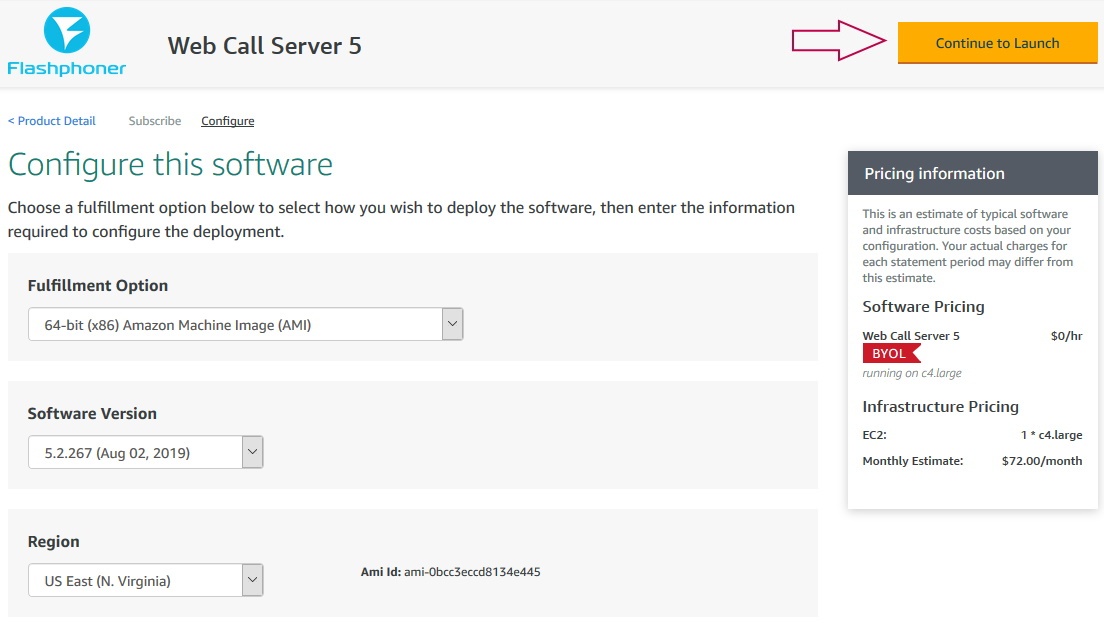
3. Server configuration page will be shown. Select region and click 'Continue to Launch':
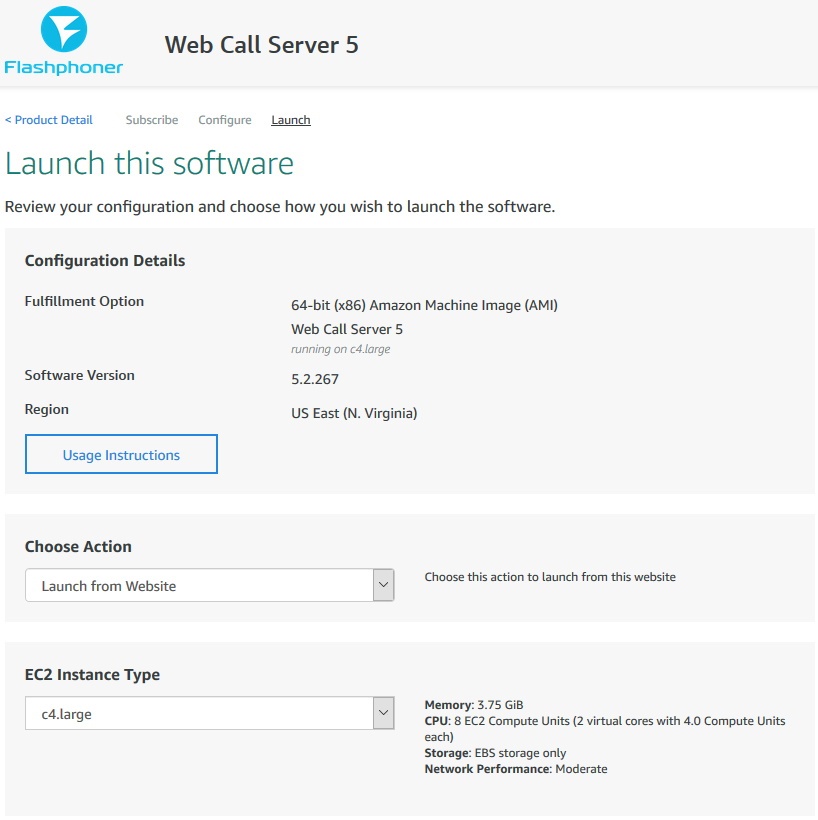
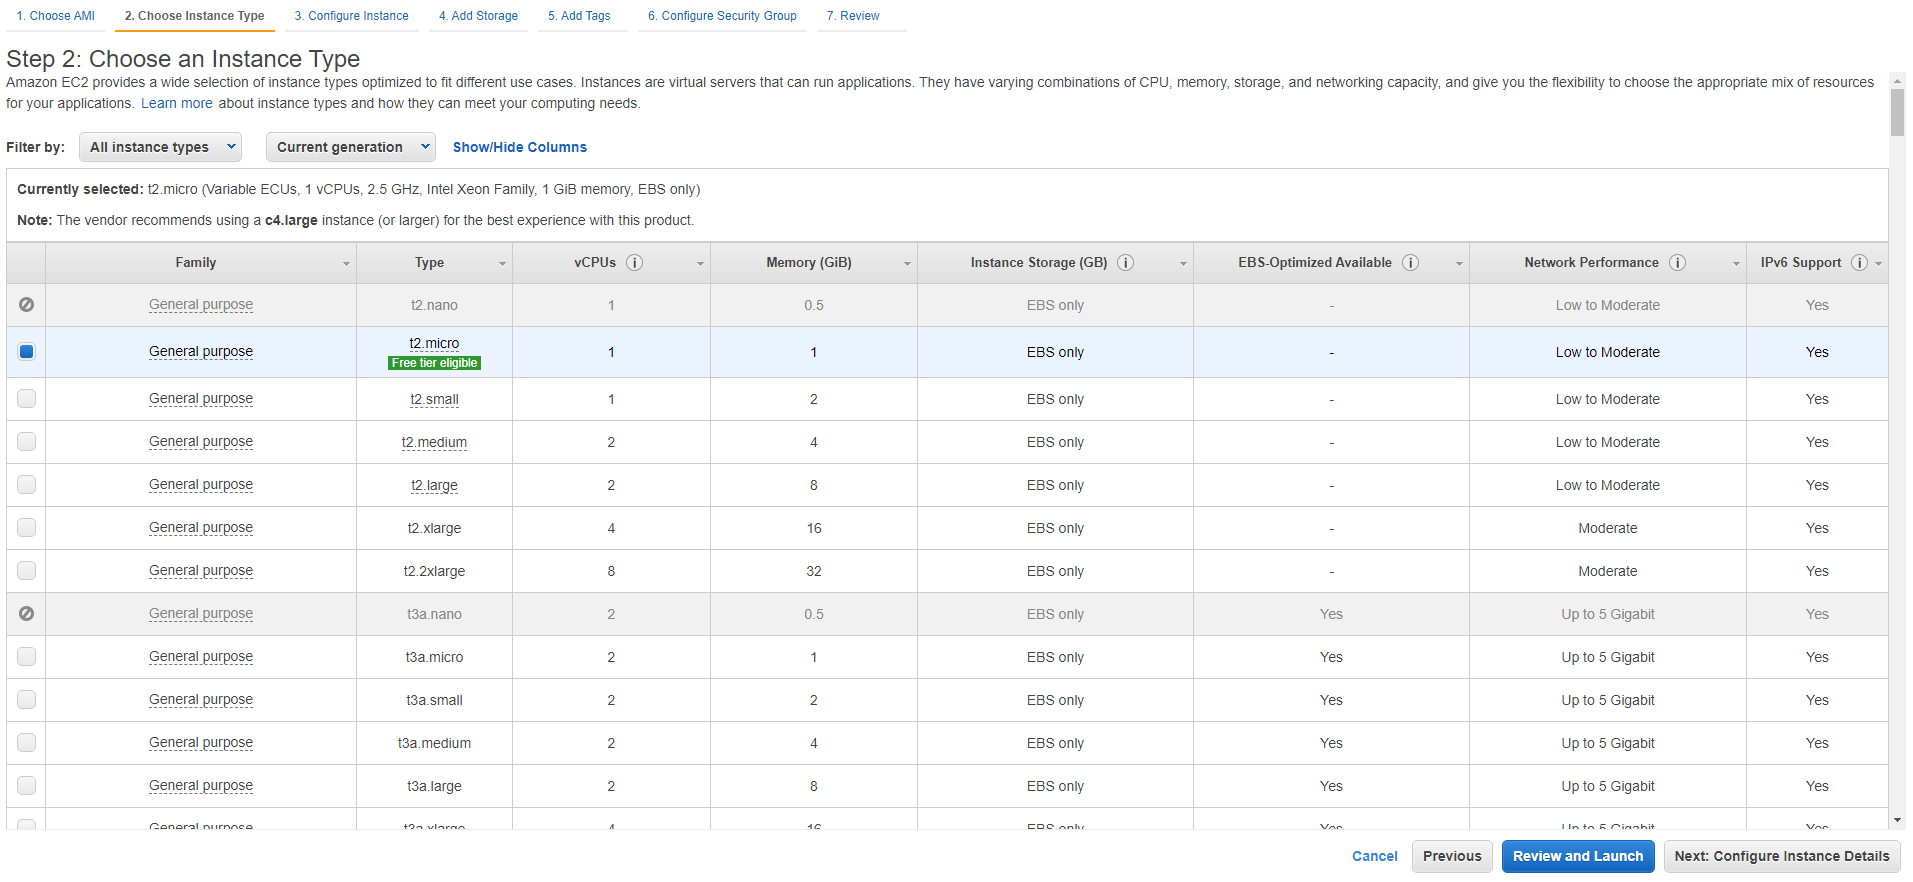
4. Instance launch page will be shown. Select the instance type.
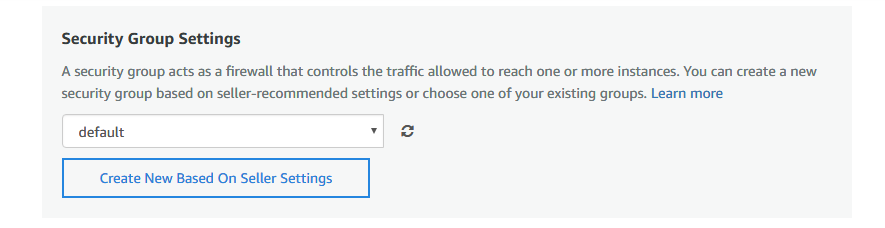
5. Then scroll page down to Security Group Settings and click 'Create New Based On Seller Settings':
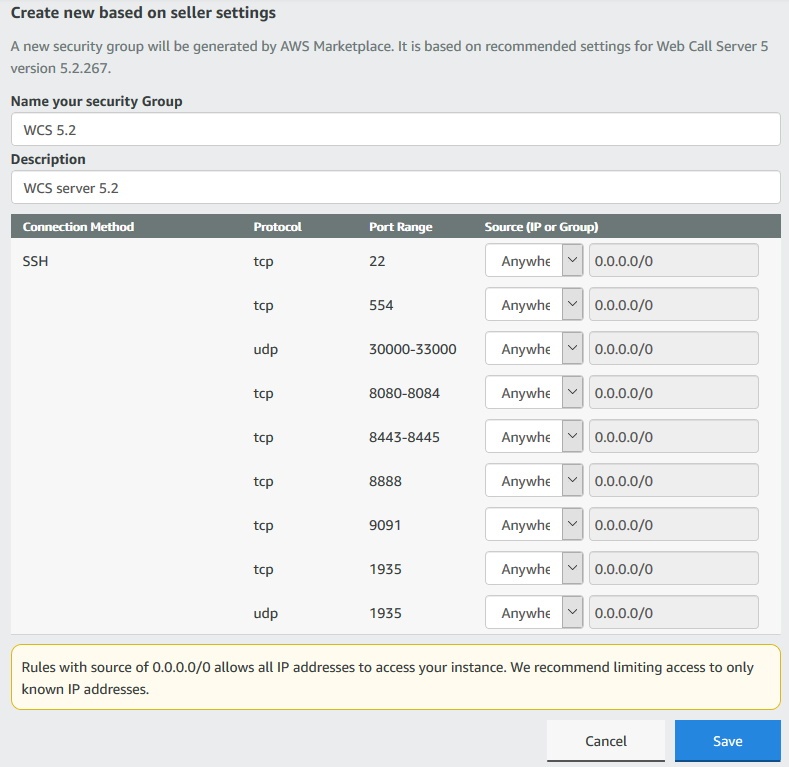
6. Security Group creation page will be shown. Set the group name, description and click Save.
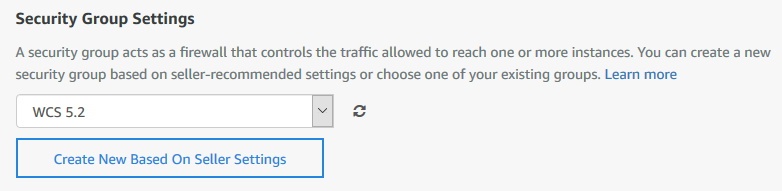
7. Select the new group in the drop-down list:
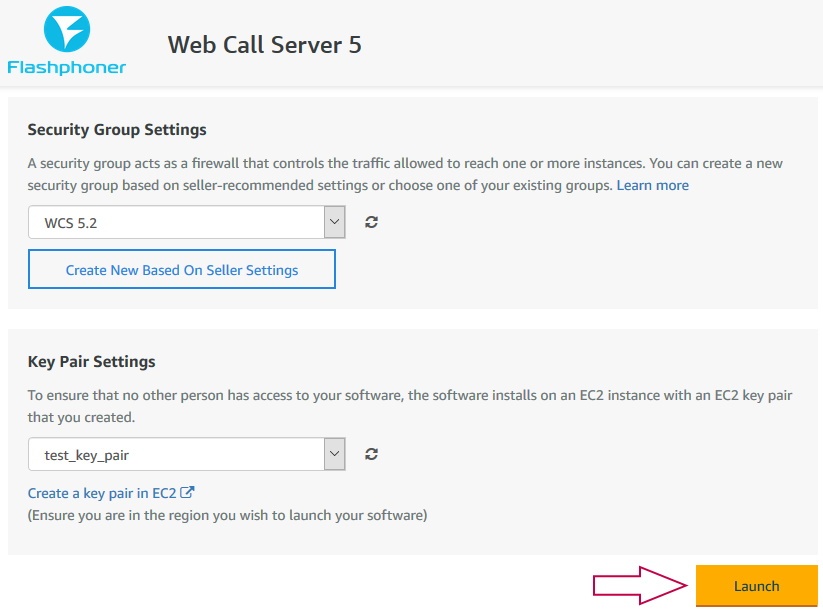
8. Click Launch:
9. A message will be displayed about instance deployment. It takes about a minute.

10. Click on 'EC2 Console' link. Find the launched virtual machine in the 'Instances' section. See the 'Public DNS' column for the host name.

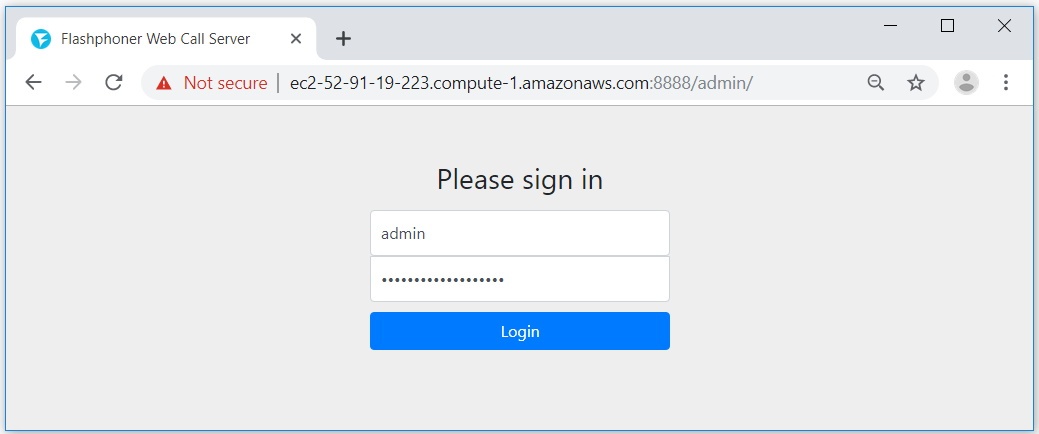
11. Open WCS server web interface https://host.amazonaws.com:8888 in your browser and accept security exception. Use the Instance ID of the launched virtual machine as the administrator password:
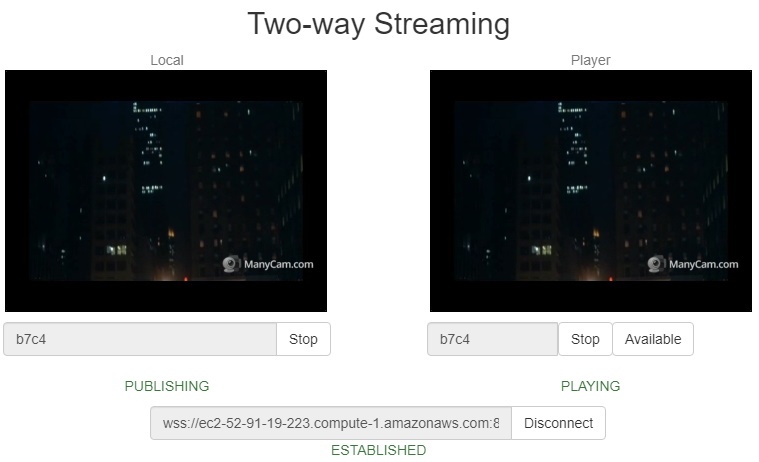
12. Check WebRTC streaming from web camera and playing the stream using Two-way Streaming web example:
WCS deployment from AWS Marketplace image with custom settings
AWS Marketplace image contains only basic WCS settings. To customize the server, it is necessary to connect to the instance via SSH and restart WCS. However, to get ready to launch server "out of the box", it is possible to set up user script to reconfigure the server during the first start. This can be useful, for example, to deploy autoscaling group.
1. In EC2 Console go to "Instances - Instances" section and click "Launch instance"

2. Choose Marketplace AMI "Web Call Server" using search string

3. Review AMI information
4. Choose instance type
5. Scroll down "Configure Instance Details" page until the end and insert custom update and setup script to "User data" text box
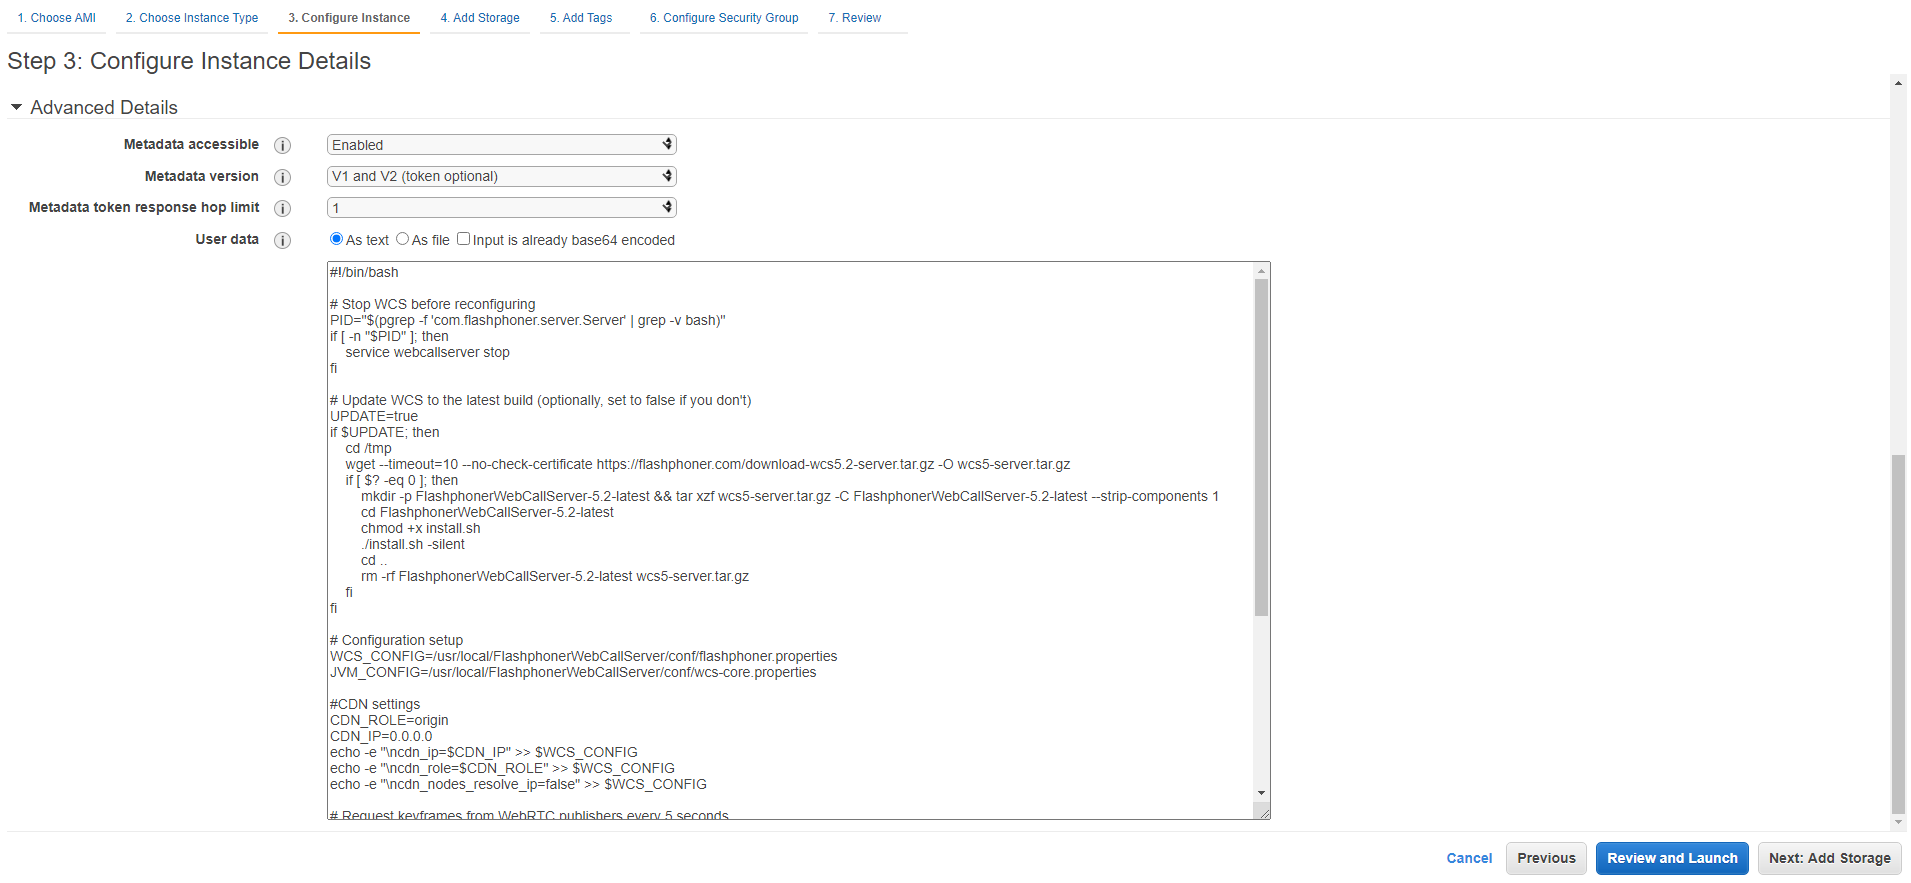
The setup script example to update WCS to latest build and to configure Origin server for WebRTC and RTMP streams publishing
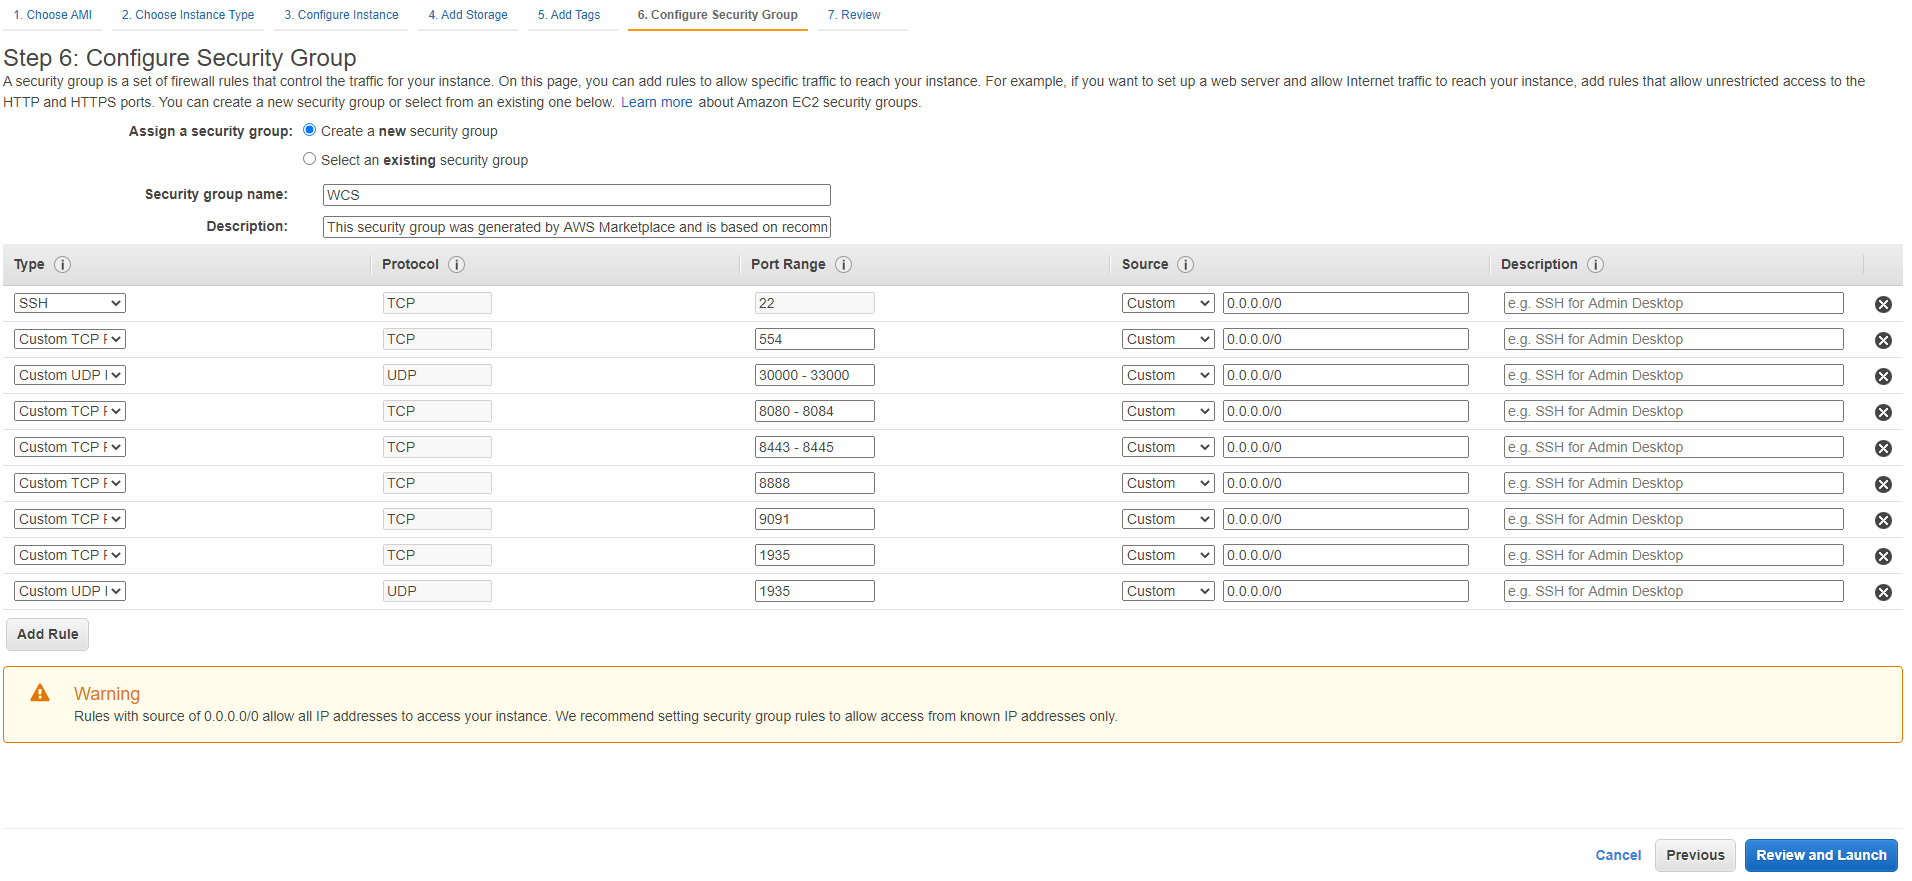
6. Configure security group. By default, the security group will be created from AMI settings. Add the necessary ports
7. Click "Review and Launch". If all the parameters are correct, click "Launch"
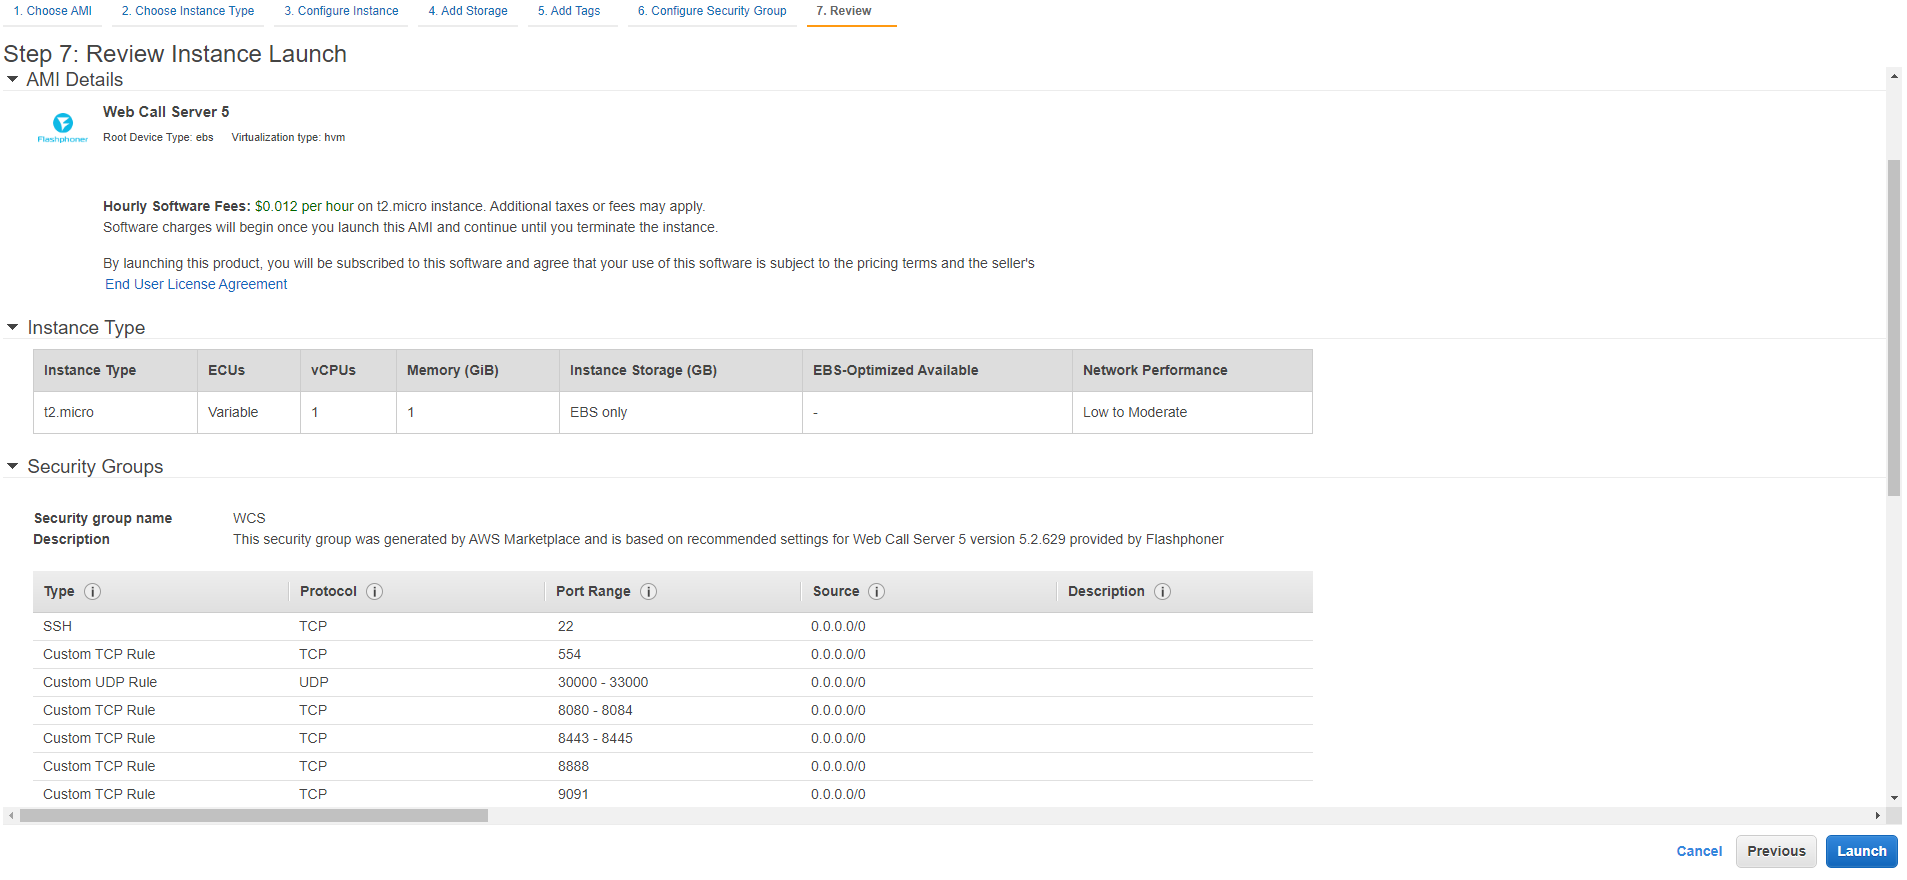
Server instance will be launched

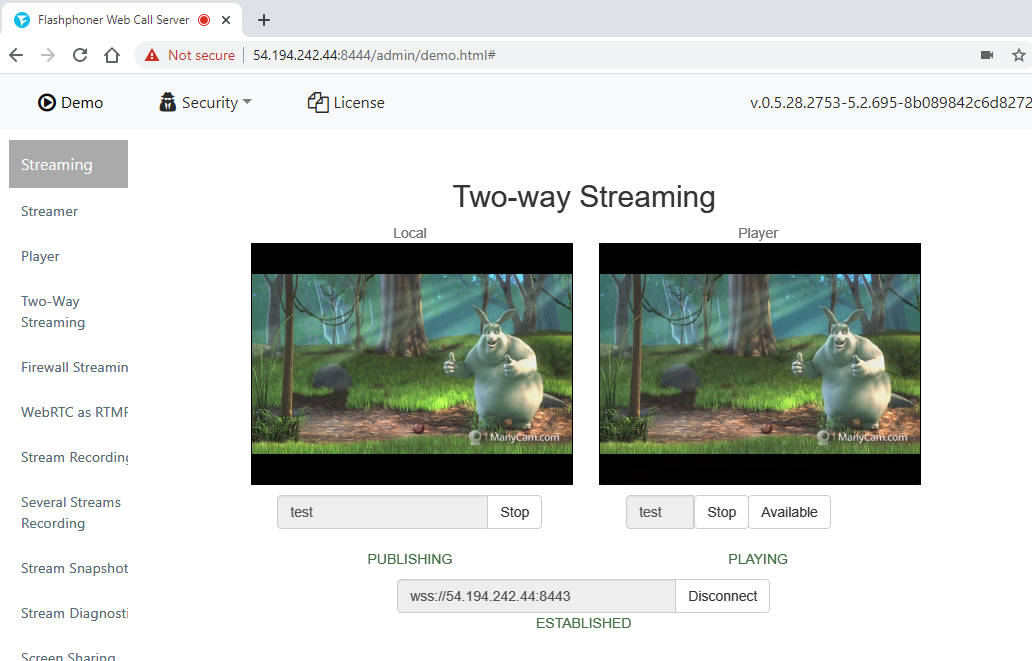
8. Open WCS web interface, publish test stream in Two Way Streaming example and play it
Known issues
1. After migration to Amazon Linux 2 AMI as basic image, systemd is used for services management
Symptoms: the command
sudo service webcallserver start
returns
Redirecting to /bin/systemctl start webcallserver.service
the command
sudo service webcallserver check_update
does not work
Solution:
a) use systemctl to start, stop, restart WCS
sudo systemctl start webcallserver
sudo systemctl stop webcallserver
sudo systemctl restart webcallserver
b) use webcallserver script to check updates
cd /usr/local/FlashphonerWebCallServer/bin
sudo ./webcallserver check_update
sudo ./webcallserver update