...
- HTTP: http://streaming.flashphoner.com:90918081/rest-api/mixer/startup
- HTTPS: https://streaming.flashphoner.com:88888444/rest-api/mixer/startup
Here:
- streaming.flashphoner.com - is the address of the WCS server
- 9091 8081 - the standard REST / HTTP port of the WCS server
- 88888444 - the standard HTTPS port
- rest-api - the required prefix
- mixer/startup - the REST-method used
...
In this case, the period is 20 ms.
Quick manual on testing
1. For this test we use:
- the demo server at demo.flashphoner.com;
- the Chrome browser and the REST-client to send queries to the server;
- the Two Way Streaming web application to publish input streams of the mixer;
- the Player web application to play the output stream of the mixer.
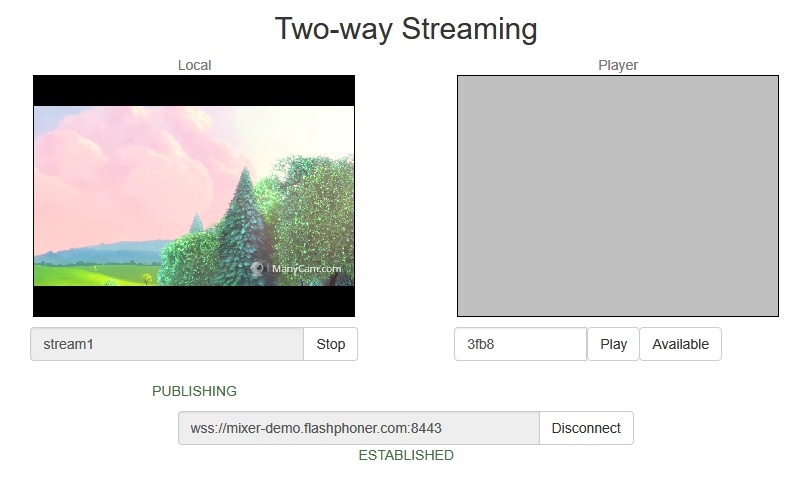
2. Open the page of the Two Way Streaming application. Publish the stream named stream1:
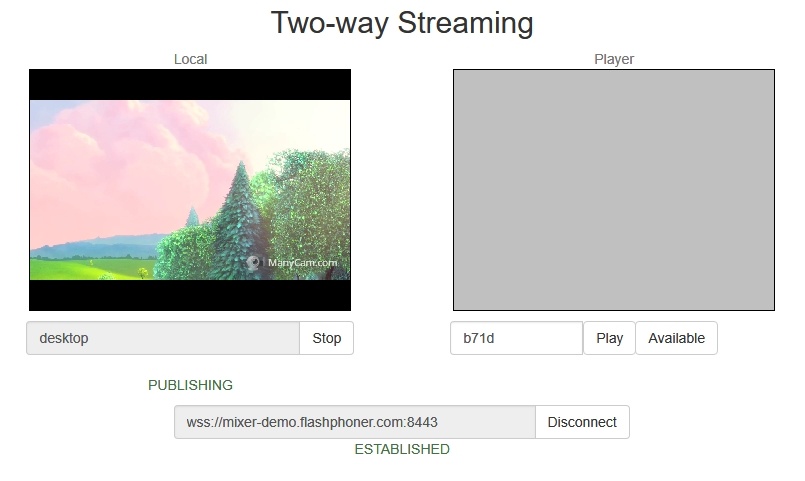
3. In another tab open the page of the Two Way Streaming application. Publish the stream named desktop:
...
Changing bitrate of mixer output stream
When OpenH264 codec is used for transcoding, it is possible to change bitrate of mixer output stream with the following parameter in flashphoner.properties file
| Code Block | ||
|---|---|---|
| ||
mixer_video_bitrate_kbps=2000 |
By default, mixer output stream bitrate is set to 2 Mbps. If a channel bandwith between server and viewer is not enough, bitrate can be reduced, for example
| Code Block | ||
|---|---|---|
| ||
encoder_priority=OPENH264
mixer_video_bitrate_kbps=1500 |
If picture quality with default bitrate is low, or distortion occurs, it is recommended to rise mixer outout stream bitrate to 3-5 Mbps
| Code Block | ||
|---|---|---|
| ||
encoder_priority=OPENH264
mixer_video_bitrate_kbps=5000 |
Mixer output stream sound management
By default, mixer output stream sound is encoded to Opus with sample rate 48 kHz. These settings may be changed using the parameters in flashphoner.properties file. For example, to use mixer output stream in SIP call the following value can be set:
| Code Block | ||
|---|---|---|
| ||
audio_mixer_output_codec=pcma
audio_mixer_output_sample_rate=8000 |
In this case, sound will be encoded to PCMA (alaw) with sample rate 8 kHz.
Using custom lossless videoprocessor for incoming streams handling
To handle mixer incoming streams, if additional bufferizing or audio and video tracks syncronizing is required for example, the custom lossless videoprocessor may be used. This feature is enabled with the following parameter in flashphoner.properties file
| Code Block | ||
|---|---|---|
| ||
mixer_lossless_video_processor_enabled=true |
The maximum size of mixer buffer in milliseconds is set with this parameter
| Code Block | ||
|---|---|---|
| ||
mixer_lossless_video_processor_max_mixer_buffer_size_ms=200 |
By default, maximum mixer buffer size is 200 ms. After filling this buffer, the custom lossless videoprocessor uses its own buffer and waits for mixer buffer freeing. The period of mixer buffer checking is set in milliseconds with this parameter
| Code Block | ||
|---|---|---|
| ||
mixer_lossless_video_processor_wait_time_ms=20 |
By default, the mixer buffer checking period is 20 ms.
Note that using the custom lossless videoprocessor may degrade realtime perfomance.
When custom lossless videoprocessor is used, it is necessary to stop mixer with REST query /mixer/terminate to free all consumed resources. Mixer can be stopped also by stopping all incoming streams, in this case mixer will stop when following timeout in milliseconds expires
| Code Block | ||
|---|---|---|
| ||
mixer_idle_timeout=60000 |
By default, mixer will stop after 60 seconds if there are no active incoming streams.
Mixer output stream layout management
By default, three mixer output stream layouts are implemented:
1. Grid layout
This layout can be enabled with the following parameter in flashphoner.properties file
| Code Block | ||
|---|---|---|
| ||
mixer_layout_class=com.flashphoner.media.mixer.video.presentation.GridLayout |
2. Zero padding grid layout
This layout can be enabled with the following parameter
| Code Block | ||
|---|---|---|
| ||
mixer_layout_class=com.flashphoner.media.mixer.video.presentation.CenterNoPaddingGridLayout |
and works for input streams of equal resolution with the same aspect ratio only
3. Desktop (screen sharing) layout
This layout is enabled if one of mixer input streams has a name defined in the following parameter
| Code Block | ||
|---|---|---|
| ||
mixer_video_layout_desktop_key_word=desktop |
By default, desktop name is used for screen sharing stream.
Custom mixer layout implementation
For more fine tuning of mixer layout, custom Java class should be developed to implement IVideoMixerLayout interface, for example
| Code Block | ||||||
|---|---|---|---|---|---|---|
| ||||||
package com.flashphoner.mixerlayout;

import com.flashphoner.sdk.media.IVideoMixerLayout;
import com.flashphoner.sdk.media.YUVFrame;
import java.awt.*;
import java.util.ArrayList;

public class TestLayout implements IVideoMixerLayout {

    private static final int PADDING = 5;

    @Override
    public Layout[] computeLayout(YUVFrame[] yuvFrames, String[] strings, int canvasWidth, int canvasHeight) {
        ArrayList<IVideoMixerLayout.Layout> layout = new ArrayList<>();
        for (int c = 0; c < yuvFrames.length; c++) {
            Point prevPoint = new Point();
            Dimension prevDimension = new Dimension(canvasWidth, canvasHeight);
            if (layout.size() > 0) {
                prevPoint.setLocation(layout.get(c-1).getPoint());
                prevDimension.setSize(layout.get(c-1).getDimension());
            }
            Point currentPoint = new Point((int) (prevPoint.getX()+prevDimension.getWidth()+PADDING),
                                           (int)(prevPoint.getY()+prevDimension.getHeight()));
            layout.add(new IVideoMixerLayout.Layout(currentPoint, new Dimension(canvasWidth/yuvFrames.length,
		                                            canvasHeight/yuvFrames.length), yuvFrames[c]));
        }
        return layout.toArray(new IVideoMixerLayout.Layout[layout.size()]);
    }
} |
Then the class should be complied into byte code. To do this, create folder tree according to TestLayout class package name
| Code Block | ||||
|---|---|---|---|---|
| ||||
mkdir -p com/flashphoner/mixerlayout |
and execute the command
| Code Block | ||||
|---|---|---|---|---|
| ||||
javac -cp /usr/local/FlashphonerWebCallServer/lib/tbs-flashphoner.jar ./com/flashphoner/mixerlayout/TestLayout.java |
Now, pack the code compiled to jar file
| Code Block | ||||
|---|---|---|---|---|
| ||||
jar -cf testlayout.jar ./com/flashphoner/mixerlayout/TestLayout.class |
and copy this file to WCS libraries folder
| Code Block | ||||
|---|---|---|---|---|
| ||||
cp testlayout.jar /usr/local/FlashphonerWebCallServer/lib |
To use custom mixer layout class, set it to the following parameter in flashphoner.properties file
| Code Block | ||
|---|---|---|
| ||
mixer_layout_class=com.flashphoner.mixerlayout.TestLayout |
and restart WCS.
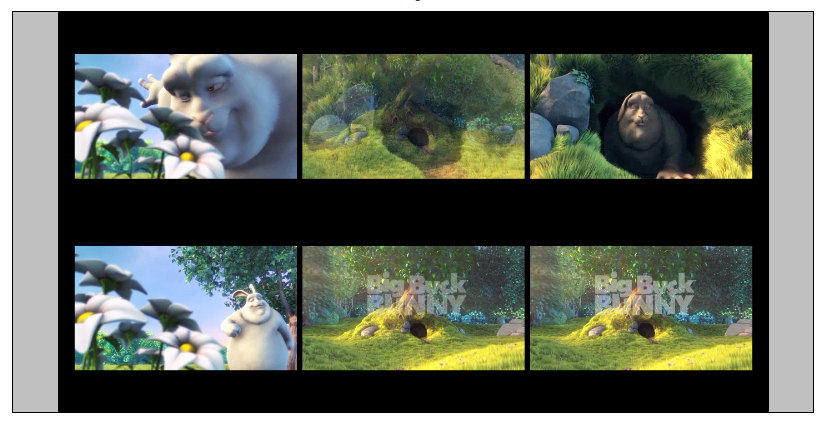
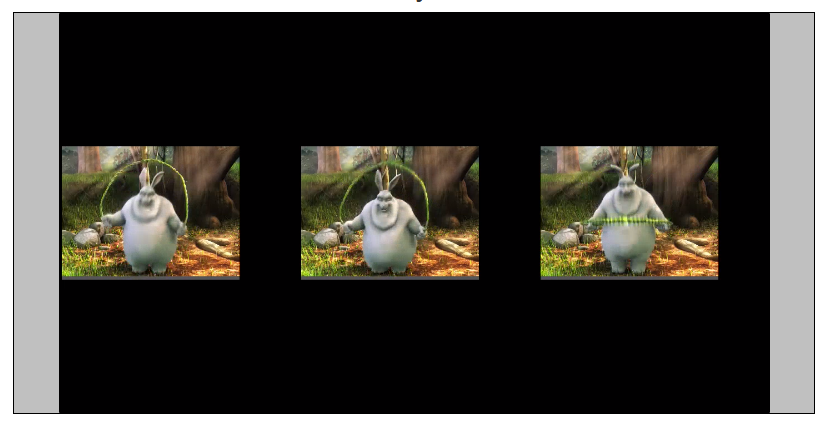
With this custom layout, mixer output stream for three input streams will look like:
Quick manual on testing
1. For this test we use:
- the demo server at demo.flashphoner.com;
- the Chrome browser and the REST-client to send queries to the server;
- the Two Way Streaming web application to publish input streams of the mixer;
- the Player web application to play the output stream of the mixer.
2. Open the page of the Two Way Streaming application. Publish the stream named stream1:
3. In another tab open the page of the Two Way Streaming application. Publish the stream named desktop:
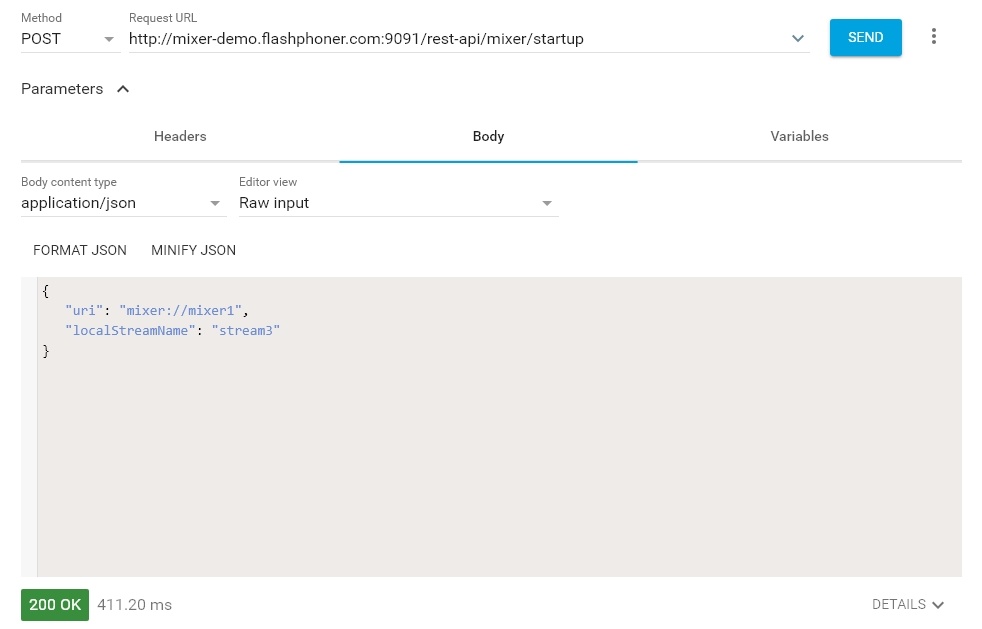
4. Open the REST client. Send the /mixer/startup query and specify the URI of the mixer mixer://mixer1 and the output stream name stream3 in its parameters:
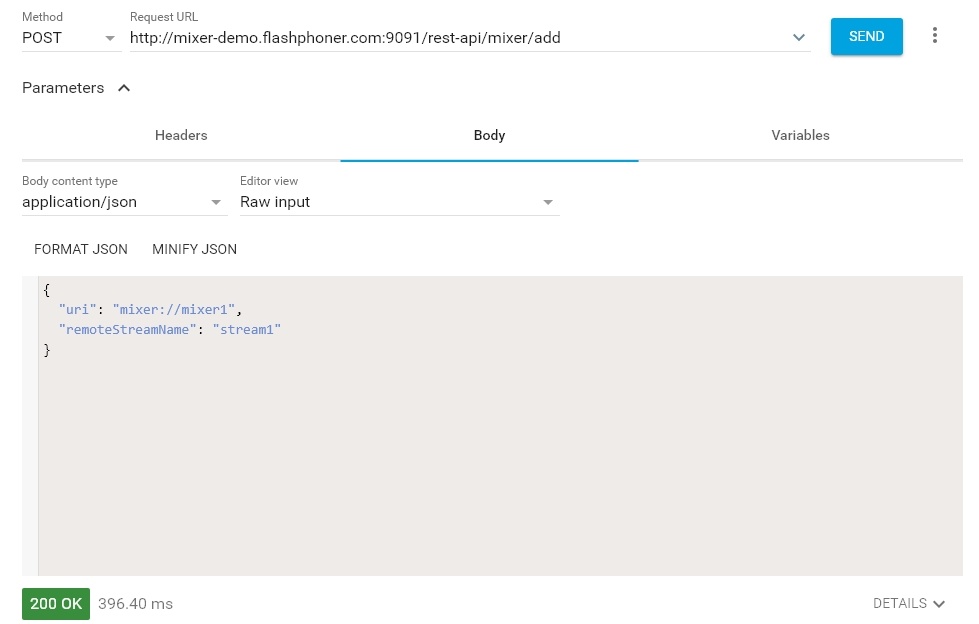
5. Send the /mixer/add query and specify the URI of the mixer mixer://mixer1 and the input stream name stream1 in its parameters:
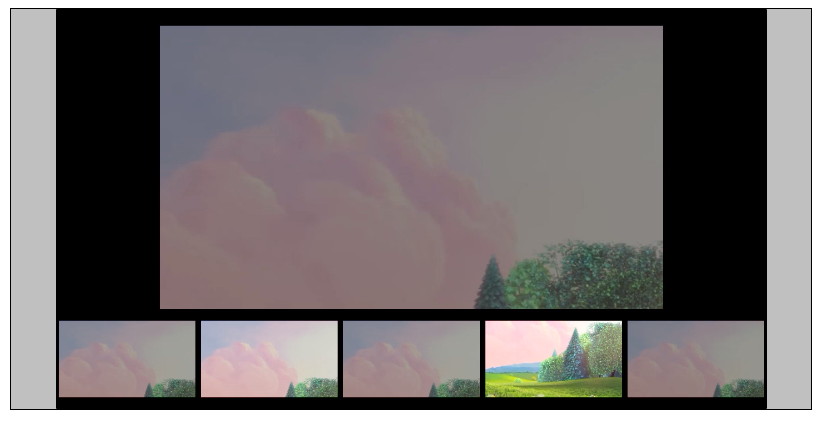
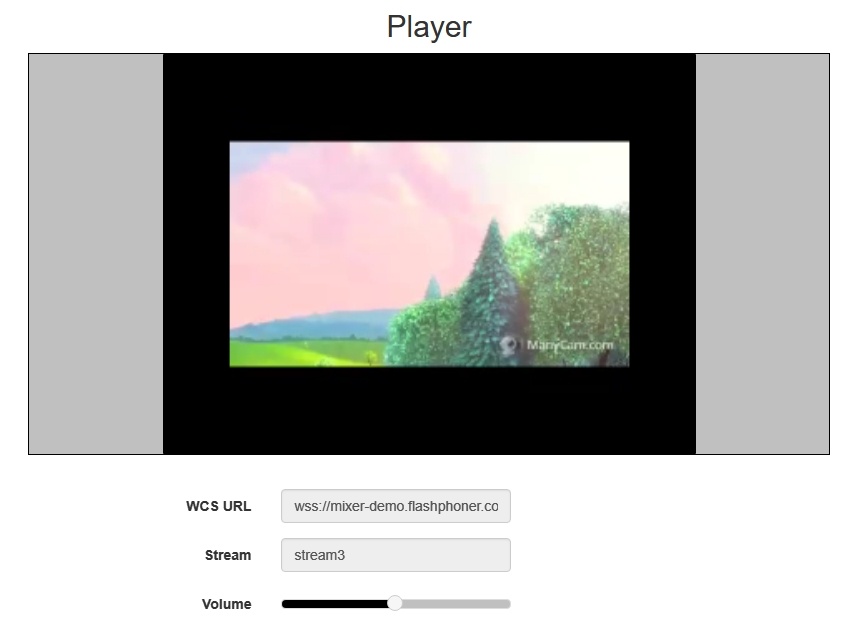
6. Open the Player web application, specify the name of the output stream of the mixer stream3 in the Stream field and click Start:
7. Send /mixer/add and specify the URI of the mixer mixer://mixer1 and the output input stream name stream3 desktop in its parameters:

5. Send the /mixer/add query and specify the URI of the mixer mixer://mixer1 and the input stream name stream1 in its parameters:
6. Open the Player web application, specify the name of the output stream of the mixer stream3 in the Stream field and click Start:
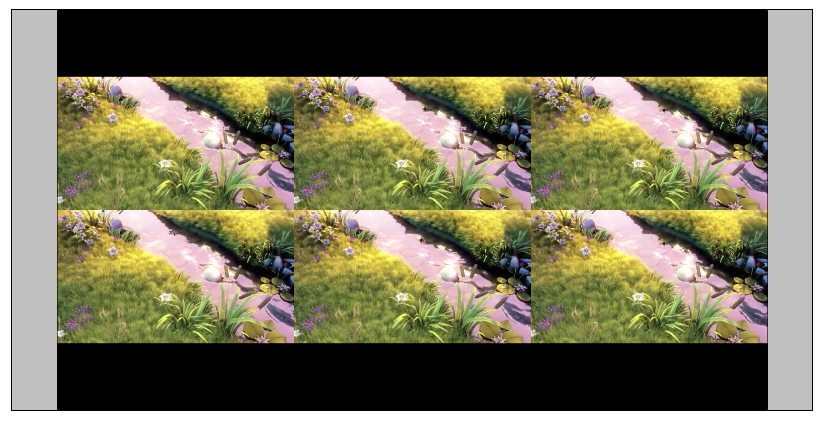
7. Send /mixer/add and specify the URI of the mixer mixer://mixer1 and the input stream name desktop in its parameters:
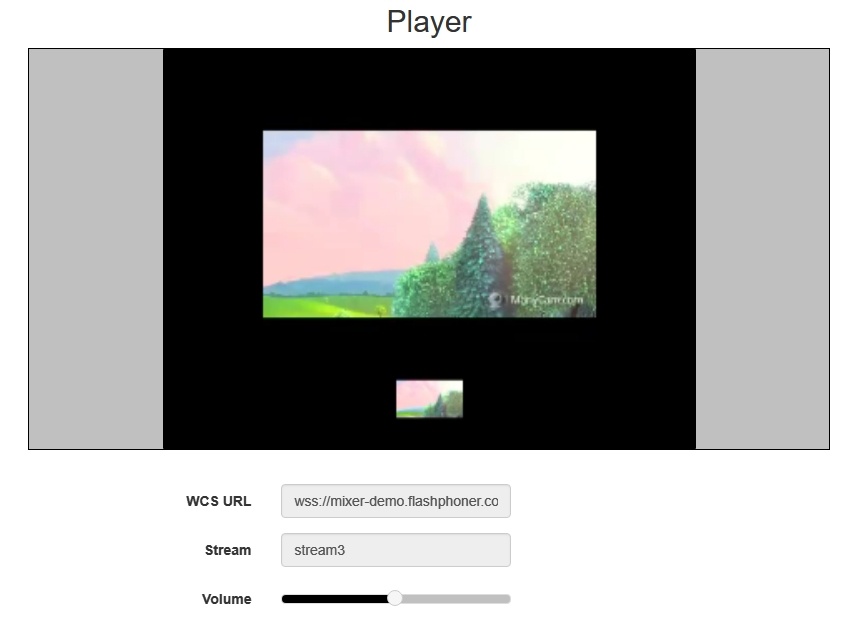
8. In the output stream of the mixer you should see the desktop stream that imitates screen sharing and the stream stream1:
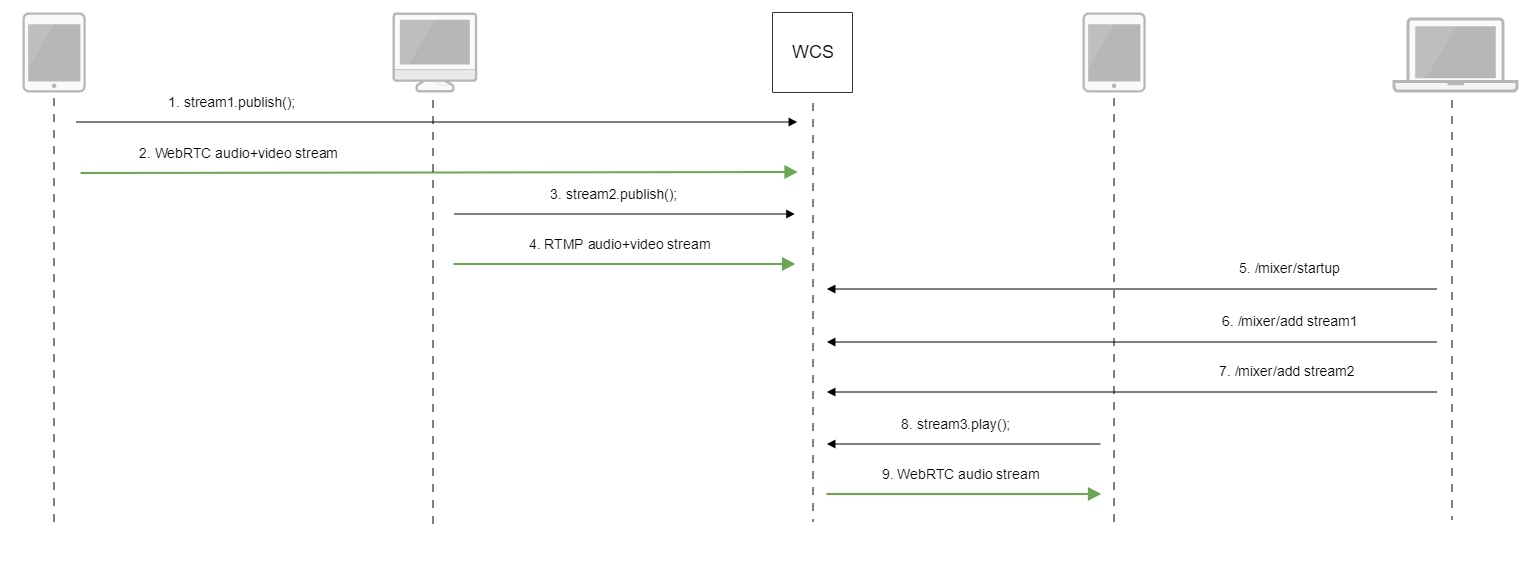
Call flow
Below is the call flow when using the mixer.
...
2. Sending the WebRTC stream to the server
3. Publishing the RTMP stream stream2
4. Sending the RTMP stream to the server
5. Sending the /mixer/startup query to create 8. In the output stream of the mixer you should see the desktop stream that imitates screen sharing and the stream stream1:
Call flow
Below is the call flow when using the mixer.
1. Publishing of the WebRTC stream stream1
2. Sending the WebRTC stream to the server
3. Publishing the RTMP stream stream2
4. Sending the RTMP stream to the server
5. Sending the /mixer/startup query to create the mixer://stream3 mixer with the output stream3
| Code Block | ||||
|---|---|---|---|---|
| ||||
http://demo.flashphoner.com:9091/rest-api/mixer/startup
{
 "uri": "mixer://stream3",
 "localStreamName": "stream3"
} |
6. Sending the /mixer/add query to add stream1 to the mixer://stream3 mixer with the output stream3
| Code Block | ||||
|---|---|---|---|---|
| ||||
http://demo.flashphoner.com:9091/rest-api/mixer/startupadd { "uri": "mixer://stream3", "localStreamName": "stream3" "remoteStreamName": "stream1" } |
67. Sending the /mixer/add query to add stream1 stream2 to the mixer://stream3 mixer
| Code Block | ||||
|---|---|---|---|---|
| ||||
http://demo.flashphoner.com:9091/rest-api/mixer/add
{
 "uri": "mixer://stream3",
 "localStreamName": "stream3"
 "remoteStreamName": "stream1stream2"
} |
...
8. Playing the WebRTC stream stream3
9. Sending the WebRTC audio stream to the client
Known issues
1. A mixer is not created is the name of the mixer contains symbols restricted for URI.
Symptoms: a mixer with the name like test_mixer does not create.
Solution: do not use disallowed symbols in the name of a mixer or a stream, especially if automatic mixer creation option is enabled. For instance, the name
| Code Block | ||||
|---|---|---|---|---|
| ||||
http://demo.flashphoner.com:9091/rest-api/mixer/add
{
 "uri": "mixer://stream3",
 "localStreamName": "stream3"
 "remoteStreamName": "stream2"
} |
8. Playing the WebRTC stream stream3
9. Sending the WebRTC audio stream to the client
Known issues
1) A mixer is not created is the name of the mixer contains symbols restricted for URI.
...
user_1#my_room |
cannot be used.
If streams of chat rooms are mixed, room names also cannot use restricted symbols.
2. Mixer output stream will be empty if transcoding is enabled on server on demand only.
Symptoms: video streams mixer created successfully, but black screen is played in mixer output stream.
Solution: for stream mixer to work transcoding should be enabled on server with the following parameter in flashphoner.properties file
| Code Block | ||||
|---|---|---|---|---|
| ||||
user_1#my_room |
...
streaming_video_decoder_fast_start=true |