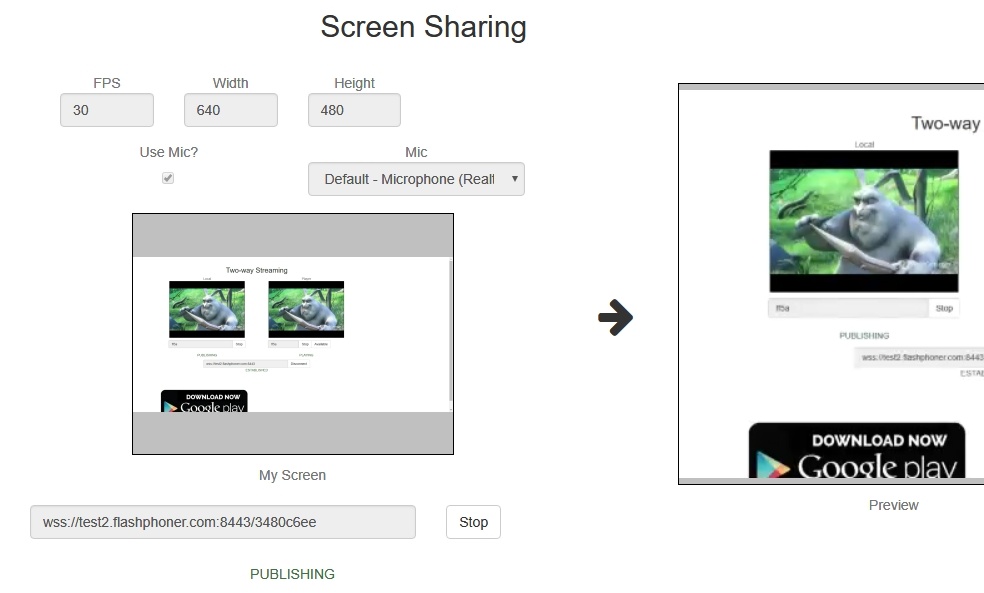
Screen sharing example
Screen sharing is available for Chrome and Firefox, and requires build-up and installation of the corresponding extension from Chrome Store.
Source code for the extension is available by the following link:
Chrome Screen Sharing Extension
Extension for Google Chrome with publication in Chrome Store
Create a Google account
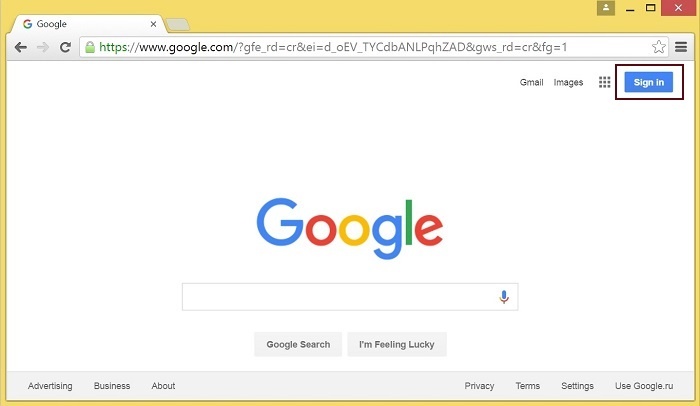
1. Go to google.com and click ‘Sign in’ button
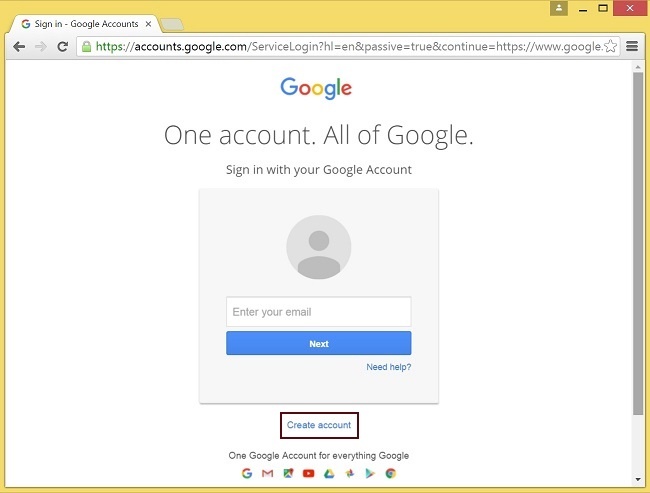
2. On the ‘Sign in’ page, click ‘Create account’ link
3. ‘Create your Google Account’ page will be opened
Fill the required fields and click ‘Next step’ button to create the account.
Register as Chrome Web Store Developer
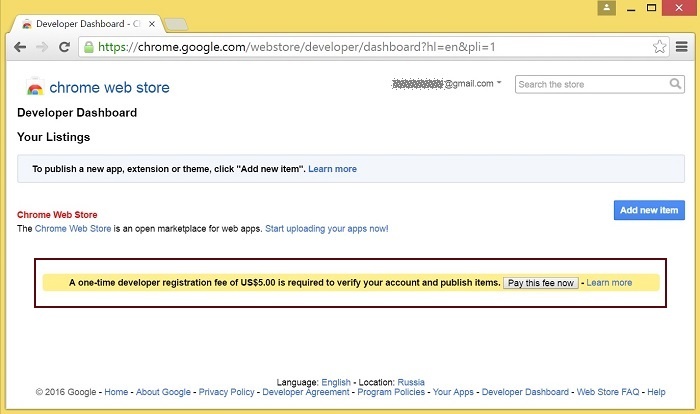
1. Sign in to Chrome Developer Dashboard with the created Google account
2. Pay a one-time $5 developer signup fee
Customization for your domain
Follow the procedures described below to use the extensions with your domain.
Edit manifest file manifest.json of the Chrome extension.
Change:
- name
- author
- description
- homepage_url
- under "externally_connectable":"matches" change flashphoner.com to your domain
Save your icons for the extension to chrome-extension directory and edit the file names in "icons" and "web_accessible_resources". (For more information, see Manifest - Icons and Supplying Images.)
Package the extension
Package files from chrome-extension folder into ZIP archive.
Publish the extension
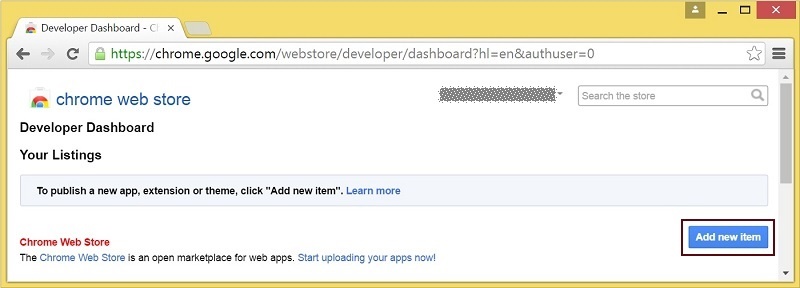
1. Sign in to Chrome Developer Dashboard
2. In the dashboard, click ‘Add new item’ button
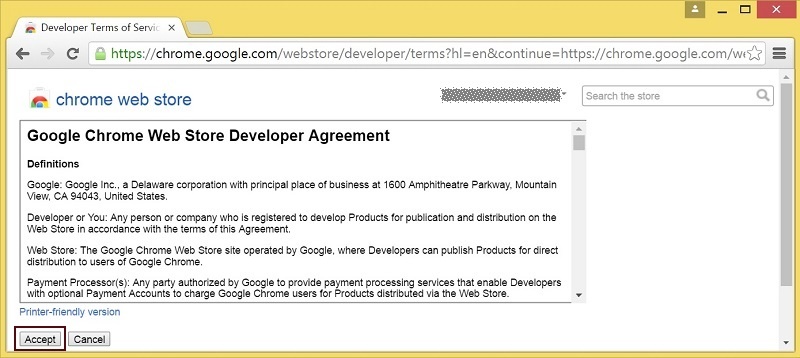
3. Accept the developer agreement
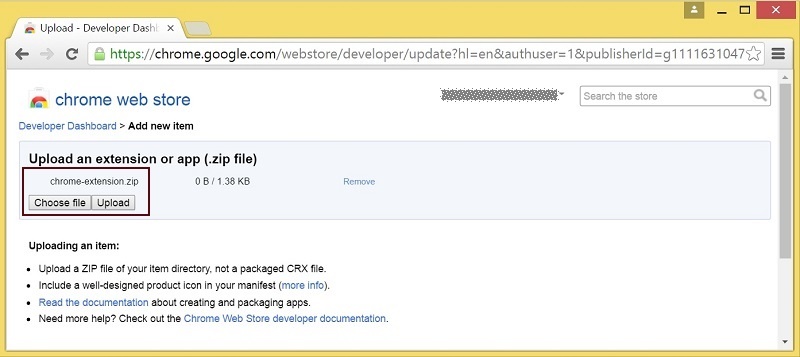
4. On the ‘Upload’ page, choose the chrome-extension.zip file and click ‘Upload’ button
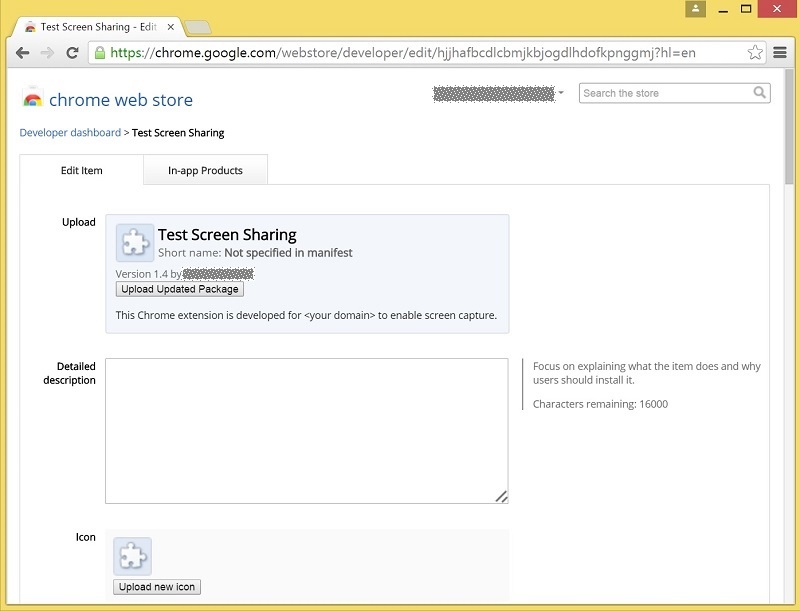
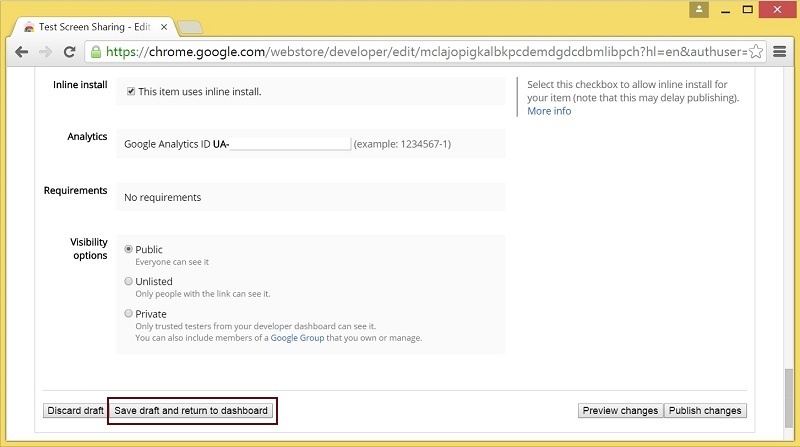
5. When the extension is uploaded, the page for editing the extension draft will be opened
Edit the extension as required and click ‘Save draft and return to dashboard’ button at the bottom of the page.
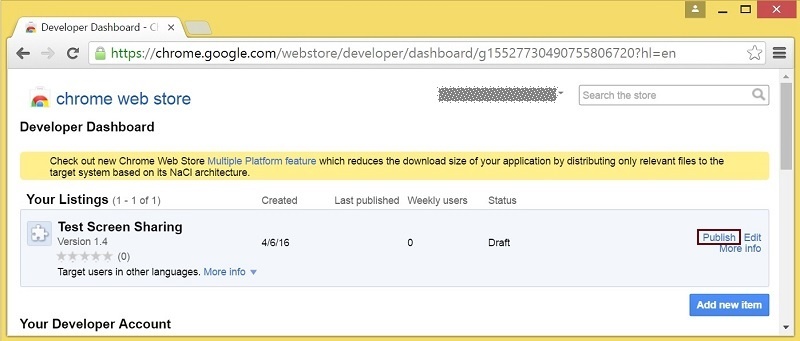
6. The extension will appear in the developer dashboard
Click ‘Publish’ link to publish the extension.
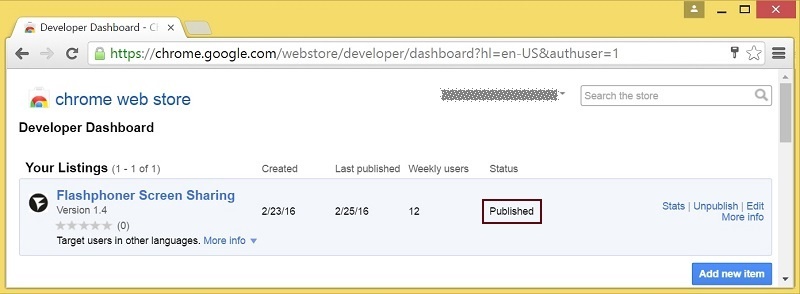
A published extension will have status ‘Published’ as on the image below.
For more information, see Chrome Web Store Publishing Tutorial.
Extension Inline Installation
Extension installation can be initiated by clicking a link on the Screen Sharing client page.
Note that the extension to be installed should be customized, published and approved before inline installation can be used.
Follow the procedures described below to use the client with your extensions.
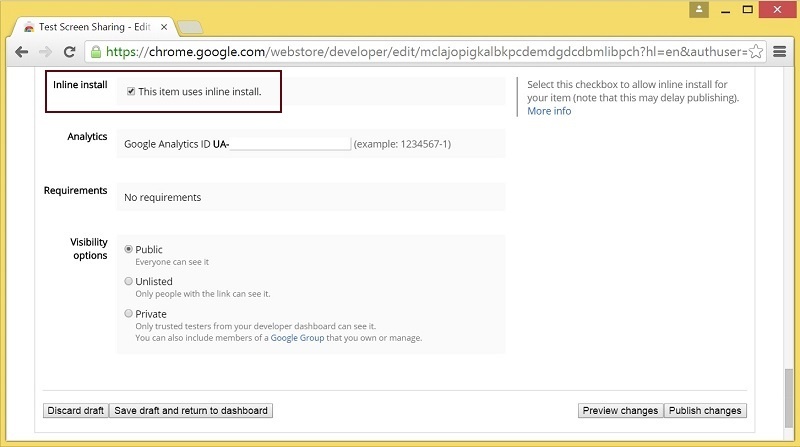
1. When publishing, select ‘Inline Install’ option
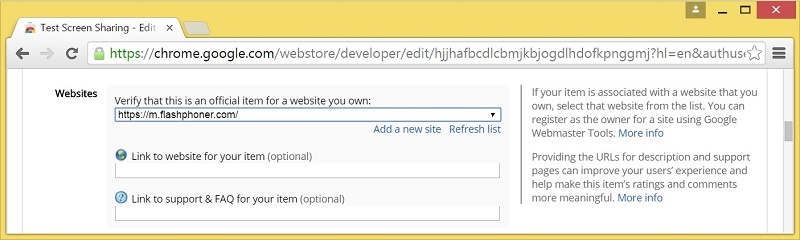
2. Verify and add website with your domain to the extension
- Click ‘Add a New Site’
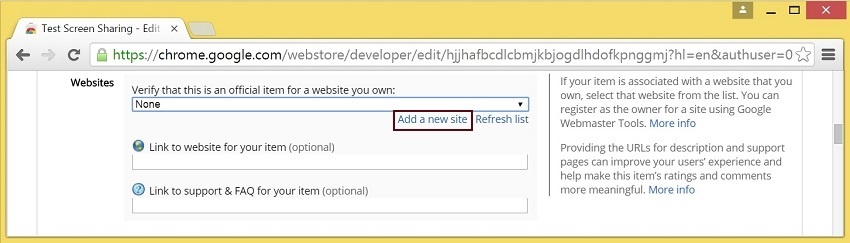
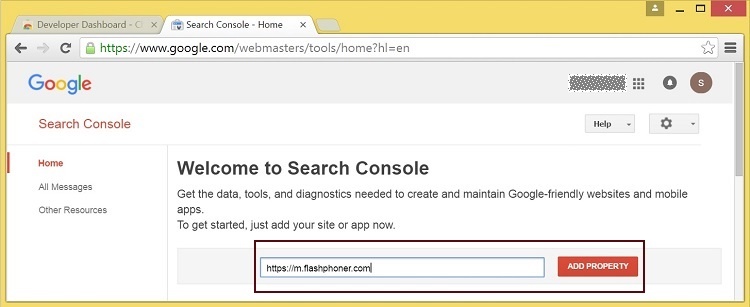
- Google Search Console page will open in a new tab
Enter URL with your domain.
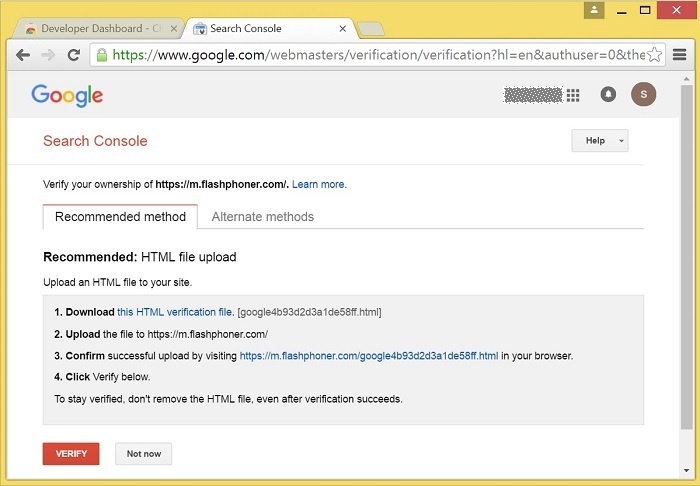
- A page with the instruction for the site verification will open
Follow the procedure steps and click ‘Verify’ button.
- If the verification is passed, a page confirming successful verification will be opened
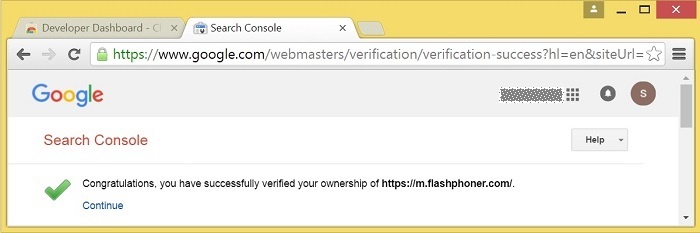
- The website will appear in the list in the extension options and the extension can be associated with the site
Code of the example for Chrome and Firefox
This example uses Flashphoner extensions for work with domain *.flashphoner.com. For work with your domain, build up and publish your extensions as described above.
As temporary solution, IP address of your WCS server can be added to file C:\Windows\System32\drivers\etc\hosts (on Windows OS) as test.flashphoner.com. That way, you will be able to test your WCS server with domain test.flashphoner.com till the extensions for your domain are built up.
With Chrome, the example works only by https://.
The path to the source code of the example on WCS server is:
/usr/local/FlashphonerWebCallServer/client/examples/demo/streaming/screen-sharing
screen-sharing.css - file with styles
screen-sharing.html - page of the screen sharing streamer
screen-sharing.js - script providing functionality for the streamer
This example can be tested using the following address:
https://host:8888/client/examples/demo/streaming/screen-sharing/screen-sharing.html
Here host is the address of the WCS server.
For Chrome, link to the extension is specified directly in file screen-sharing.html line 17
<link rel="chrome-webstore-item" href="https://chrome.google.com/webstore/detail/nlbaajplpmleofphigmgaifhoikjmbkg">
Customization of the example script for Chrome
Files of the script can be found here.
Edit screen-sharing.html line 17 and screen-sharing.js line 6
- in screen-sharing.html, chrome-webstore-item should point to your extension in Chrome Web Store
- in screen-sharing.js, change value of chromeScreenSharingExtensionId variable to your extension ID
To get extension ID, click ‘More info’ for the extension in Chrome Developer Dashboard.

Work with code of the screen sharing example
To analyze the code, let's take the version of file screen-sharing.js with hash cf0daabc6b86e21d5a2f9e4605366c8b7f0d27eb, which is available here and can be downloaded with corresponding build 0.3.18.1894.
1. Initialization of the API.
Flashphoner.init() code
Chrome extension ID is passed to the init() method.
Flashphoner.init({screenSharingExtensionId: extensionId});
2. Connection to WCS server.
Flashphoner.createSession() code
    Flashphoner.createSession({urlServer: url}).on(SESSION_STATUS.ESTABLISHED, function(session){
        //session connected, start streaming
        startStreaming(session);
    }).on(SESSION_STATUS.DISCONNECTED, function(){
        setStatus(SESSION_STATUS.DISCONNECTED);
        onStopped();
    }).on(SESSION_STATUS.FAILED, function(){
        setStatus(SESSION_STATUS.FAILED);
        onStopped();
    });
3. Receiving the event confirming successful connection
ConnectionStatusEvent ESTABLISHED code
    Flashphoner.createSession({urlServer: url}).on(SESSION_STATUS.ESTABLISHED, function(session){
        //session connected, start streaming
        startStreaming(session);
    }).on(SESSION_STATUS.DISCONNECTED, function(){
        ...
    }).on(SESSION_STATUS.FAILED, function(){
        ...
    });
4. Video streaming
session.createStream(), publish() code
Type 'screen' is specified in the constraint for video stream.
    var constraints = {
        video: {
            width: parseInt($('#width').val()),
            height: parseInt($('#height').val()),
            frameRate: parseInt($('#fps').val()),
            type: "screen"
        }
    };
    session.createStream({
        name: streamName,
        display: localVideo,
        constraints: constraints
        ...
    }).publish();
5. Receiving the event confirming successful streaming
StreamStatusEvent PUBLISHING code
When the screen sharing stream is published, preview video stream is created with method session.createStream(), and function play() is called to start playback of the stream in <div> element 'remoteVideo'.
    session.createStream({
        name: streamName,
        display: localVideo,
        constraints: constraints
    }).on(STREAM_STATUS.PUBLISHING, function(publishStream){
        /*
         * User can stop sharing screen capture using Chrome "stop" button.
         * Catch onended video track event and stop publishing.
         */
        document.getElementById(publishStream.id()).srcObject.getVideoTracks()[0].onended = function (e) {
            publishStream.stop();
        };
        document.getElementById(publishStream.id()).addEventListener('resize', function(event){
            resizeVideo(event.target);
        });
        setStatus(STREAM_STATUS.PUBLISHING);
        //play preview
        session.createStream({
            name: streamName,
            display: remoteVideo
            ...
        }).play();
    }).on(STREAM_STATUS.UNPUBLISHED, function(){
        ...
    }).on(STREAM_STATUS.FAILED, function(){
        ...
    }).publish();
6. Receiving the event confirming successful preview stream playback
StreamStatusEvent PLAYING code
        session.createStream({
            name: streamName,
            display: remoteVideo
        }).on(STREAM_STATUS.PLAYING, function(previewStream){
            document.getElementById(previewStream.id()).addEventListener('resize', function(event){
                resizeVideo(event.target);
            });
            //enable stop button
            onStarted(publishStream, previewStream);
        }).on(STREAM_STATUS.STOPPED, function(){
            ...
        }).on(STREAM_STATUS.FAILED, function(){
            ...
        }).play();
7. Preview stream playback stop
stream.stop() code
function onStarted(publishStream, previewStream) {
    $("#publishBtn").text("Stop").off('click').click(function(){
        $(this).prop('disabled', true);
        previewStream.stop();
    }).prop('disabled', false);
}
8. Receiving the event confirming successful playback stop
StreamStatusEvent STOPPED code
On receiving the event, publishStream.stop() is called to stop screen sharing streaming
        session.createStream({
            name: streamName,
            display: remoteVideo
        }).on(STREAM_STATUS.PLAYING, function(previewStream){
            ...
        }).on(STREAM_STATUS.STOPPED, function(){
            publishStream.stop();
        }).on(STREAM_STATUS.FAILED, function(){
            ...
        }).play();
9. Screen sharing streaming stop by click on Chrome extension button
publishStream.stop(). code
        document.getElementById(publishStream.id()).srcObject.getVideoTracks()[0].onended = function (e) {
            publishStream.stop();
        };
10. Receiving the event confirming successful streaming stop
StreamStatusEvent UNPUBLISHED code
    session.createStream({
        name: streamName,
        display: localVideo,
        constraints: constraints
    }).on(STREAM_STATUS.PUBLISHING, function(publishStream){
        ...
    }).on(STREAM_STATUS.UNPUBLISHED, function(){
        setStatus(STREAM_STATUS.UNPUBLISHED);
        //enable start button
        onStopped();
    }).on(STREAM_STATUS.FAILED, function(){
        ...
    }).publish();