iOS GPUImageDemo Swift
Пример приложения с захватом видео с использованием библиотеки GPUImage
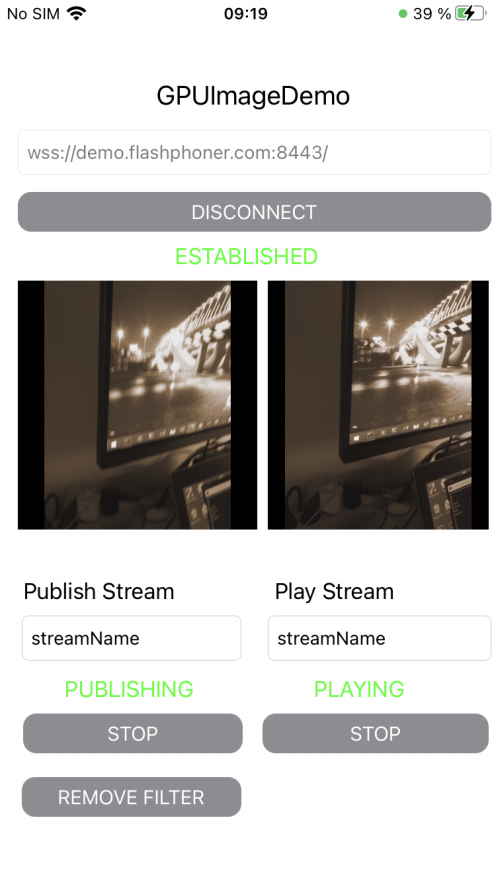
Данное приложение демонстрирует возможность захвата видео из кастомного источника c использованием библиотеки GPUImage на Swift для применения фильтров.
На скриншоте представлен пример публикации потока с фильтром MonochromeFilter из комплекта GPUImage
Поля ввода
WCS URL, гдеdemo.flashphoner.com- адрес WCS-сервераPublish Stream- для имени публикуемого потокаPlay Stream- для имени воспроизводимого потока
Кнопка Apply Filter/Remove Filter включает и отключает фильтр (на скриншоте фильтр включен)
Работа с кодом примера
Для разбора кода возьмем версию примера ImageOverlaySwift, которая доступна для скачивания на GitHub:
GPUImageDemoViewController- класс основного вида приложения (файл имплементации GPUImageDemoViewController.swift)CameraVideoCapturer- класс, реализующий захват и обработку видео (файл имплементации CameraVideoCapturer.swift)
1. Импорт API
2. Инициализация класса для захвата и обработки видео
3. Создание сессии и подключение к серверу.
WCSSession, WCSSession.connect code
В параметрах сессии указываются:
- URL WCS-сервера
- имя серверного REST hook приложения
defaultApp
@IBAction func connectPressed(_ sender: Any) {
    changeViewState(connectButton, false)
    if (connectButton.title(for: .normal) == "CONNECT") {
        if (session == nil) {
            let options = FPWCSApi2SessionOptions()
            options.urlServer = urlField.text
            options.appKey = "defaultApp"
            do {
                try session = WCSSession(options)
            } catch {
                print(error)
            }
        }
        ...
        changeViewState(urlField, false)
        session?.connect()
    } else {
        session?.disconnect()
    }

}
4. Публикация видеопотока
WCSSession.createStream, WCSStream.publish code
Методу createStream передаются параметры:
- имя публикуемого потока
- вид для локального отображения
- объект для захвата видео
@IBAction func publishPressed(_ sender: Any) {
    changeViewState(publishButton,false)
    if (publishButton.title(for: .normal) == "PUBLISH") {
        let options = FPWCSApi2StreamOptions()
        options.name = publishName.text
        options.display = localDisplay.videoView
        options.constraints = FPWCSApi2MediaConstraints(audio: true, videoCapturer: capturer);
        do {
        publishStream = try session!.createStream(options)
        } catch {
            print(error);
        }
        ...
        do {
            try publishStream?.publish()
            capturer.startCapture()
        } catch {
            print(error);
        }
    } else {
        do {
            try publishStream?.stop();
        } catch {
            print(error);
        }

    }

}
5. Воспроизведение видеопотока
WCSSession.createStream, WCSStream.play code
Методу createStream передаются параметры:
- имя воспроизводимого потока
- вид для отображения потока
@IBAction func playPressed(_ sender: Any) {
    changeViewState(playButton,false)
    if (playButton.title(for: .normal) == "PLAY") {
        let options = FPWCSApi2StreamOptions()
        options.name = playName.text;
        options.display = remoteDisplay.videoView;
        do {
        playStream = try session!.createStream(options)
        } catch {
            print(error)
        }
        ...
        do {
            try playStream?.play()
        } catch {
            print(error);
        }
    } else{
        do {
            try playStream?.stop();
        } catch {
            print(error);
        }
    }
}
6. Остановка воспроизведения видеопотока
WCSStream.stop code
@IBAction func playPressed(_ sender: Any) {
    changeViewState(playButton,false)
    if (playButton.title(for: .normal) == "PLAY") {
        ...
    } else{
        do {
            try playStream?.stop();
        } catch {
            print(error);
        }
    }
}
7. Остановка публикации видеопотока
WCSStream.stop code
@IBAction func publishPressed(_ sender: Any) {
    changeViewState(publishButton,false)
    if (publishButton.title(for: .normal) == "PUBLISH") {
        ...
    } else {
        do {
            try publishStream?.stop();
        } catch {
            print(error);
        }

    }

}
8. Вызов функции, применяющей фильтр
@IBAction func applyFilterPressed(_ sender: Any) {
    if capturer.filter != nil {
        capturer.applyFilter(nil)
        applyFilterButton.setTitle("APPLY FILTER", for: .normal)
    } else {
        let filter = MonochromeFilter()
        capturer.applyFilter(filter)
        applyFilterButton.setTitle("REMOVE FILTER", for: .normal)

    }
}
9. Применение фильтра
func applyFilter(_ filter: BasicOperation?) {
    self.filter = filter

    if let cam = self.camera, capturing {
        cam.removeAllTargets()

        self.gpuImageConsumer.removeSourceAtIndex(0)

        if let fil = self.filter {
            cam --> fil --> self.gpuImageConsumer
        } else {
            cam --> self.gpuImageConsumer
        }
    }

}
10. Получение очередного кадра от камеры
public func newTextureAvailable(_ texture:Texture, fromSourceIndex:UInt) {
    // Ignore still ../images and other non-video updates (do I still need this?)
    guard let frameTime = texture.timingStyle.timestamp?.asCMTime else { return }
    // If two consecutive times with the same value are added to the movie, it aborts recording, so I bail on that case
    guard (frameTime != previousFrameTime) else {
        return
    }

    var pixelBufferFromPool:CVPixelBuffer? = nil

    let pixelBufferStatus = CVPixelBufferCreate(kCFAllocatorDefault, texture.texture.width, texture.texture.height, kCVPixelFormatType_32BGRA, nil, &pixelBufferFromPool);

    guard let pixelBuffer = pixelBufferFromPool, (pixelBufferStatus == kCVReturnSuccess) else {
        return

    }
    CVPixelBufferLockBaseAddress(pixelBuffer, [])

    renderIntoPixelBuffer(pixelBuffer, texture:texture)
    capturer.captureOutput(pixelBuffer, time: frameTime)
    CVPixelBufferUnlockBaseAddress(pixelBuffer, [])
}
11. Преобразование кадра в пиксельный буфер
func renderIntoPixelBuffer(_ pixelBuffer:CVPixelBuffer, texture:Texture) {
    guard let pixelBufferBytes = CVPixelBufferGetBaseAddress(pixelBuffer) else {
        print("Could not get buffer bytes")
        return
    }
    let mtlTexture = texture.texture;
    guard let commandBuffer = sharedMetalRenderingDevice.commandQueue.makeCommandBuffer() else { fatalError("Could not create command buffer on image rendering.")}
    commandBuffer.commit()
    commandBuffer.waitUntilCompleted()

    let bytesPerRow = CVPixelBufferGetBytesPerRow(pixelBuffer)
    let region = MTLRegionMake2D(0, 0, mtlTexture.width, mtlTexture.height)
    mtlTexture.getBytes(pixelBufferBytes, bytesPerRow: bytesPerRow, from: region, mipmapLevel: 0)
}