AWS load balancer with auto scale quick setup
Overview
WCS Amazon instances support AWS load balancer.
WebSocket connections will be distributed between active load balancer instances. In case a scaling policy is executed (when the policy target – e.g., CPU load on instance - is reached) and new instances are launched, they will be added to the load balancer.
The following components would be required
- AMI on the basis of which new instances will be created for scaling out
- Load Balancer
- Launch Configuration
- Auto Scaling Group
Launching AWS Auto Scaling group with classic load balancer from custom AMI
Load balancer with autoscaling deployment from custom AMI can be useful for logn term projects (months and years). In this case, AWS Marketplace image will be more expensive due to hourly payment, therefore it is recommended to buy and activate WCS monthly subscription.
Attention
Amazon claims classic load balancer will work till August 2022.
1. Create new AMI
1.1. Launch an instance from a FlashphonerWebCallServer AMI and configure the WCS
- activate license
- import certificates
- change configuration settings as required
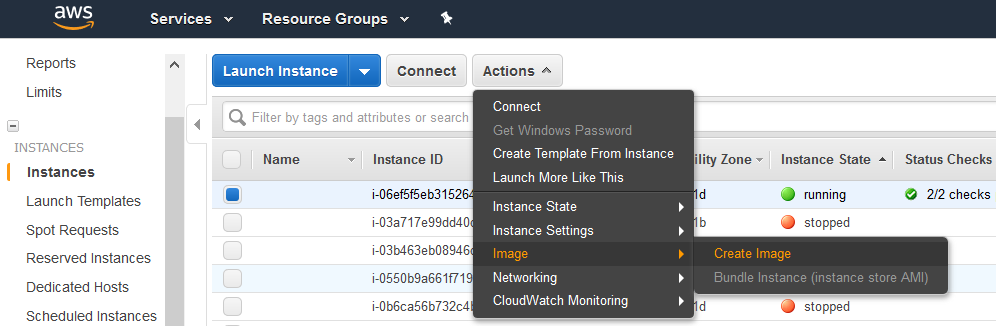
1.2. In AWS console, select the instance and then Actions - Image - Create Image and create a new image:
2. Create new Load Balancer
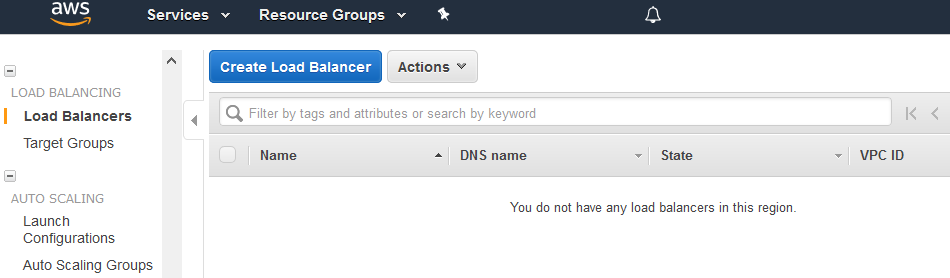
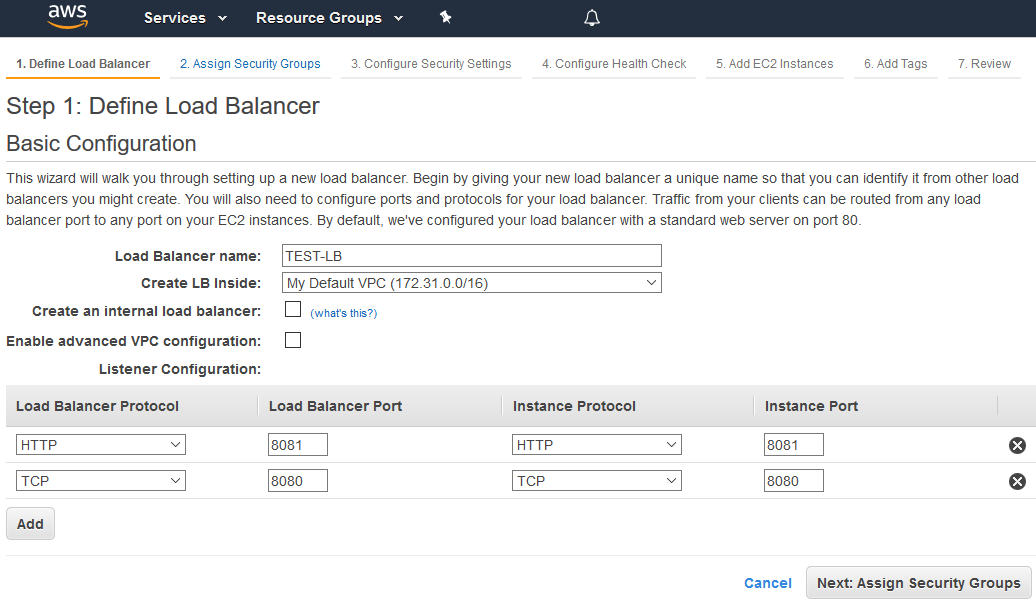
2.1. In AWS console, go to EC2 - Load Balancers and click Create Load Balancer
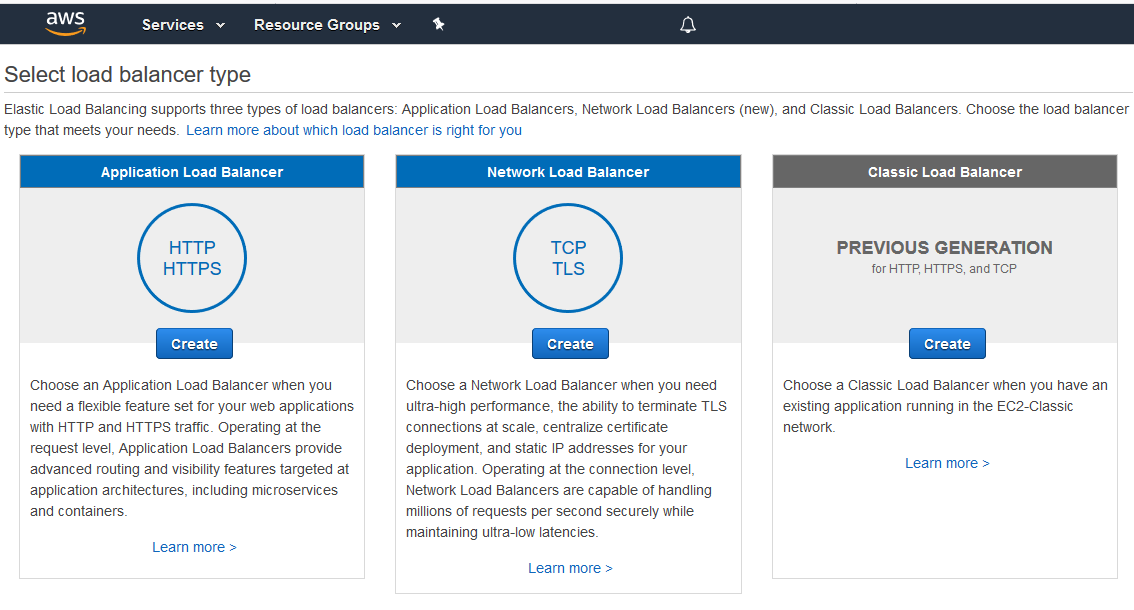
2.2 Select Classic Load Balancer type (This type allows specifying port for health check)
2.3. When defining load balancer, add required protocols. For example TCP, port 8080 for WebSocket connections ws:host:8080)
2.4. Assign a security group.
2.5. Configure health check
The URL for health check is
- for HTTP:
http://WCS_ADDRESS:8081/?action=stat - for HTTPS:
https://WCS_ADDRESS:8444/?action=stat

2.6. Add existing EC2 instances as required
By default, cross-zone load balancing is enabled to distribute traffic between all available availability zones in your region.
2.7. Complete the wizard to create the load balancer
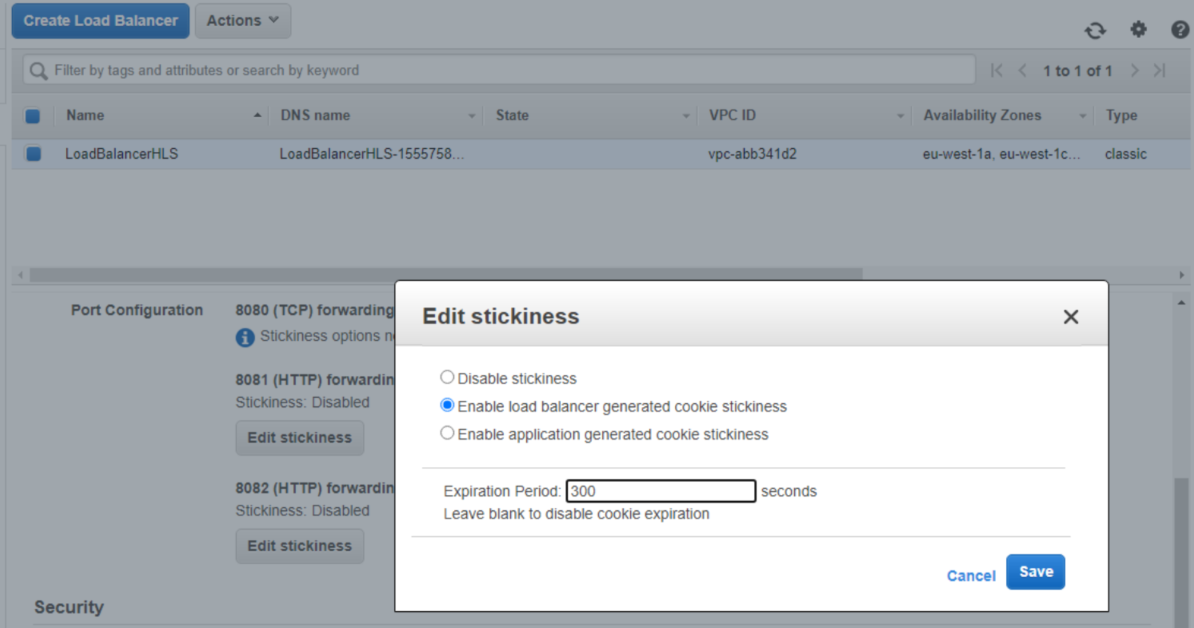
2.8. Enable stickiness for HTTP/HTTPS LB ports
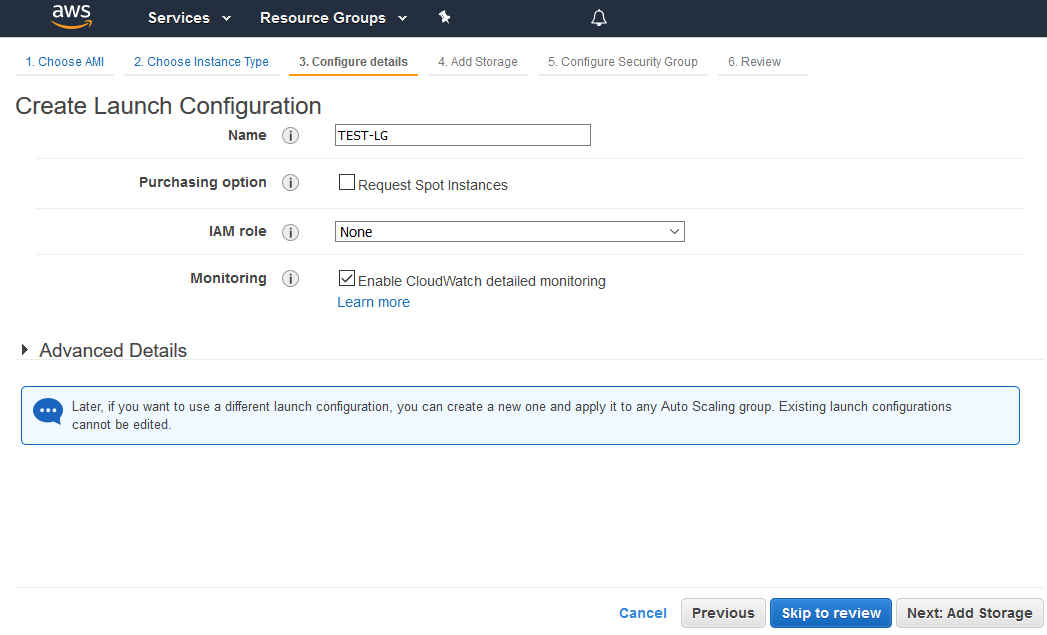
3. Create new Launch Configuration
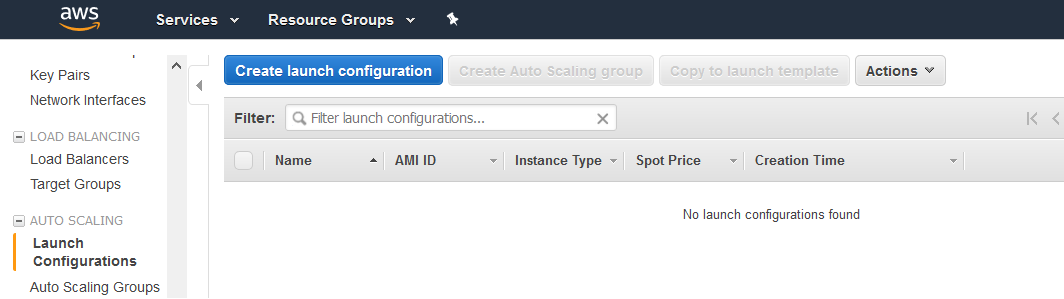
3.1. In AWS console, go to EC2 - Launch Configurations and click Create launch configuration
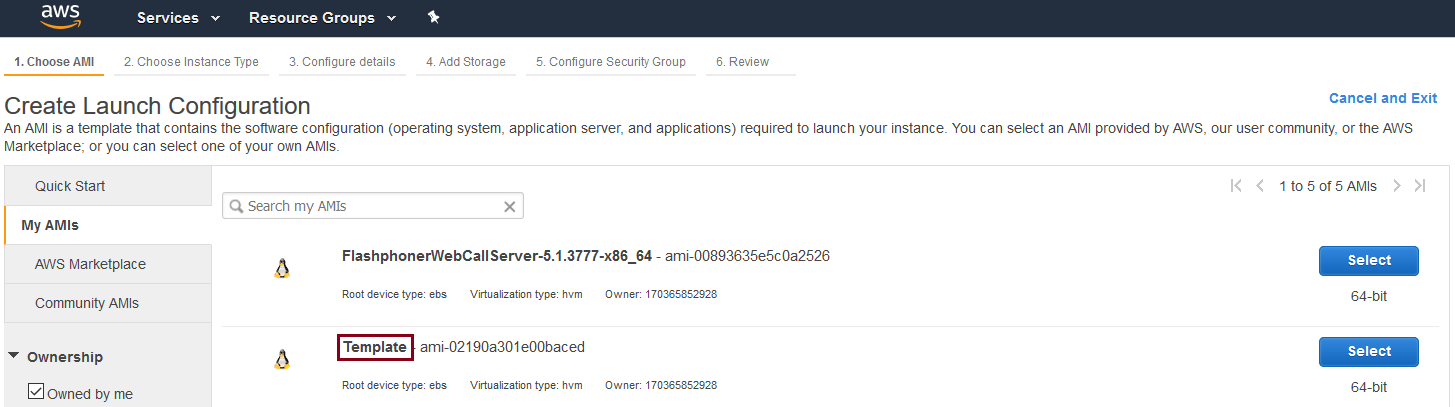
3.2. When choosing AMI, select the AMI previously created from an instance with required WCS configuration
3.3. Complete the wizard to create the configuration
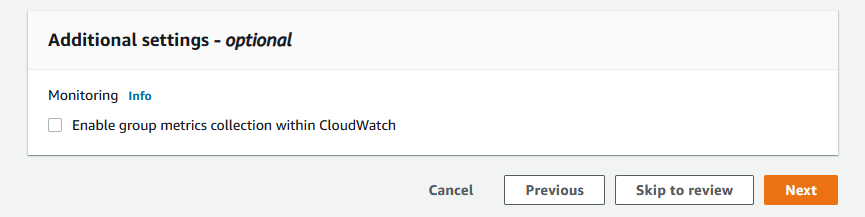
Detailed monitoring, where data is available in 1-minute periods, can be enabled when configuring details.
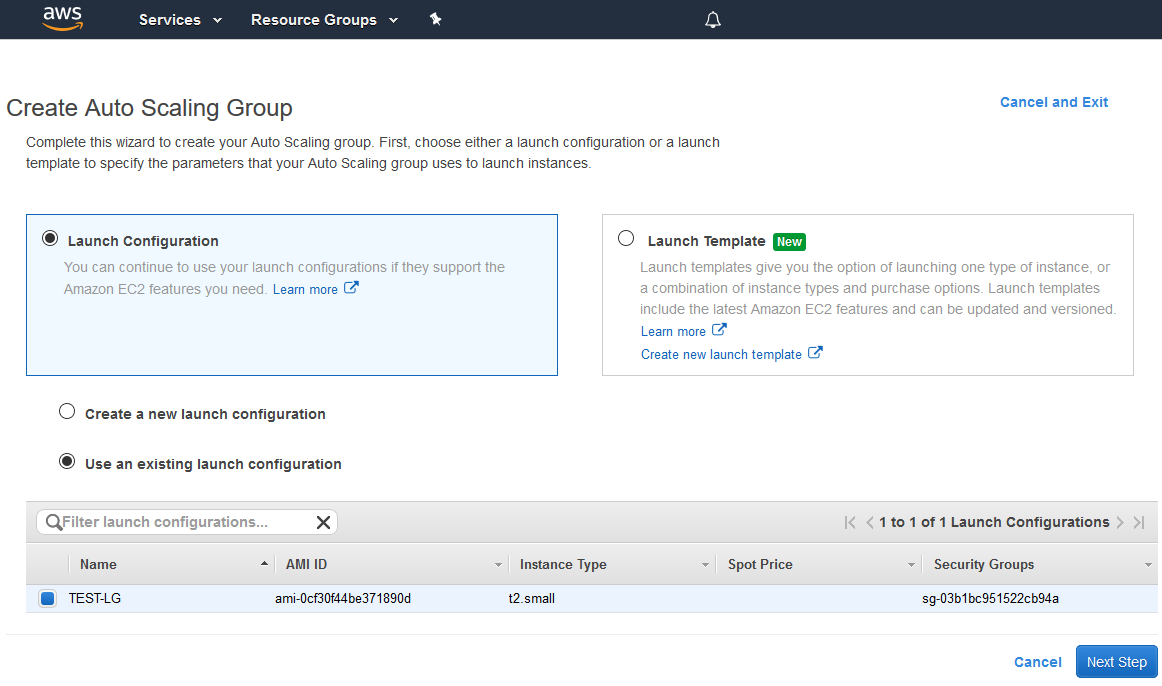
4. Create new Auto Scaling group
4.1. In AWS console, go to EC2 - Auto Scaling Groups and click Create Auto Scaling group

4.2. Select the required launch configuration or template, or create a new one
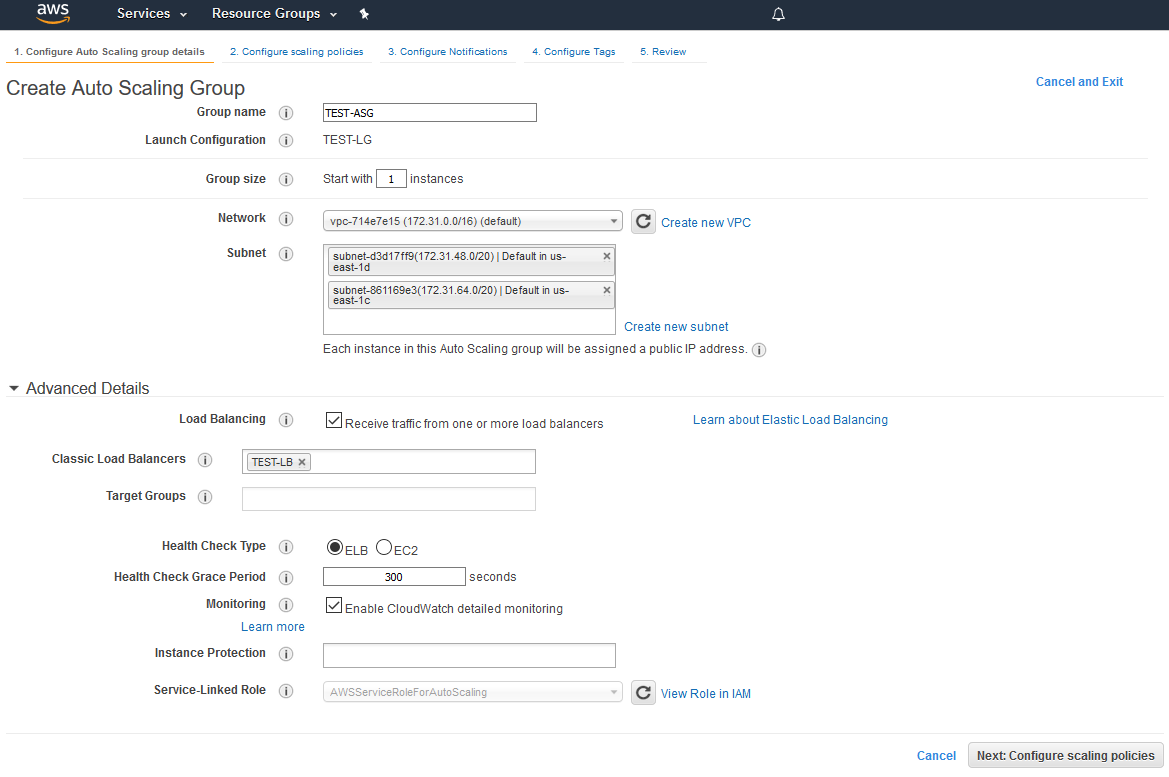
4.3. Configure Auto Scaling group details
- add required subnets
- add required load balancer
4.4. Configure scaling policies
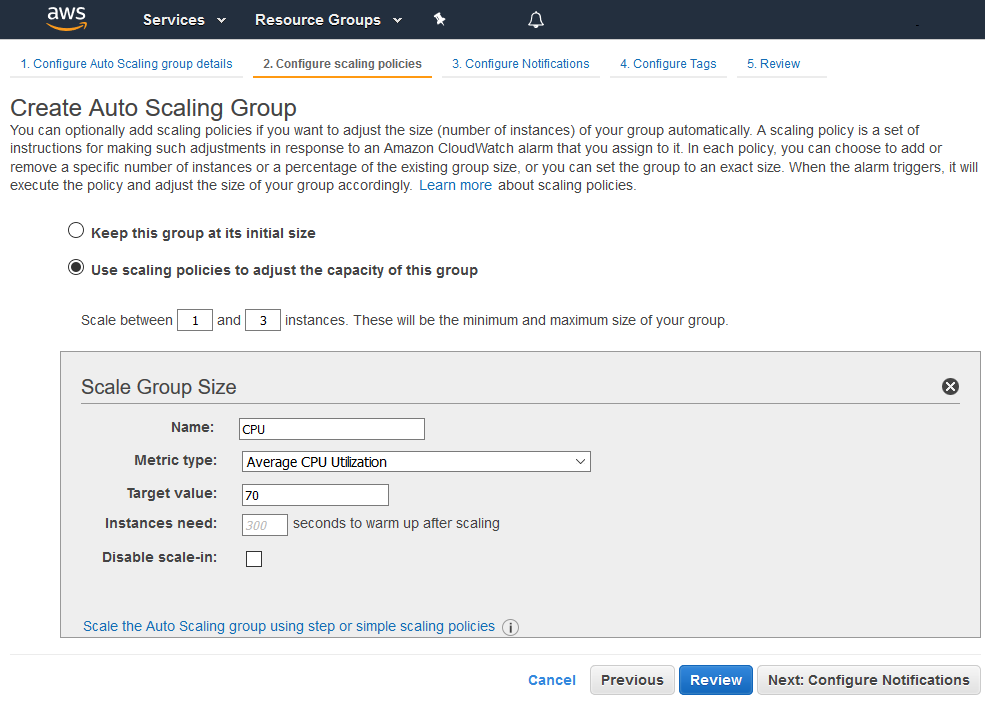
4.5. Complete the wizard to create the auto scaling group
Launching Application Load Balancer using existing instances
Sometimes, a certain set of instances is already launched and configured (Origin servers group in CDN, for example), and load balancing between those servers should be set up. Use Application Load Balancer to do this.
1. Instances launching
Launch and configure server instances as needed by this manual.
2. Application Load Balancer creation
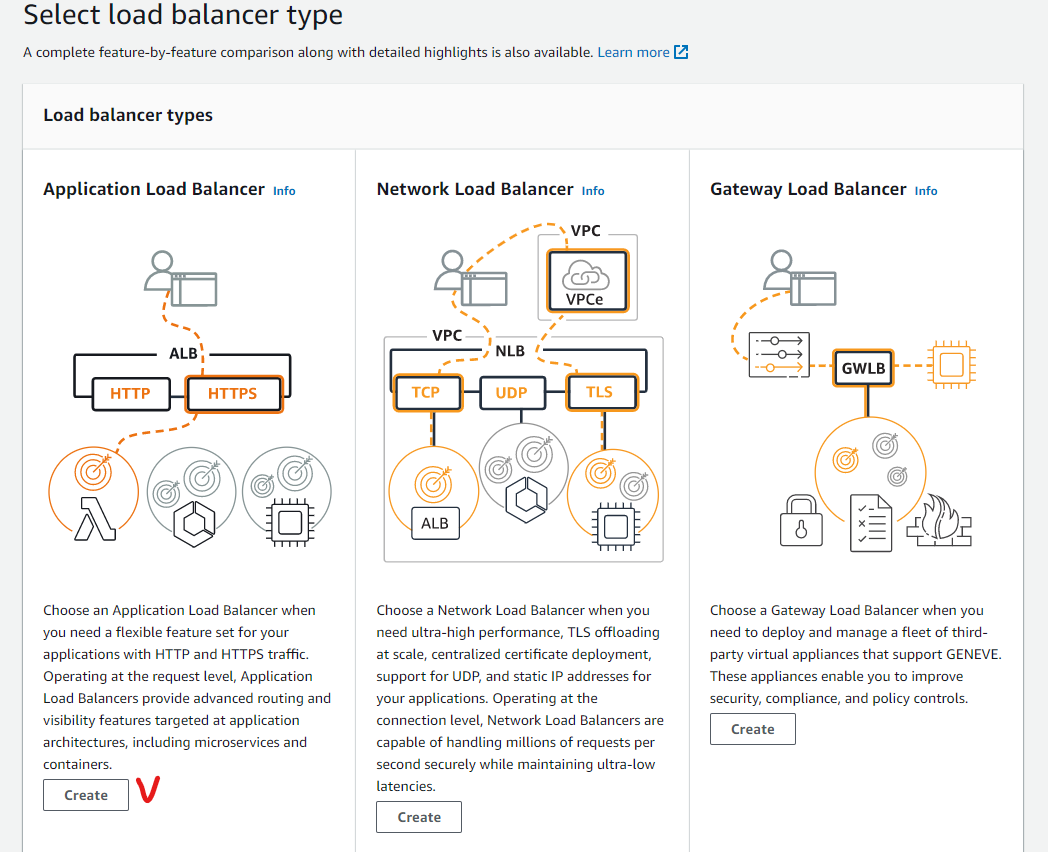
2.1. In EC2 Console menu, go to Load balancers - Load balancers section and click Create load balancer". Click Create for Application Load Balancer
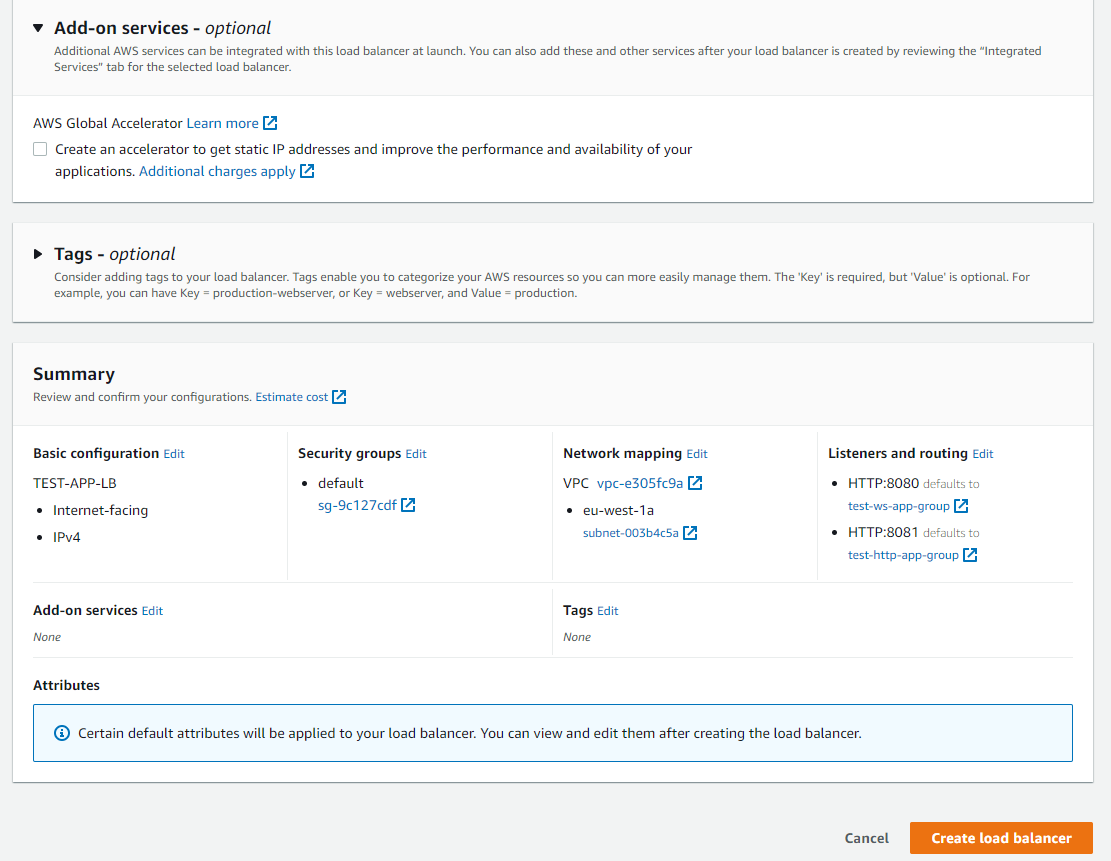
2.2. Enter the balancer name, choose Internet-facing type (supposed by default)

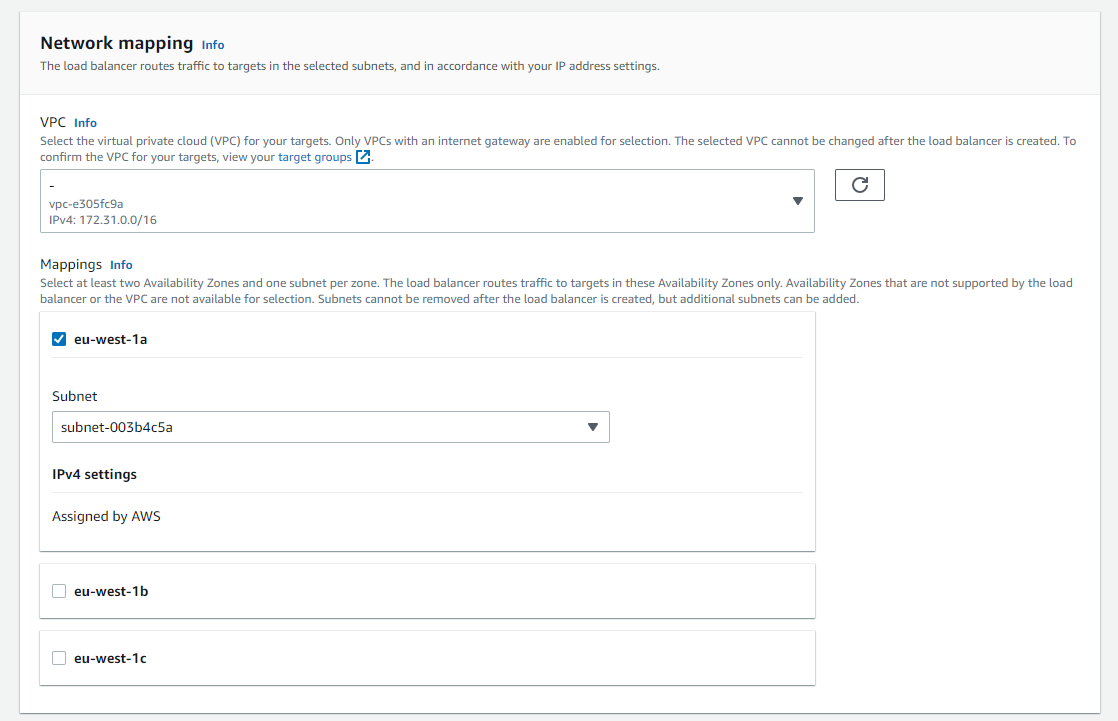
2.3. In Network mapping section choose a subnets needed
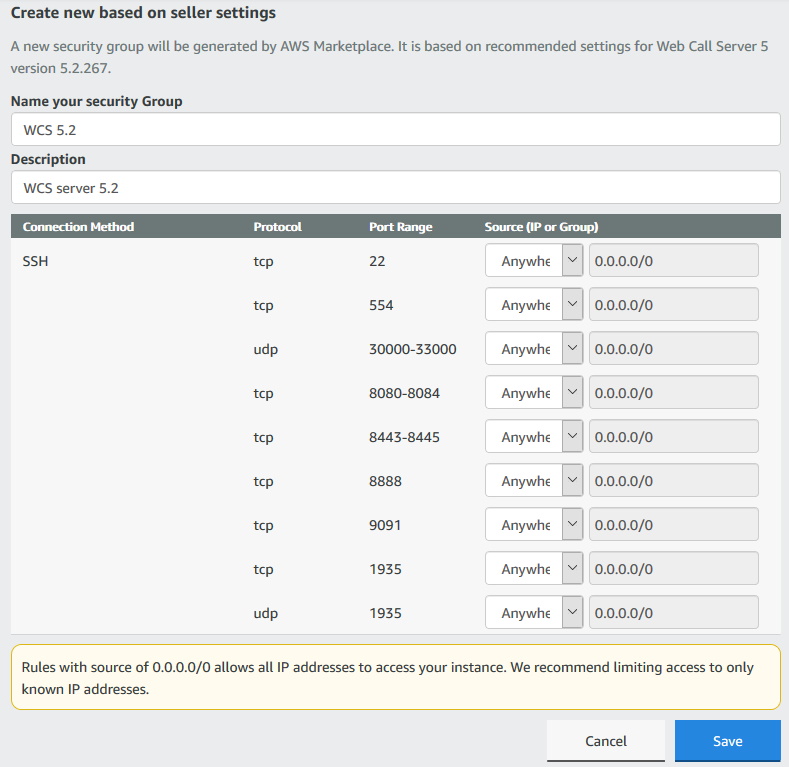
2.4. Choose or create security groups as needed
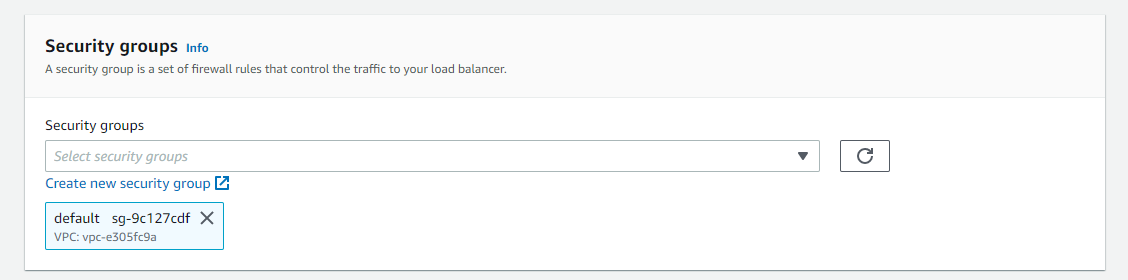
Note that a standard WCS ports set should be opened in load balancer security group
2.5. In Listeners and routing section add Websocket port listener (mandatory) and HTTP port listener (if needed)
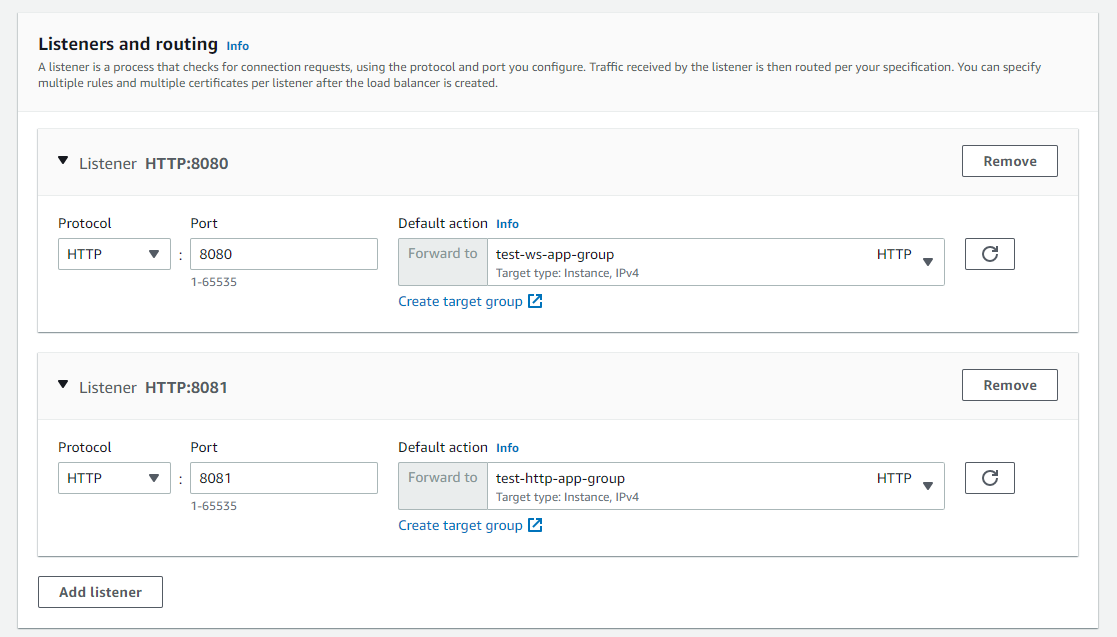
A target group must be created for every listener, see below.
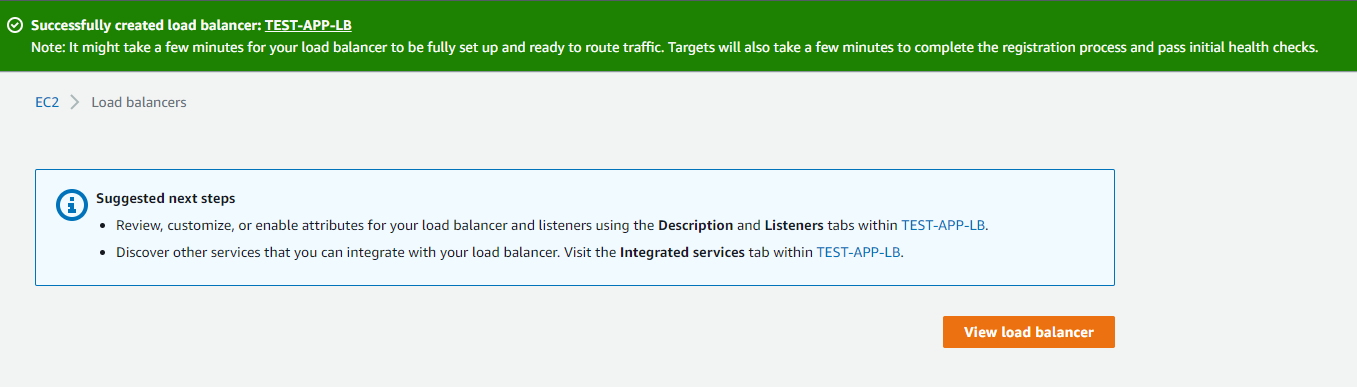
2.6. Click Create load balancer
Load balancer is created
3. Websocket listener target group creation
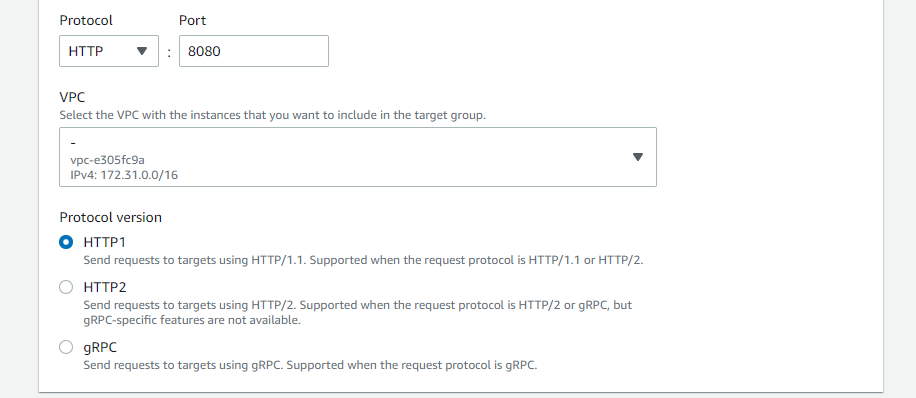
3.1. Choose target type Instances (supposed by default), set group name
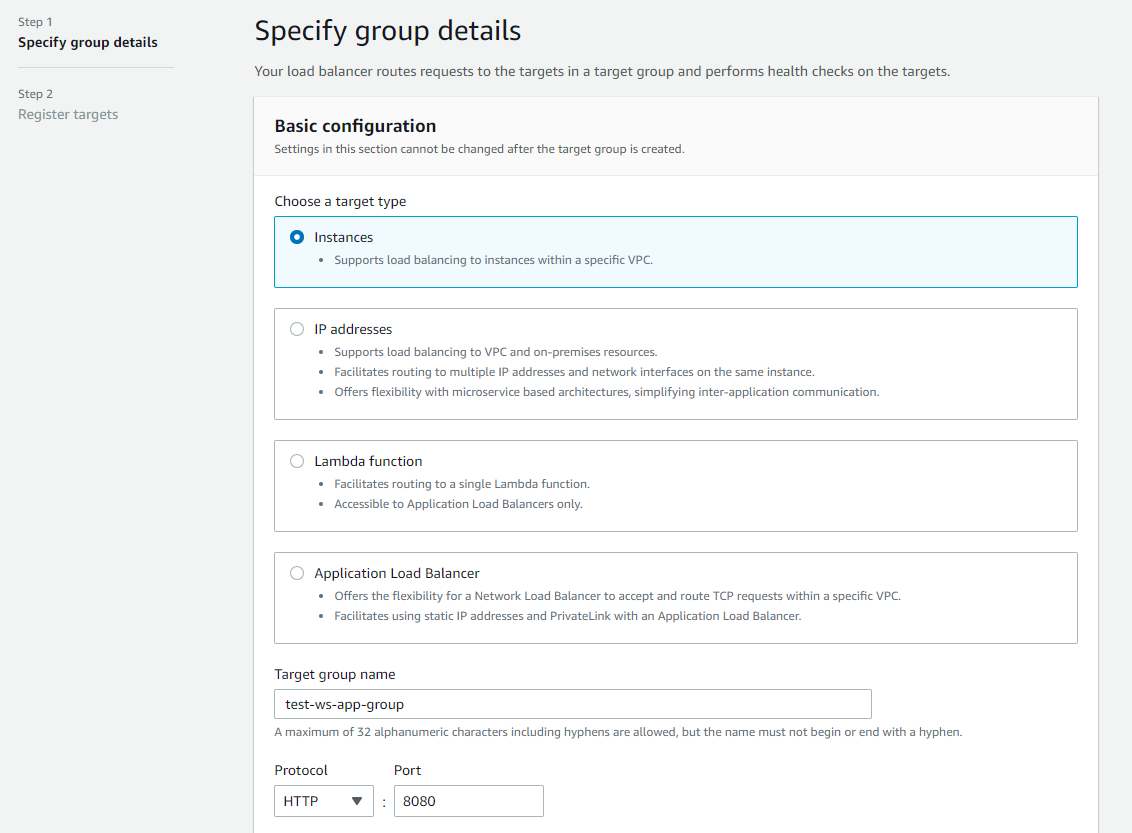
3.2. Set WCS instance Websocket port (8080), choose subnet and protocol version (HTTP1)
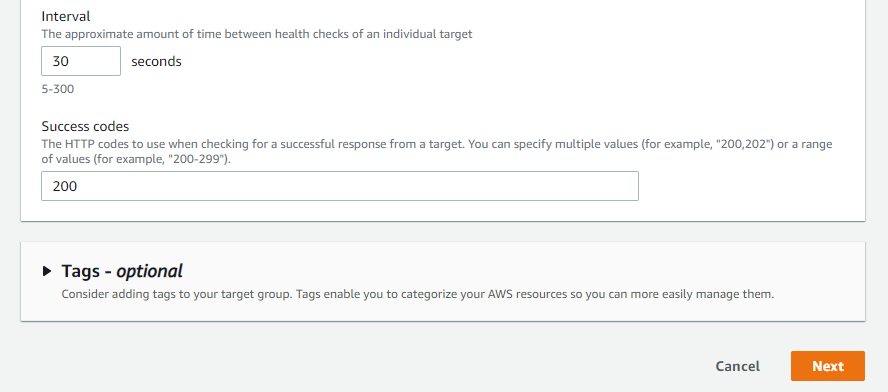
3.3. In Health check configure instance health check using HTTP port (8081) and statistics page query /?action=stat
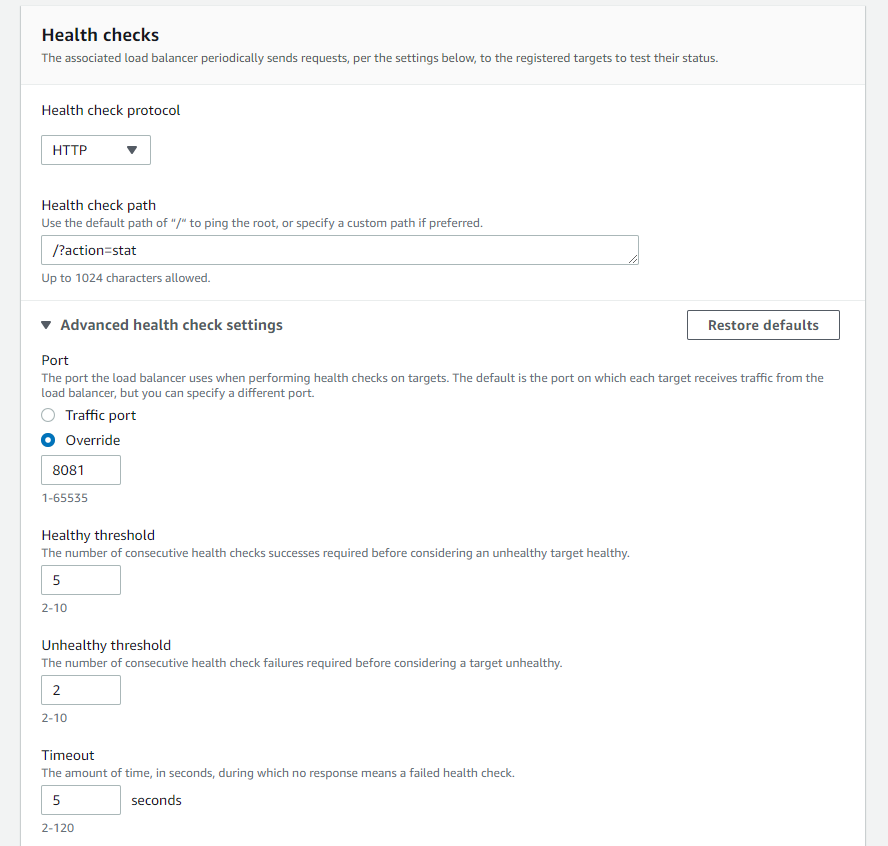
Then click Next
3.4. At Register targets page select instances as needed and click Include as pending below
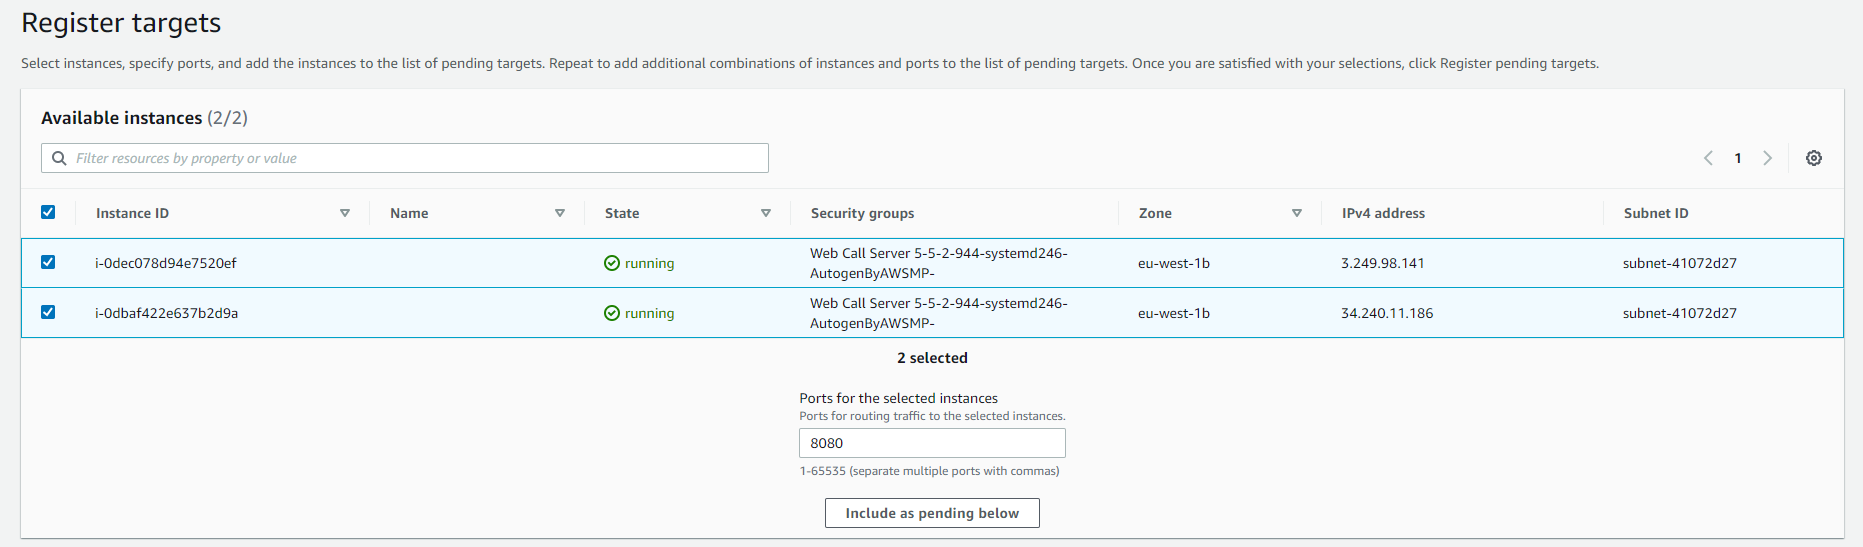
Then click Register pending targets
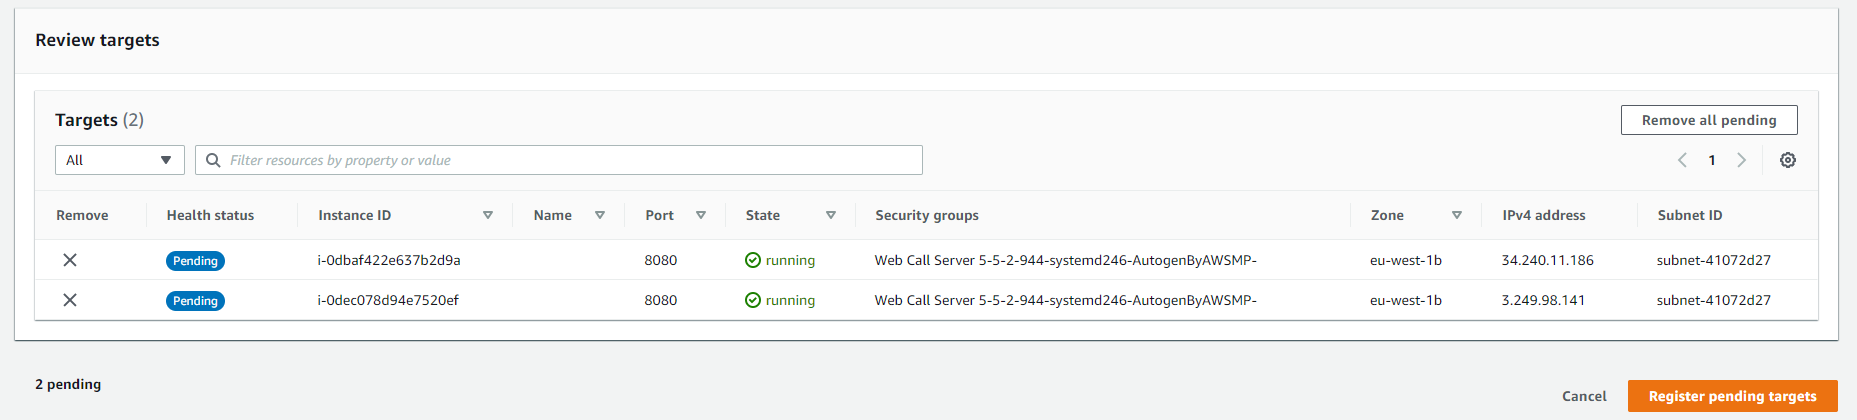
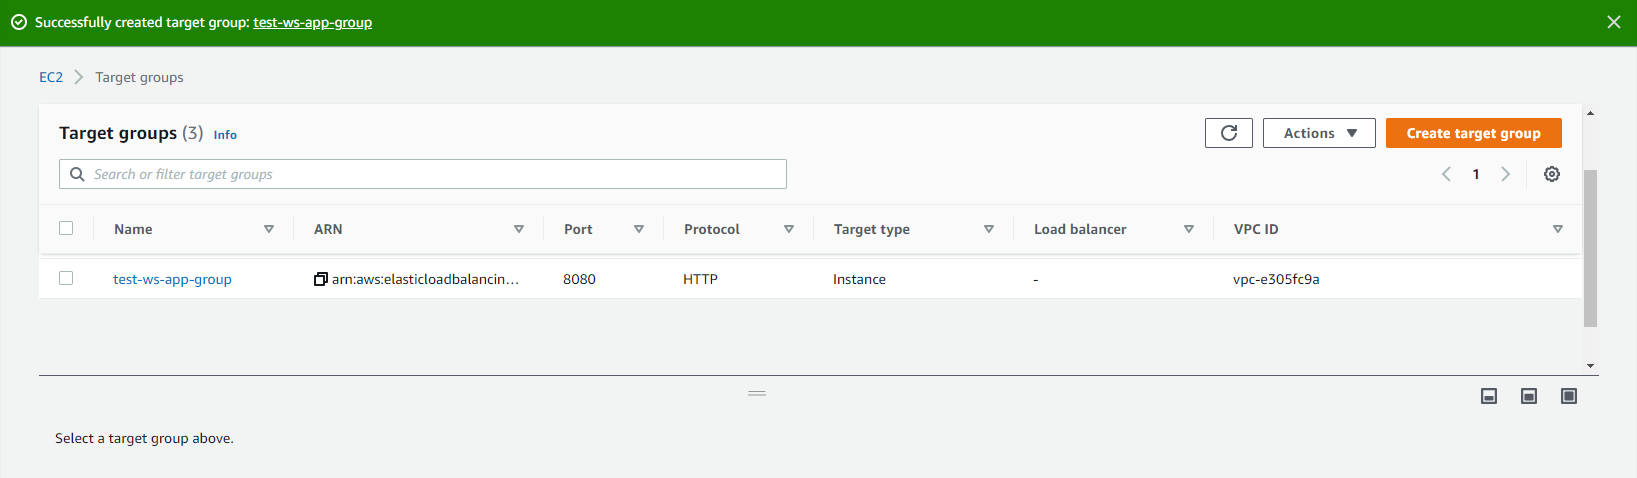
Target group is created
Application load balancer using this group will forward requests to it after at least one of the group instances passes health check.
4. Listener parameters configuration
If Application Load Balancer is created to use in Autoscaling group (see below), HTTPS listener cannot be configured on creation, only HTTP. In this case, listener parameters shoul be changed.
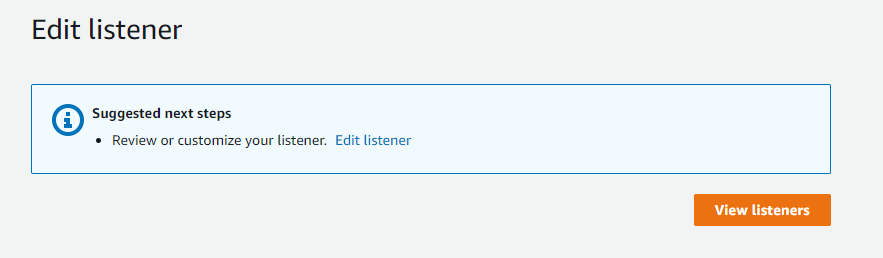
4.1. In EC2 Console section Load balancers - Load balancers choose Listeners tab for load balancer to configure. Choose Websocket listener and click Edit
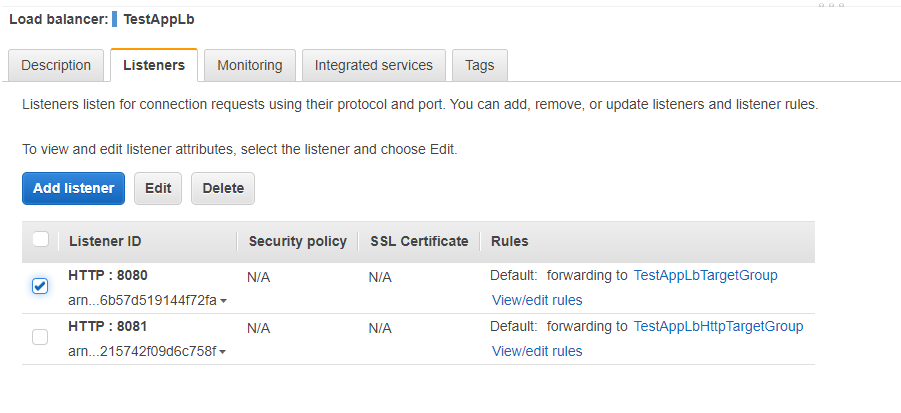
4.2. Choose HTTPS protocol and set Secure Websocket port (8443 for example)
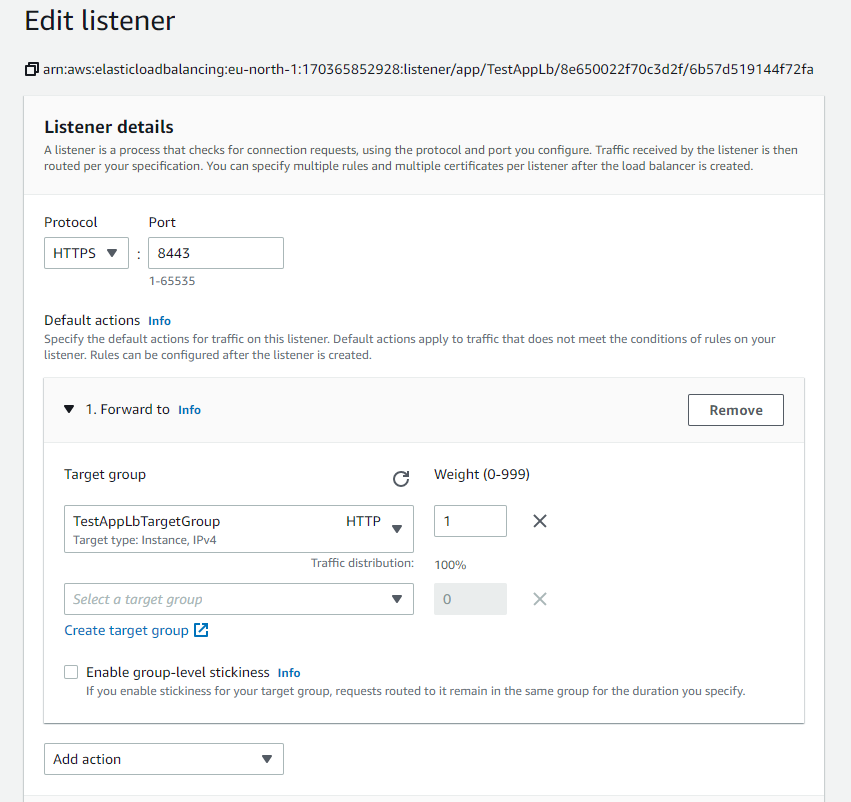
4.3. In Secure listener settings section choose SSL certificate to use with domain asigned to load balancer entry point or create a new one. Then click Save changes
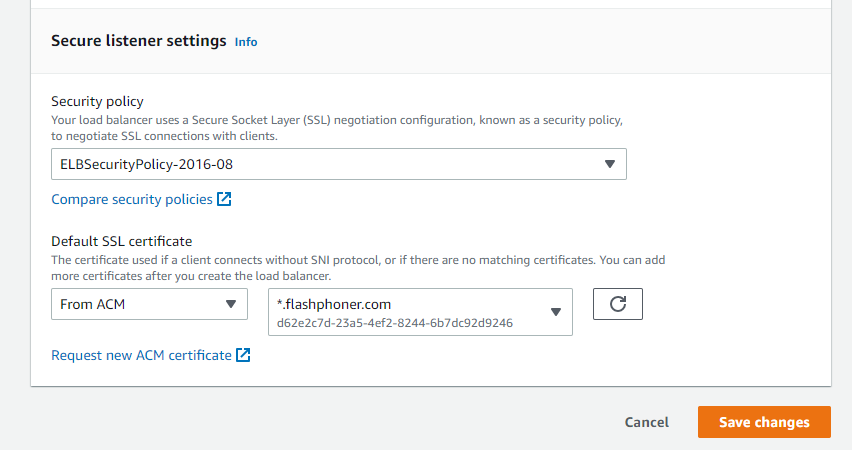
Load balancer listener parameters are changed and will be applied immediately
Launching AWS Auto Scaling group with load balancing from AWS Marketplace AMI
Load balancer with autoscaling deployment from AWS Marketplace AMI may be useful for periodic servers group launching, for example, during the event (lasting for hours, days, weeks). In this case, WCS monthly subscription may be more expensive then AWS hourly payment, therefore it is recommeded to use AWS Marketplace AMI.
1. Create launch template
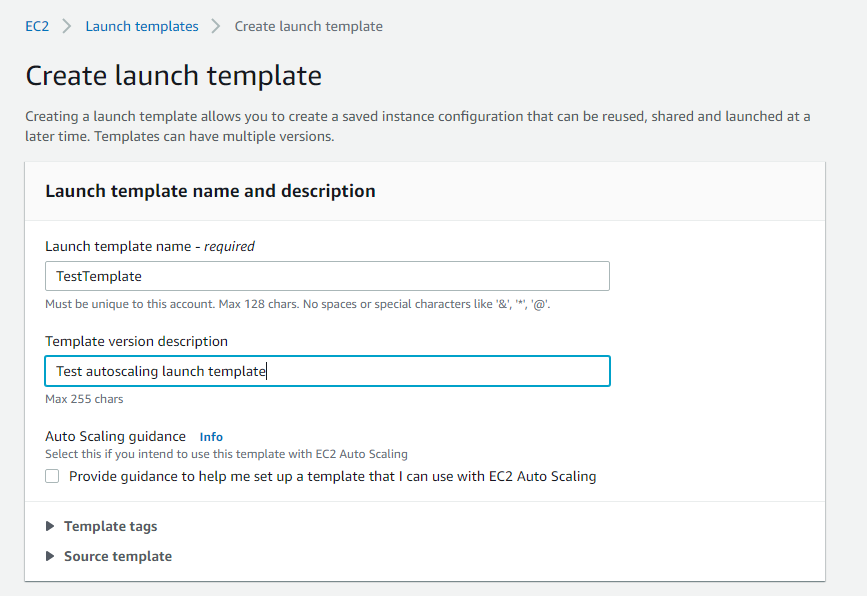
1.1. In EC2 Console go to Instances - Launch Templates section and click Create launch template. Launch template creation wizard will open. Enter template name and description
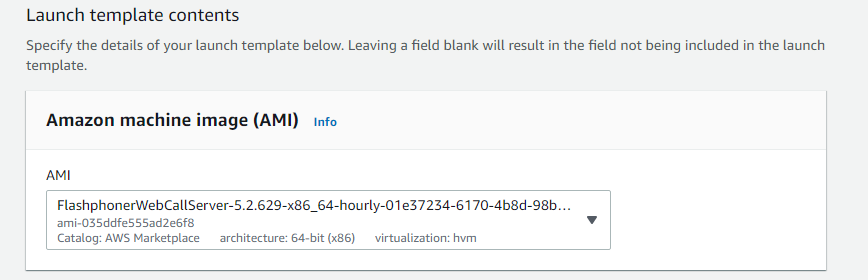
1.2. Choose latest FlashphonerWebCallServer image
1.3. Choose instance type, key pair for SSH access to an instance, security group
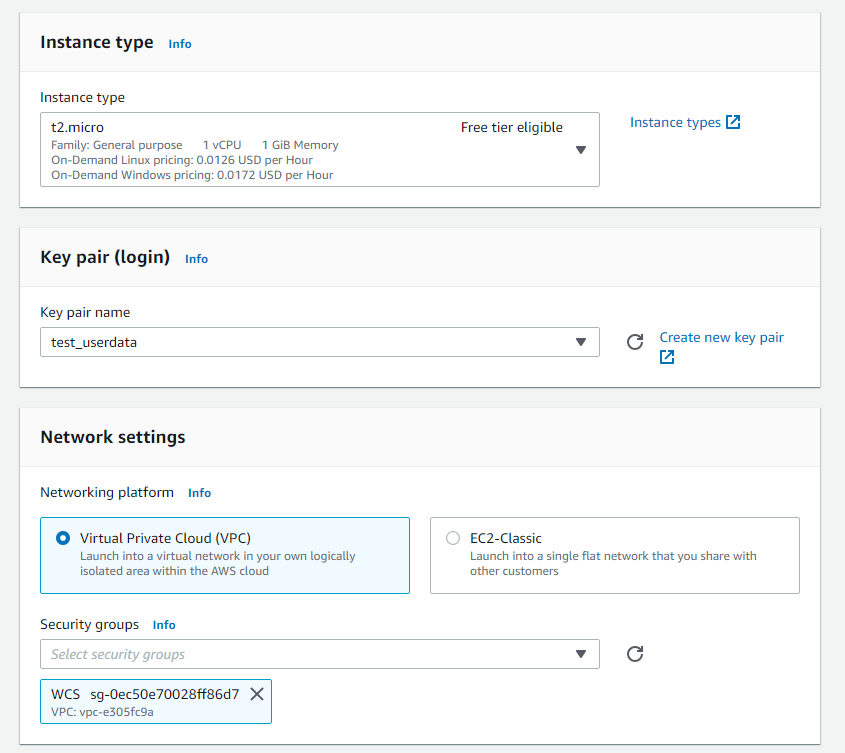
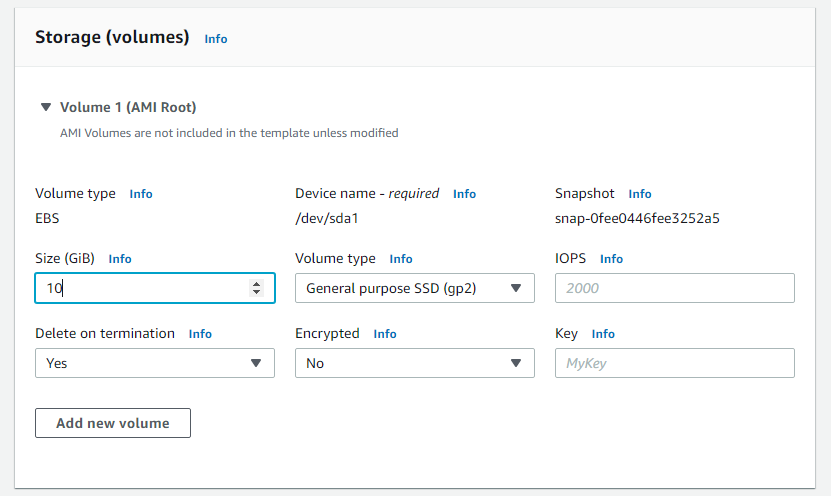
1.4. Set disk size and parameters for instances
1.5. Expand Advanced details section. Insert custom update and setup script to User data text box
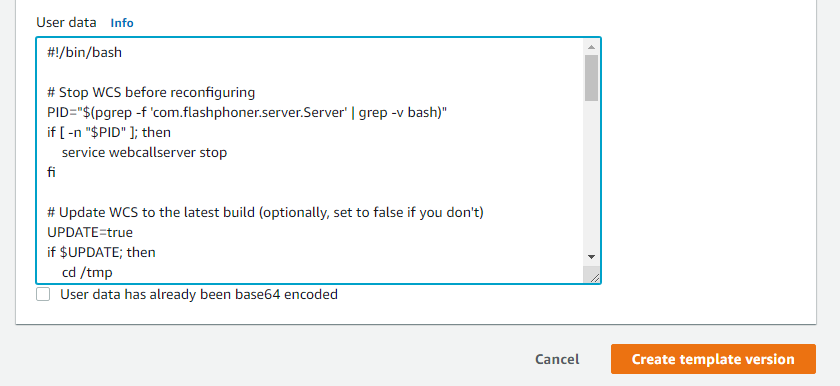
The setup script example to update WCS to latest build and to configure CDN Edge server for WebRTC playback
Edge setup script
#!/bin/bash

# Stop WCS before reconfiguring
PID="$(pgrep -f 'com.flashphoner.server.Server' | grep -v bash)"
if [ -n "$PID" ]; then
    service webcallserver stop
fi

# Update WCS to the latest build (optionally, set to false if you don't)
UPDATE=true
if $UPDATE; then
    cd /tmp
    wget --timeout=10 --no-check-certificate https://flashphoner.com/download-wcs5.2-server.tar.gz -O wcs5-server.tar.gz
    if [ $? -eq 0 ]; then
        mkdir -p FlashphonerWebCallServer-5.2-latest && tar xzf wcs5-server.tar.gz -C FlashphonerWebCallServer-5.2-latest --strip-components 1
        cd FlashphonerWebCallServer-5.2-latest
        chmod +x install.sh
        ./install.sh -silent
        cd ..
        rm -rf FlashphonerWebCallServer-5.2-latest wcs5-server.tar.gz
    fi
fi

# Configuration setup
WCS_CONFIG=/usr/local/FlashphonerWebCallServer/conf/flashphoner.properties
JVM_CONFIG=/usr/local/FlashphonerWebCallServer/conf/wcs-core.properties
USERS_CONFIG=/usr/local/FlashphonerWebCallServer/conf/database.yml

#CDN settings
CDN_ROLE=edge
CDN_IP=0.0.0.0
CDN_POINT_OF_ENTRY=172.31.43.82
echo -e "\ncdn_enabled=true" >> $WCS_CONFIG
echo -e "\ncdn_ip=$CDN_IP" >> $WCS_CONFIG
echo -e "\ncdn_role=$CDN_ROLE" >> $WCS_CONFIG
echo -e "\ncdn_point_of_entry=$CDN_POINT_OF_ENTRY" >> $WCS_CONFIG
echo -e "\ncdn_nodes_resolve_ip=false" >> $WCS_CONFIG

# Configure heap settings
HEAP_SIZE=512m
sed -i -e "s/^\(-Xmx\).*\$/\1$HEAP_SIZE/" $JVM_CONFIG

# Disable demo user (optionally, set to true if you want to disable)
DISABLE_DEMO=false
if $DISABLE_DEMO; then
 if grep "demo:" $USERS_CONFIG > /dev/null 2>&1; then
  sed -i -e "/demo:/s/active:\ true/active:\ false/" $USERS_CONFIG
 fi
fi

# Start WCS after reconfiguring
PID="$(pgrep -f 'com.flashphoner.server.Server' | grep -v bash)"
if [ -n "$PID" ]; then
    service webcallserver restart
else
    service webcallserver start
fi

# Disable internal firewall, ports are allowed/blocked on security group level
iptables -F
1.6. Click Create launch template
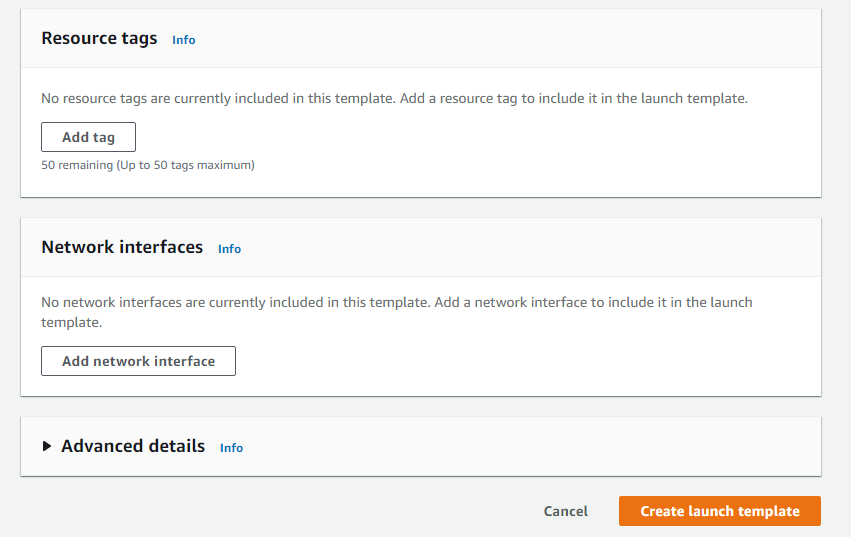
Launch template will be created

2. Create Auto scaling group
2.1. In EC2 Console go to Instances - Auto Scaling Groups section and click Create an Auto Scaling Group. Autoscaling group creation wizard will open. Enter group name
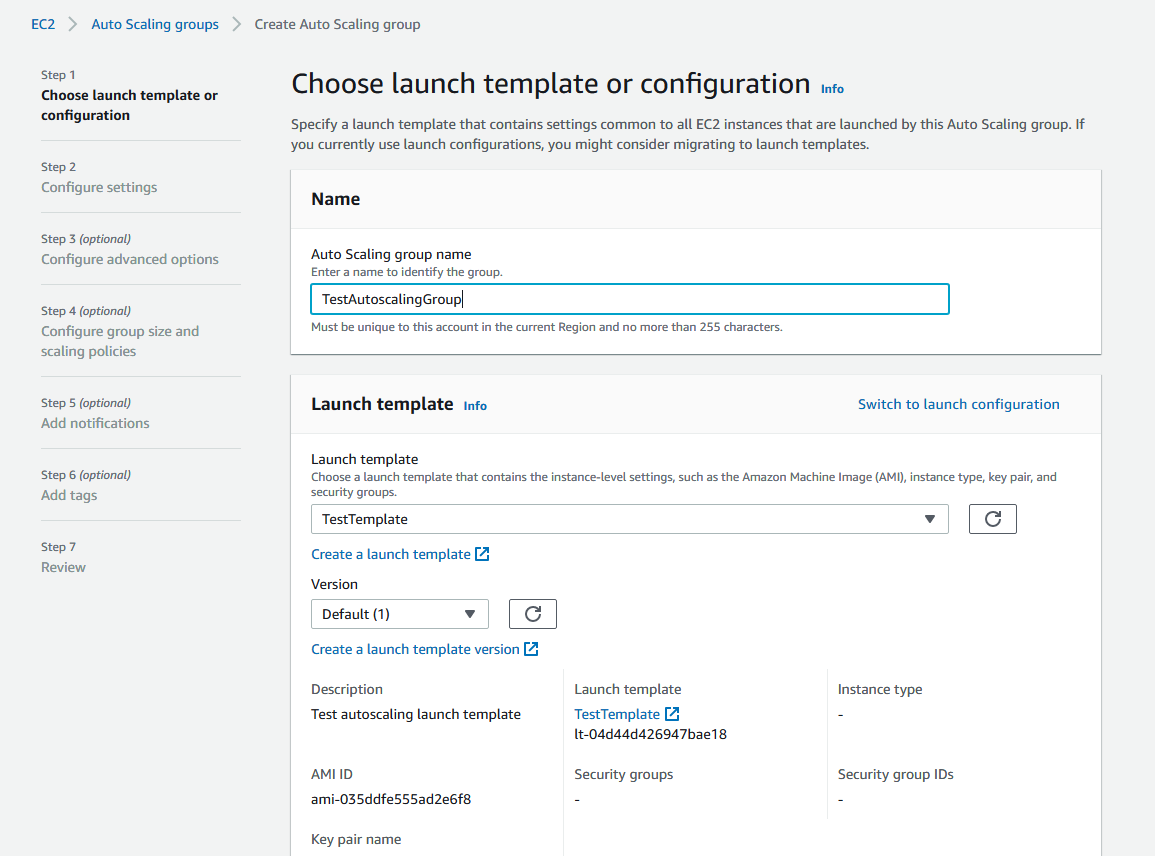
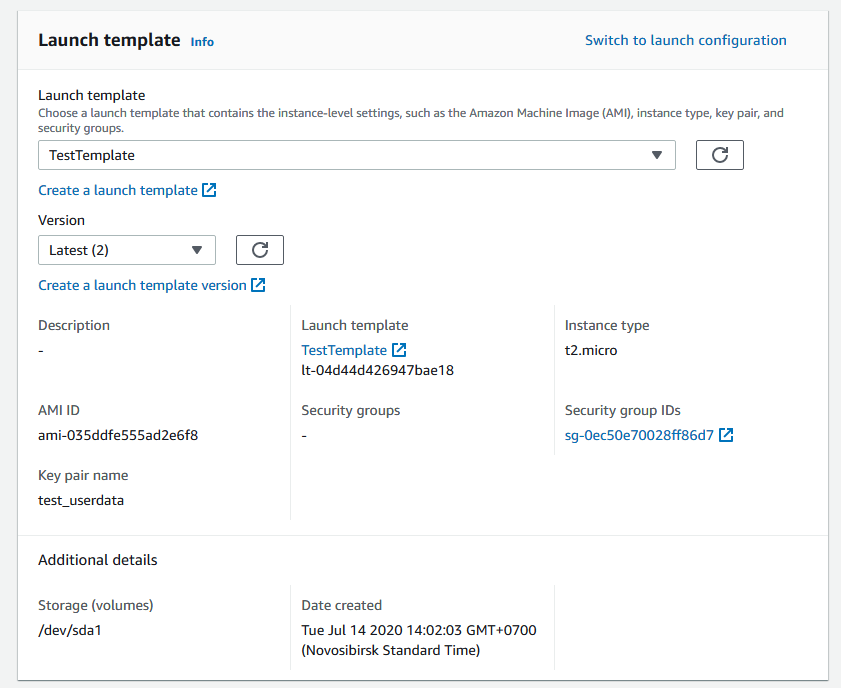
2.2 Choose launch template, set Latest version
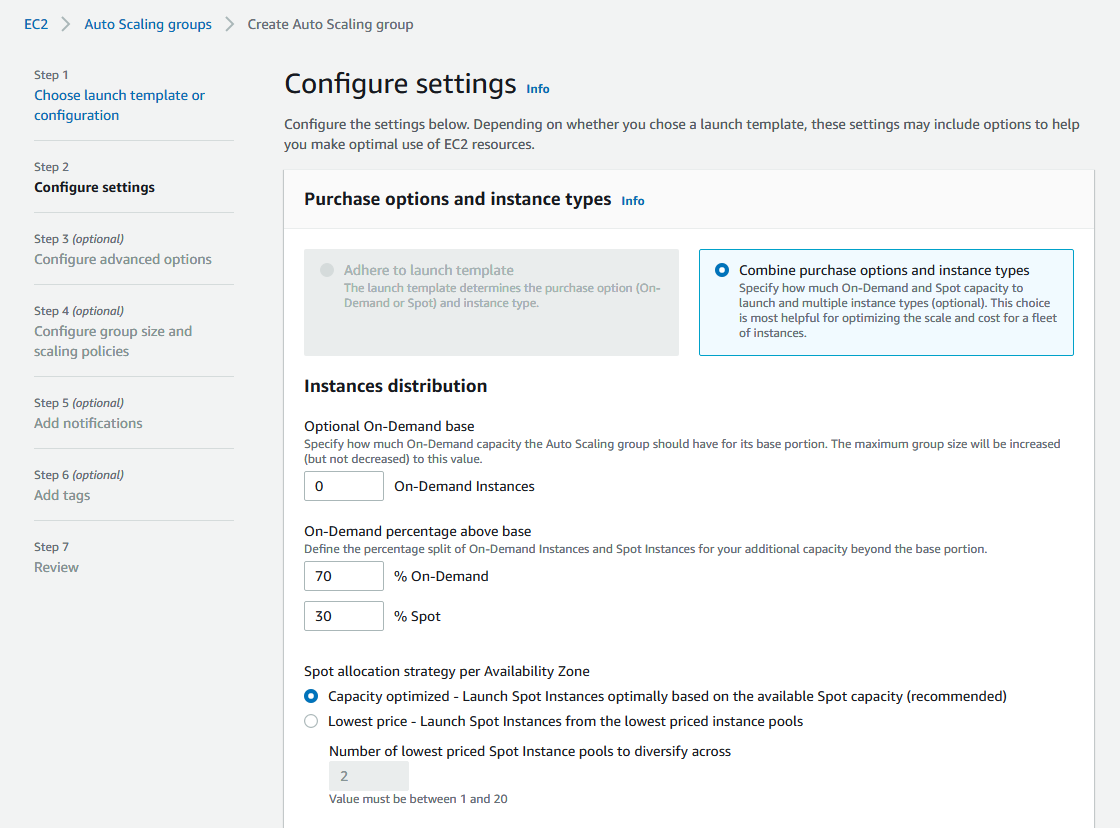
2.3. Set instances distributon percentage (on demand/spot). By default 70 % on demand will be set, it is recommended to raise this value to 100 %
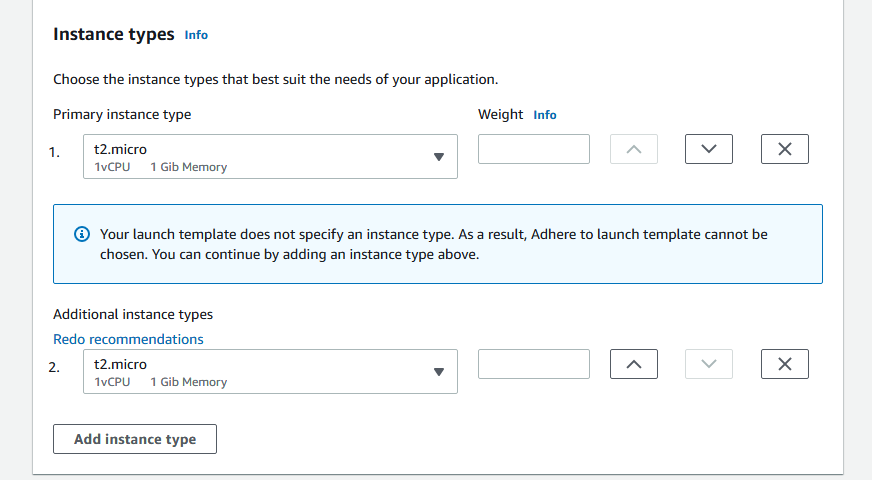
2.4 Choose instance types
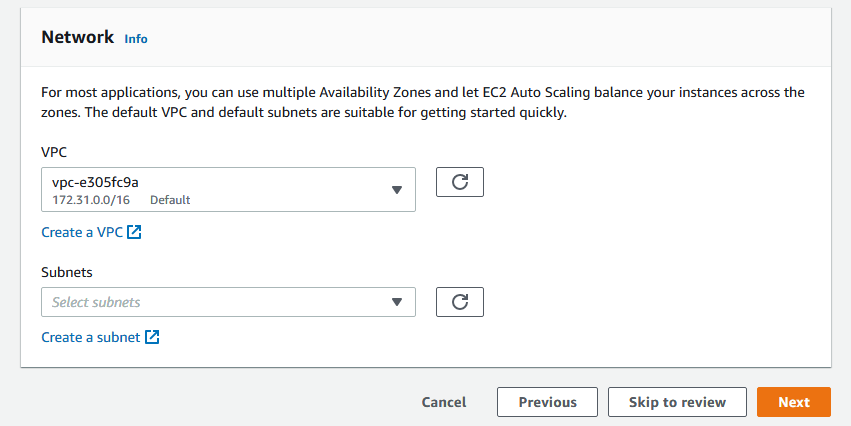
2,5. Choose VPC and subnets for instances
2.6.Choose Attach to a new load balancer
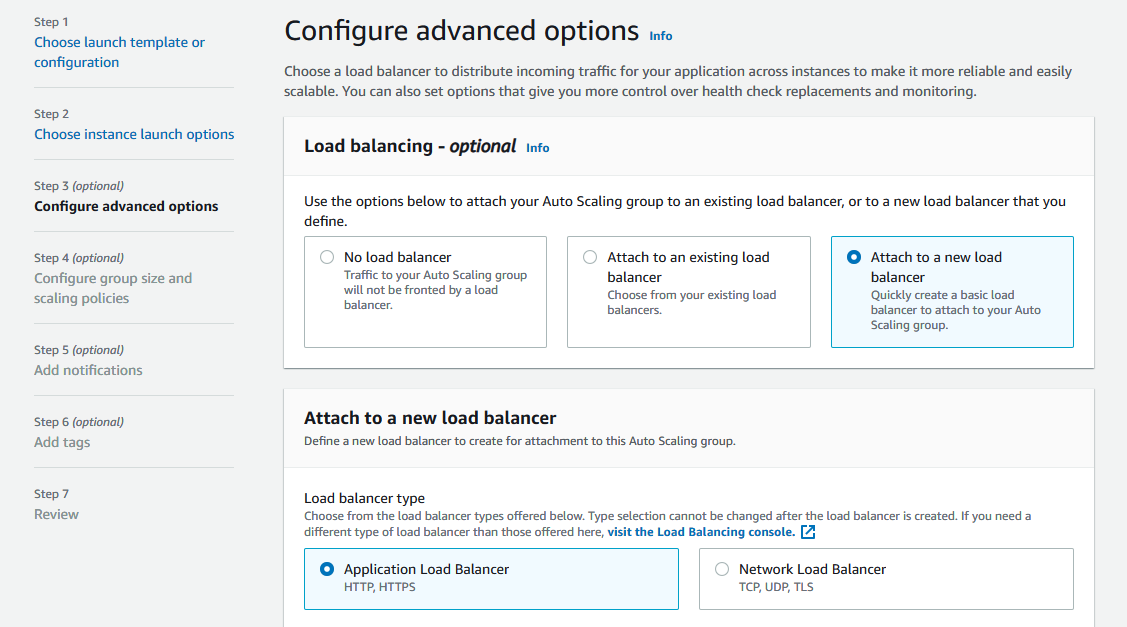
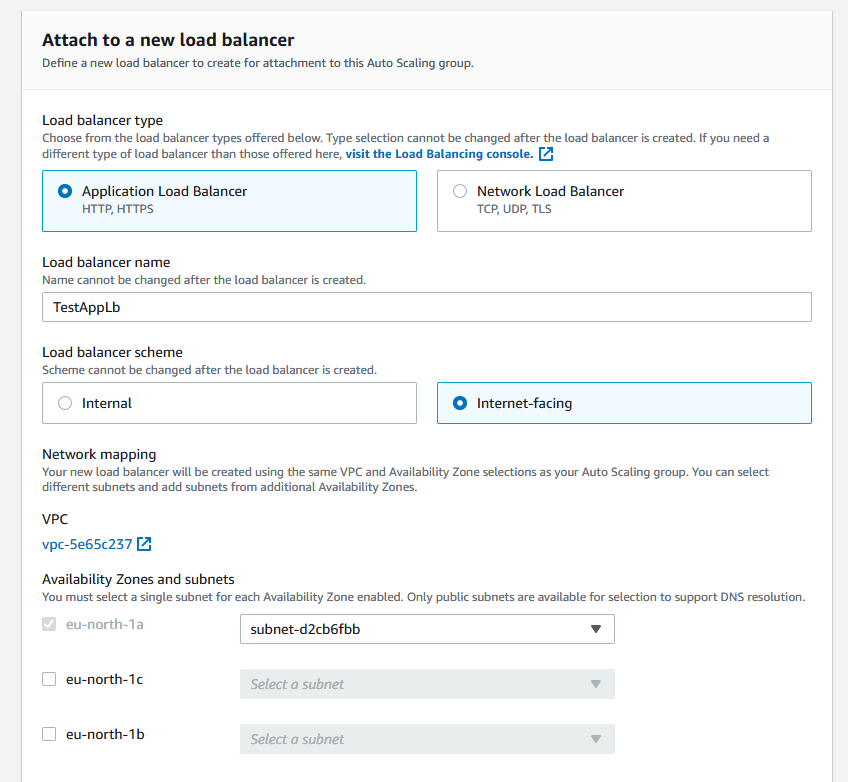
2.7. Choose Application Load balancer type, set the name, choose Internet-facing, set availability zones and corresponding subnets
2.8. In Listeners and routing section set Websocket port (8080), choose Create a target group and set the target group name to be created
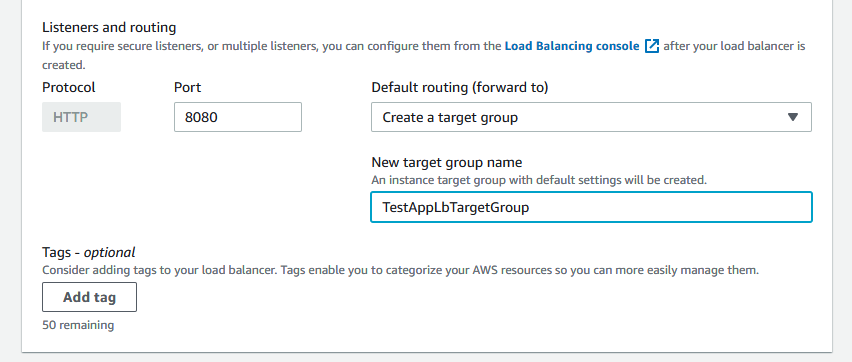
Then click Next
2.9. Set the maximum group size
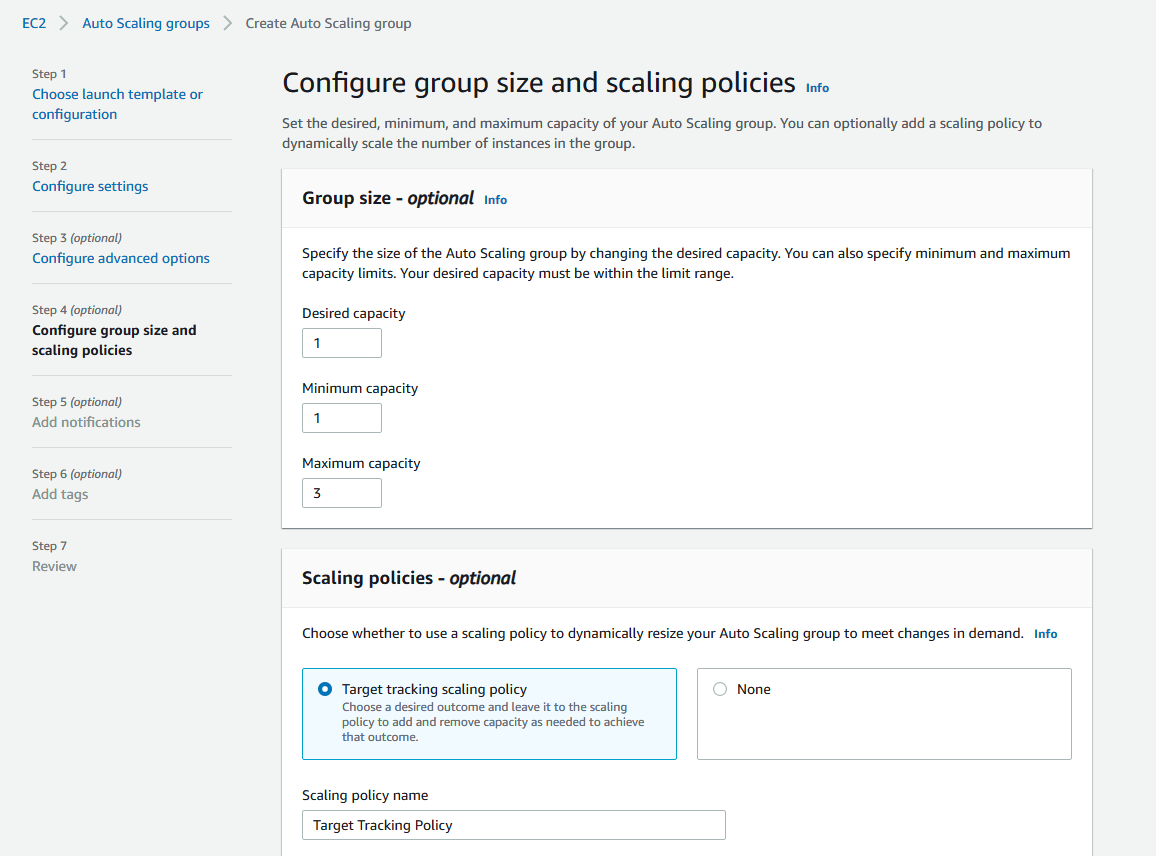
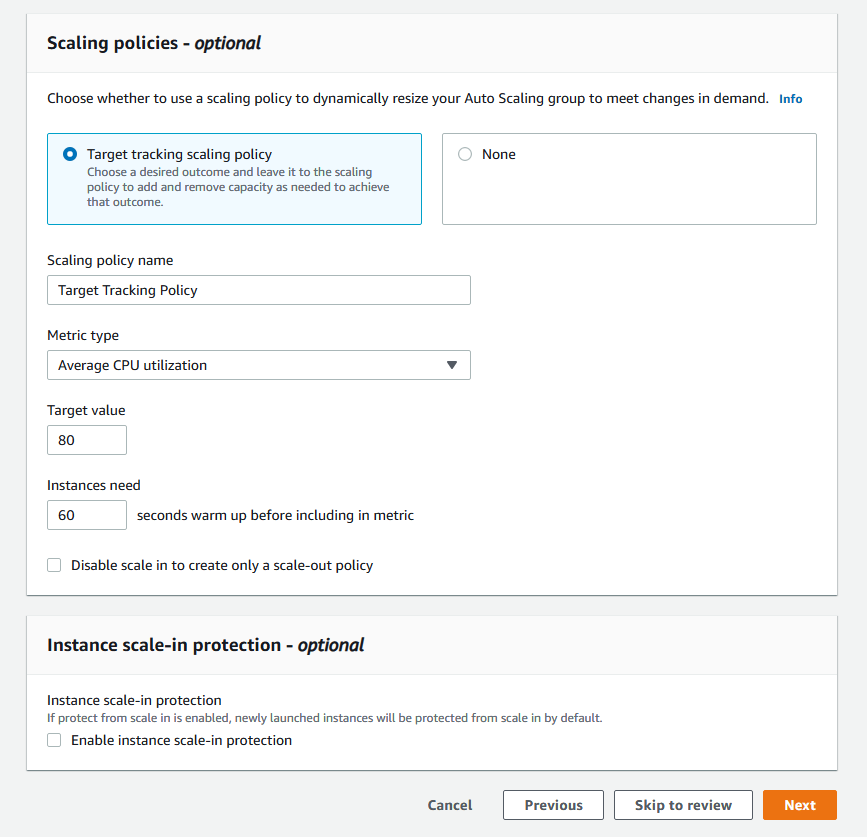
2.10. Select scaling policy by CPU utilization, set target value and instance warming time
2.11. Review group parameters
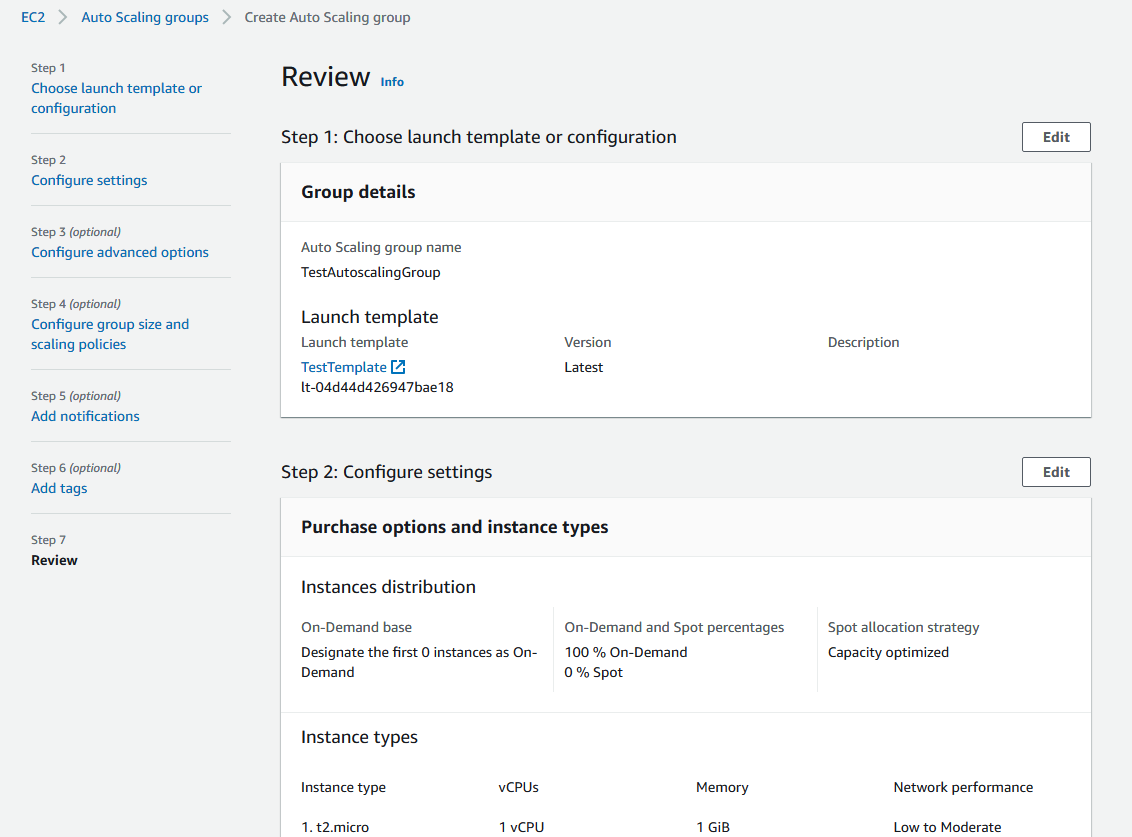
2.12. Click Create Auto Scaling group

Autoscaling group will be created, and one instance will be launched

2.13. Configure load balancer listener as described above
Testing
If load balancer has no running instances, then a new instance will be started when an auto scaling group receiving traffic from the load balancer is created. More instances will be started in case scaling is triggered. (For testing purposes, streaming with transcoding – e.g., streaming RTMP to auto created mixer – can be used to load server CPU). All the started instances will be auto added to the corresponding load balancer.
When an instance (one or more of the added to the balancer) is in service, ws-connection can be done to, e.g., ws://Load balancer DNS name:8080.
Two-way Streaming example opened either by the balancer or an instance address can be used to establish Websocket connection:
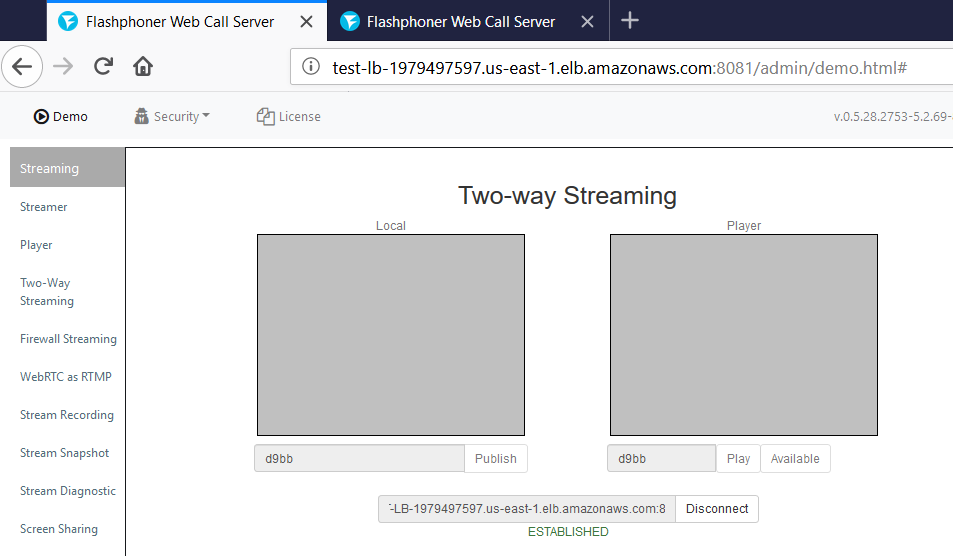
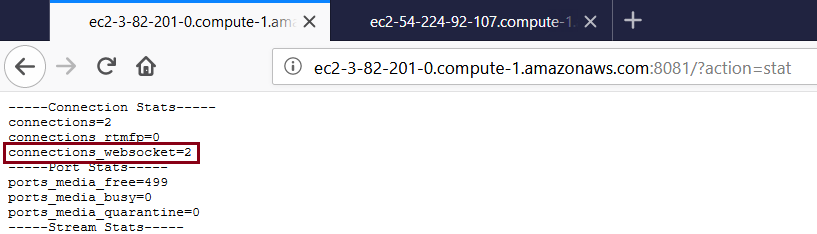
To verify that the connections are distributed between active load balancer instances, use the stats page: http://WCS_ADDRESS:8081/?action=stat
Open the page for each of the instances to see the connections_websocket number: