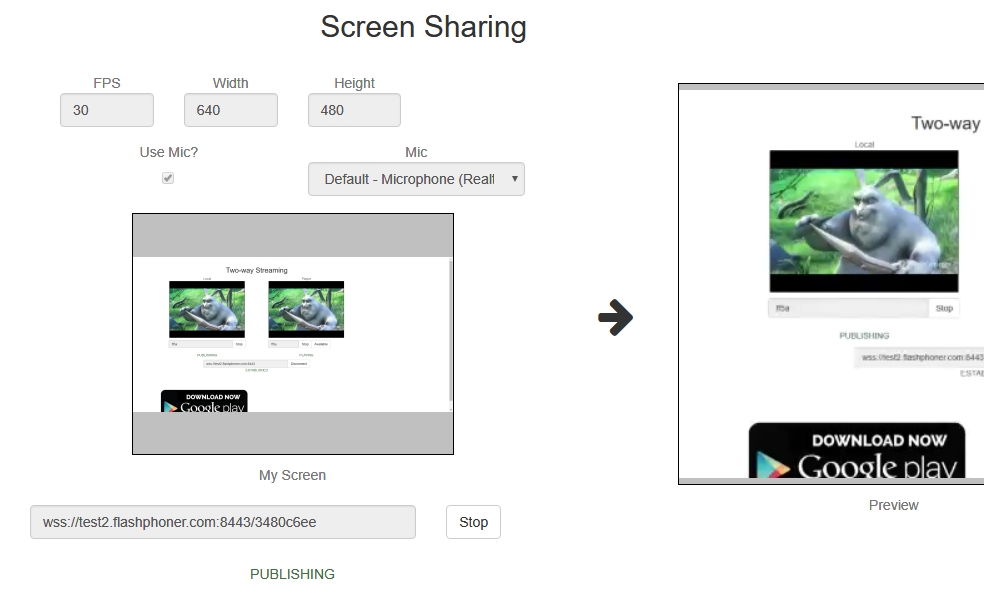
Screen Sharing
Screen sharing example
Screen sharing is available for Chrome and Firefox. To share screen in Chrome before 73 the extension need to build and install, in the latest Chrome versions (73 and newer), Firefox and Safari screen can be shared without extension. Today, it is not recommended to use extension.
Extension for Google Chrome with publication in Chrome Store
Source code for the extension is available by the following link:
Chrome Screen Sharing Extension
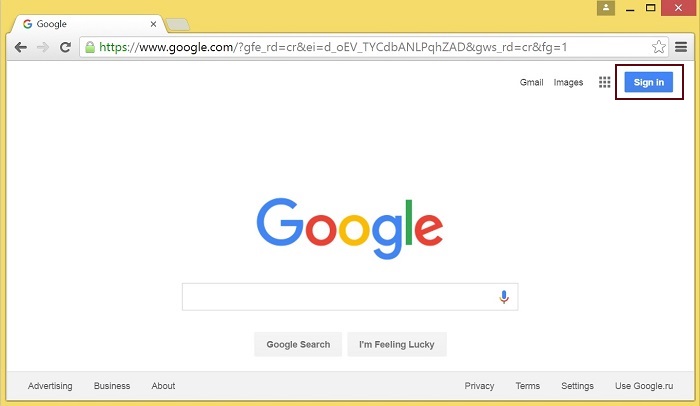
Create a Google account
-
Go to google.com and click
Sign inbutton
-
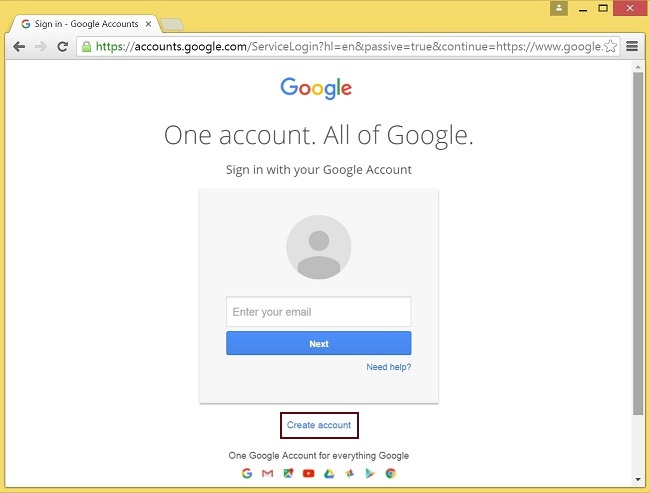
On the
Sign inpage, clickCreate accountlink
-
Create your Google Accountpage will be opened
Fill the required fields and clickNext stepbutton to create the account.
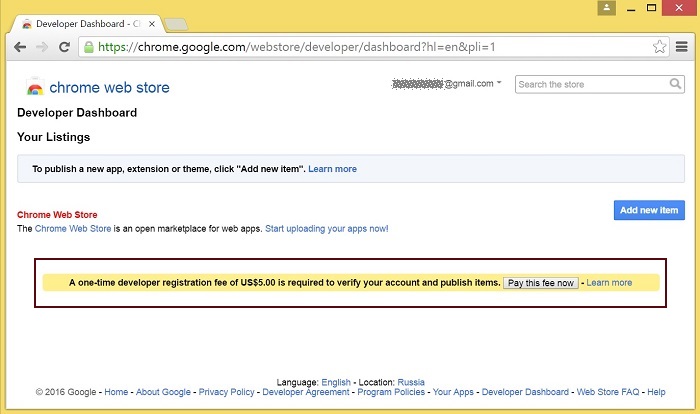
Register as Chrome Web Store Developer
-
Sign in to Chrome Developer Dashboard with the created Google account
-
Pay a one-time $5 developer signup fee
Customization for your domain
Follow the procedures described below to use the extensions with your domain.
Edit manifest file manifest.json of the Chrome extension.
Change:
- name
- author
- description
- homepage_url
- under
"externally_connectable":"matches"changeflashphoner.comto your domain
Save your icons for the extension to chrome-extension directory and edit the file names in "icons" and "web_accessible_resources". (For more information, see Manifest - Icons and Supplying Images.)
Pack the extension
Pack files from chrome-extension folder into ZIP archive.
Publish the extension
-
Sign in to Chrome Developer Dashboard
-
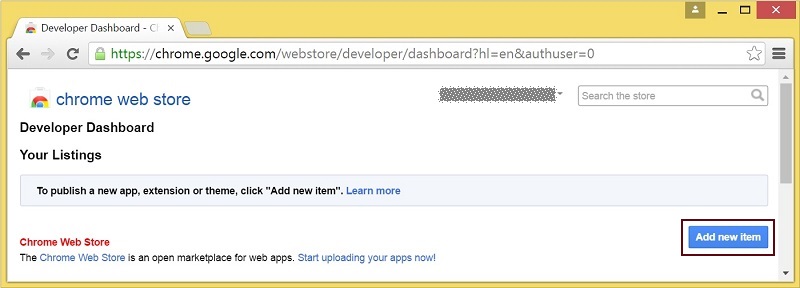
In the dashboard, click
Add new itembutton
-
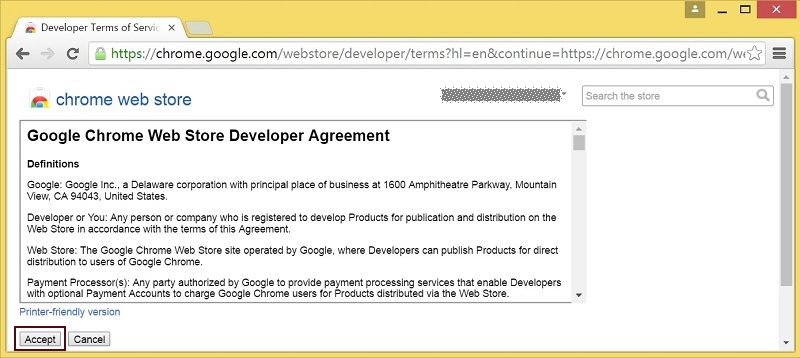
Accept the developer agreement
-
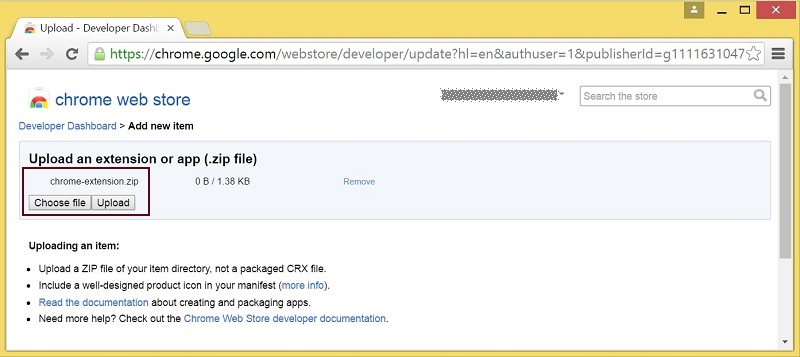
On the
Uploadpage, choose thechrome-extension.zipfile and clickUploadbutton
-
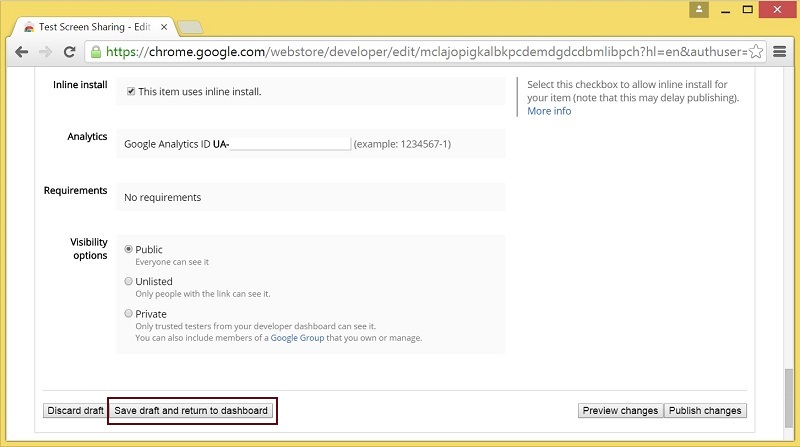
When the extension is uploaded, the page for editing the extension draft will be opened
Edit the extension as required and clickSave draft and return to dashboardbutton at the bottom of the page

-
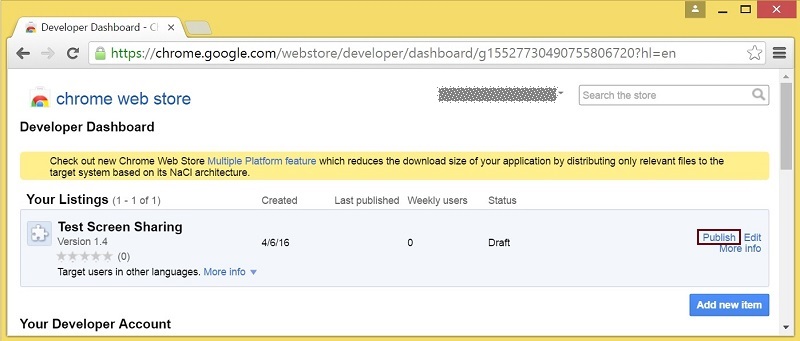
The extension will appear in the developer dashboard
ClickPublishlink to publish the extension
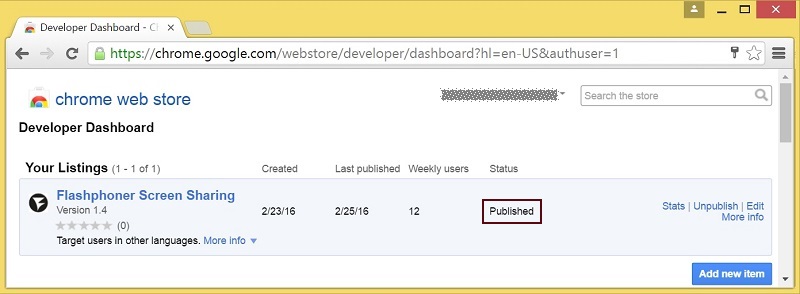
A published extension will have status Published as on the image below.
For more information, see Chrome Web Store Publishing Tutorial.
Extension Inline Installation
Extension installation can be initiated by clicking a link on the Screen Sharing client page. Note that the extension to be installed should be customized, published and approved before inline installation can be used.
Follow the steps described below to use the client with your extensions:
-
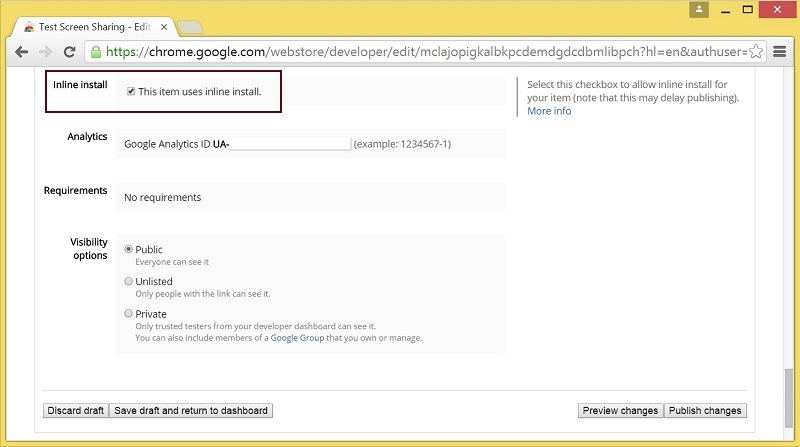
When publishing, select
Inline Installoption
-
Verify and add website with your domain to the extension
-
Click
Add a New Site
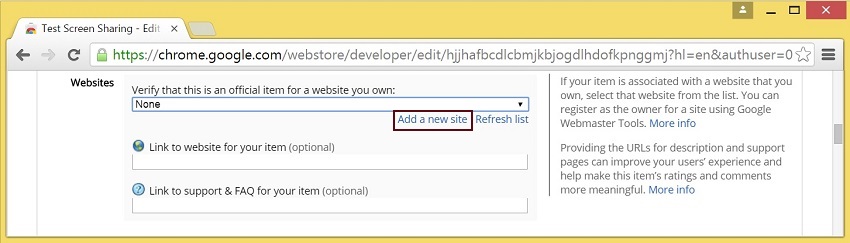
-
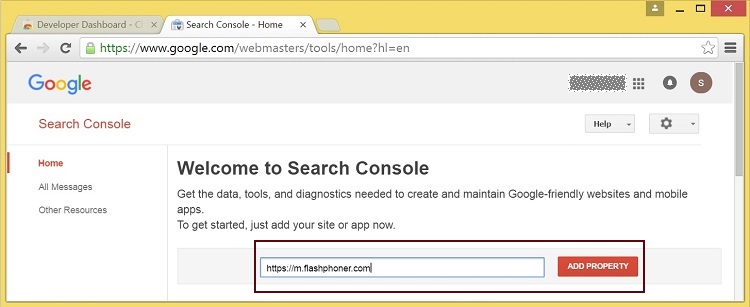
Google Search Console page will open in a new tab. Enter URL with your domain
-
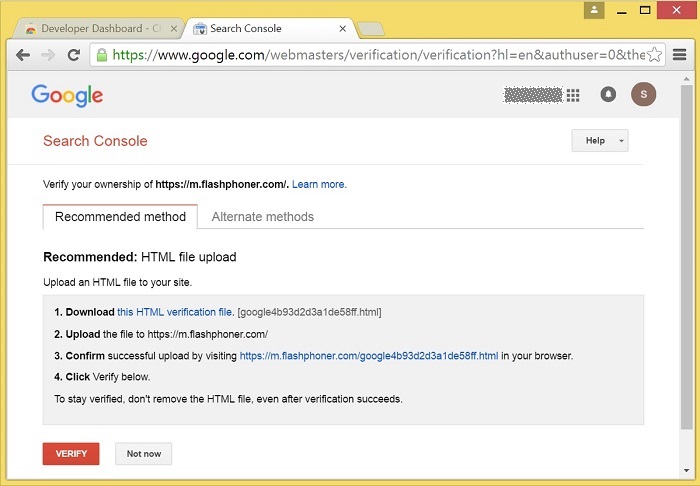
A page with the instruction for the site verification will open. Follow the procedure steps and click
Verifybutton
-
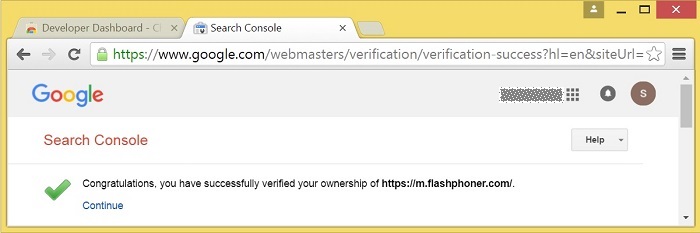
If the verification is passed, a page confirming successful verification will be opened
-
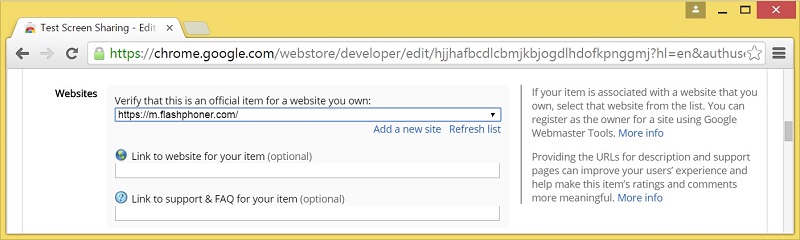
The website will appear in the list in the extension options and the extension can be associated with the site
-
Configuring the client
Edit Screen-sharing.html and Screen-sharing.js
- In
Screen-sharing.htmlthechrome-webstore-itemparameter should point to your extension in the Chrome Store - In
Screen-sharing.jsreplace the value of thechromeScreenSharingExtensionIdparameter to the ID of your extension
To get the ID of the extension, click More info of this extension in Chrome Developer Dashboard

Media source parameters
To configure screen media source parameters, use parameters of the Configuration object passed to the init() method upon initializing of the Flashphoner API instance.
var f = Flashphoner.getInstance();
var configuration = new Configuration();
....
configuration.screenSharingVideoWidth = 1920;
configuration.screenSharingVideoHeight = 1080;
configuration.screenSharingVideoFps = 10;
f.init(configuration);
Parameter list
| Parameter | Description |
|---|---|
| screenSharingVideoWidth | Screen media source width |
| screenSharingVideoHeight | Screen media source height |
| screenSharingVideoFps | Screen media source framerate |
These parameters set marginal values of resolution and framerate (FPS). For instance, screenSharingVideoWidth = 1080 means the width of the source video cannot be more than 1080 pixels, but can be less. (i.e. when sending a stream of an app window that has the width of 720 pixels).
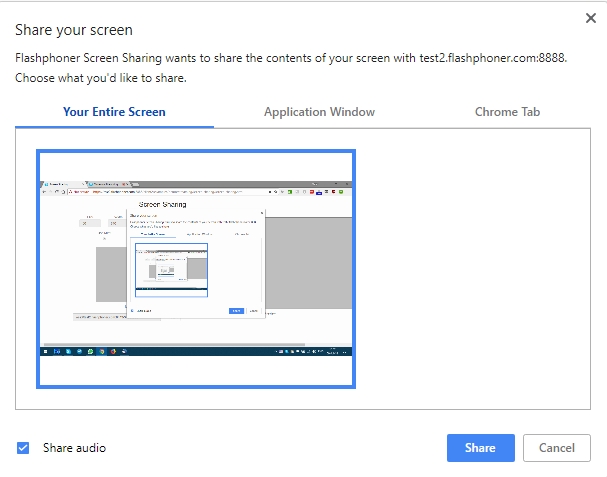
System sound capture in Chrome browser
In Chrome browser, there is ability to translate audio stream from system sound source while capturing a screen. The feature is useful in screencasting, for example. To capture system sound, set Share audio option in Chrome extension dialog window while choosing streaming source window or browser tab:
Chrome extension code:
Capture source management in Firefox browser
In Firefox browser, all the screen or some program window can be chosen as video stream source with constraints.video.mediaSource parameter
code:
constraints.video.type = "screen";
if (Browser.isFirefox()){
    constraints.video.mediaSource = $('#mediaSource').val();
}
session.createStream({
    name: streamName,
    display: localVideo,
    constraints: constraints
})
Source selection interface example:
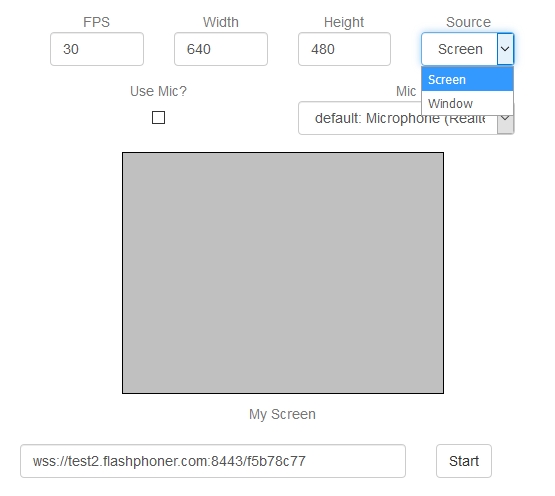
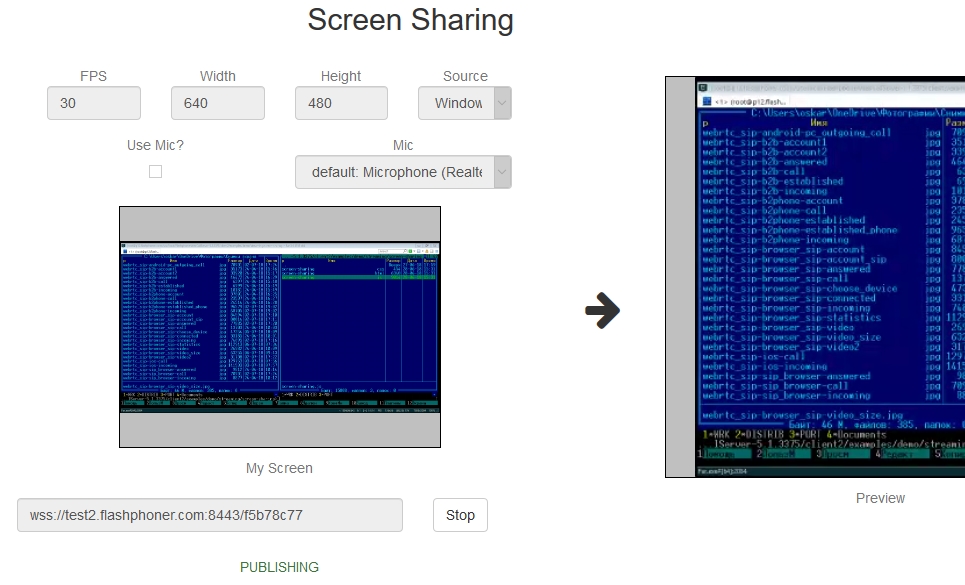
Program window capture
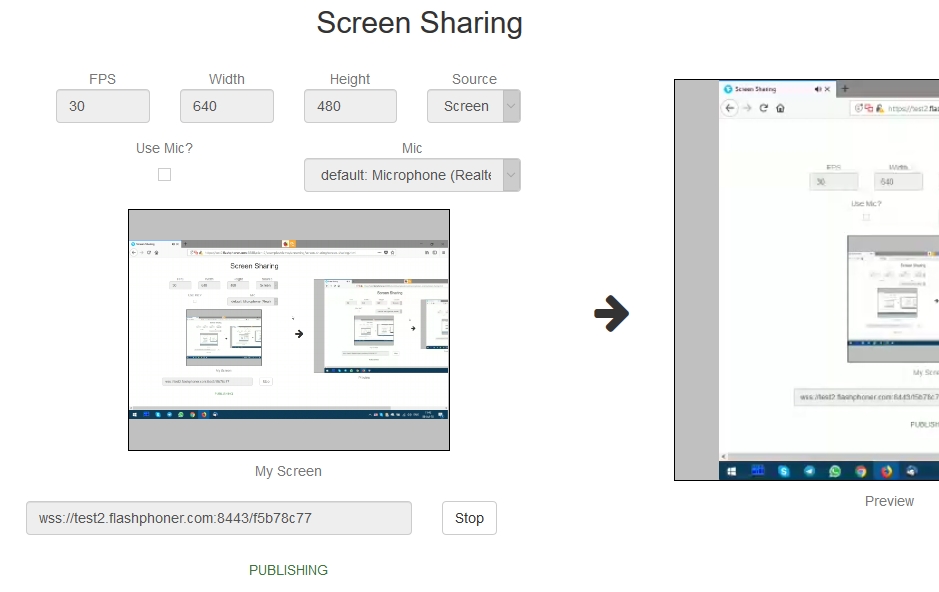
Screen capture
Screen sharing without extension
Firefox browser
Firefox browser does not use extension to share screen
Chromium based browsers
Since Chrome 73 and Flashphoner WebSDK 0.5.28.2753.86 screen sharing is possible without extension. To do this constraints.video.withoutExtension parameter should be passed when stream is created
Safari browser in MacOS
Since Safari 13 and Flashphoner WebSDK 0.5.28.2753.152 screen sharing is possible without extension. To do this constraints.video.withoutExtension parameter should be passed when stream is created
if ($("#woChromeExtension").prop('checked') || Browser.isSafari()) {
constraints.video.withoutExtension = true;
}
Known limits
-
In Chrome browser, picture resolution and FPS are set by source dimensions (screen, windows or browser tab) and by real picture updating speed, not by constraints. This issue is fixed since Flashphoner WebSDK build 0.5.28.2753.152
-
System sound capture only works starting from Crome 74
Code of the example
This example uses Flashphoner extensions for work with domain *.flashphoner.com. For work with your domain, build up and publish your extensions as described above.
As temporary solution, IP address of your WCS server can be added to file C:\Windows\System32\drivers\etc\hosts (on Windows OS) as test.flashphoner.com. That way, you will be able to test your WCS server with domain test.flashphoner.com till the extensions for your domain are built up.
With Chrome, the example works only via HTTPS.
The path to the source code of the example on WCS server is:
/usr/local/FlashphonerWebCallServer/client/examples/demo/streaming/screen-sharing
- screen-sharing.css - file with styles
- screen-sharing.html - page of the screen sharing streamer
- screen-sharing.js - script providing functionality for the streamer
This example can be tested using the following address:
https://host:8888/client/examples/demo/streaming/screen-sharing/screen-sharing.html
Here host is the address of the WCS server.
For Chrome, link to the extension is specified directly in file screen-sharing.html line 17
<link rel="chrome-webstore-item" href="https://chrome.google.com/webstore/detail/nlbaajplpmleofphigmgaifhoikjmbkg">
Analyzing the code
1. Initialization of the API
Flashphoner.init() code
Chrome extension ID is passed to the init() method.
2. Connection to WCS server
Flashphoner.createSession() code
Flashphoner.createSession({urlServer: url}).on(SESSION_STATUS.ESTABLISHED, function(session){
//session connected, start streaming
startStreaming(session);
}).on(SESSION_STATUS.DISCONNECTED, function(){
setStatus(SESSION_STATUS.DISCONNECTED);
onStopped();
}).on(SESSION_STATUS.FAILED, function(){
setStatus(SESSION_STATUS.FAILED);
onStopped();
});
3. Receiving the event confirming successful connection
ConnectionStatusEvent ESTABLISHED code
Flashphoner.createSession({urlServer: url}).on(SESSION_STATUS.ESTABLISHED, function(session){
//session connected, start streaming
startStreaming(session);
}).on(SESSION_STATUS.DISCONNECTED, function(){
...
}).on(SESSION_STATUS.FAILED, function(){
...
});
4. Stream constraints setting
resolution and fps code
var constraints = {
video: {
width: parseInt($('#width').val()),
height: parseInt($('#height').val()),
//WCS-2014. fixed window/tab sharing
frameRate: parseInt($('#fps').val())
}
};
michrophone usage code
video source type and Chrome screen sharing without extension code
constraints.video.type = "screen";
if ($("#woChromeExtension").prop('checked')) {
 constraints.video.withoutExtension = true;
}
Firefox media source code
5. Video streaming
Session.createStream(), Stream.publish() code
session.createStream({
  name: streamName,
  display: localVideo,
  constraints: constraints
  ...
}).publish();
6. Receiving the event confirming successful streaming
StreamStatusEvent PUBLISHING code
When the screen sharing stream is published, preview video stream is created with method Session.createStream(), and function Stream.play() is called to start playback of the stream in div element remoteVideo.
session.createStream({
  name: streamName,
  display: localVideo,
  constraints: constraints
}).on(STREAM_STATUS.PUBLISHING, function(publishStream){
  /*
   * User can stop sharing screen capture using Chrome "stop" button.
   * Catch onended video track event and stop publishing.
   */
  document.getElementById(publishStream.id()).srcObject.getVideoTracks()[0].onended = function (e) {
      publishStream.stop();
  };
  document.getElementById(publishStream.id()).addEventListener('resize', function(event){
      resizeVideo(event.target);
  });
  setStatus(STREAM_STATUS.PUBLISHING);
  //play preview
  session.createStream({
      name: streamName,
      display: remoteVideo
      ...
  }).play();
}).on(STREAM_STATUS.UNPUBLISHED, function(){
  ...
}).on(STREAM_STATUS.FAILED, function(){
  ...
}).publish();
7. Receiving the event confirming successful preview stream playback
StreamStatusEvent PLAYING code
session.createStream({
   name: streamName,
   display: remoteVideo
}).on(STREAM_STATUS.PLAYING, function(previewStream){
   document.getElementById(previewStream.id()).addEventListener('resize', function(event){
       resizeVideo(event.target);
   });
   //enable stop button
   onStarted(publishStream, previewStream);
}).on(STREAM_STATUS.STOPPED, function(){
   ...
}).on(STREAM_STATUS.FAILED, function(){
   ...
}).play();
8. Preview stream playback stop
Stream.stop() code
function onStarted(publishStream, previewStream) {
    $("#publishBtn").text("Stop").off('click').click(function(){
        $(this).prop('disabled', true);
        previewStream.stop();
    }).prop('disabled', false);
}
9. Receiving the event confirming successful playback stop
StreamStatusEvent STOPPED code
On receiving the event, publishStream.stop() is called to stop screen sharing streaming
        session.createStream({
            name: streamName,
            display: remoteVideo
        }).on(STREAM_STATUS.PLAYING, function(previewStream){
            ...
        }).on(STREAM_STATUS.STOPPED, function(){
            publishStream.stop();
        }).on(STREAM_STATUS.FAILED, function(){
            ...
        }).play();
10. Screen sharing streaming stop by click on Chrome extension button
Stream.stop() code
document.getElementById(publishStream.id()).srcObject.getVideoTracks()[0].onended = function (e) {
   publishStream.stop();
};
11. Receiving the event confirming successful streaming stop
StreamStatusEvent UNPUBLISHED code
session.createStream({
   name: streamName,
   display: localVideo,
   constraints: constraints
}).on(STREAM_STATUS.PUBLISHING, function(publishStream){
   ...
}).on(STREAM_STATUS.UNPUBLISHED, function(){
   setStatus(STREAM_STATUS.UNPUBLISHED);
   //enable start button
   onStopped();
}).on(STREAM_STATUS.FAILED, function(){
   ...
}).publish();