SIP calls using iOS SDK
Overview
SIP call on iOS devices can be made both from a browser and using the iOS SDK.
Operation flowchart
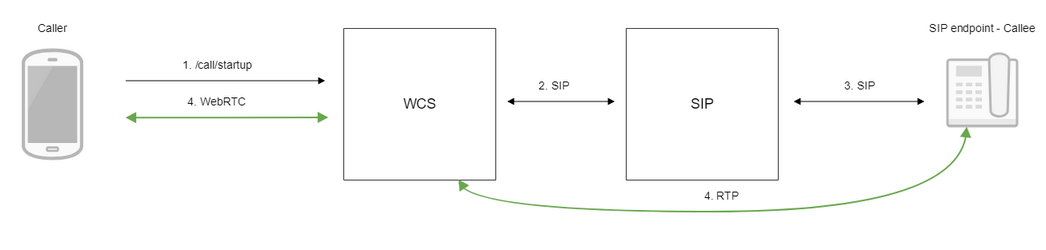
1. SIP server as a proxy server to transfer calls and RTP media

- The iOS device begins a call
- WCS connects to the SIP server
- The SIP server connects to the SIP device that receives the call
- The iOS device and the SIP device exchange audio and video streams
2. SIP server as a server to transfer calls only
- The iOS device begins a call
- WCS connects to the SIP server
- The SIP server connects to the SIP device that receives the call
- The iOS device and the SIP device exchange audio and video streams
Testing
Making an outgoing call from iOS to a SIP device
- For the test we use:
- two SIP accounts;
- the Phone application to make a call;
-
a software phone to answer the call.
-
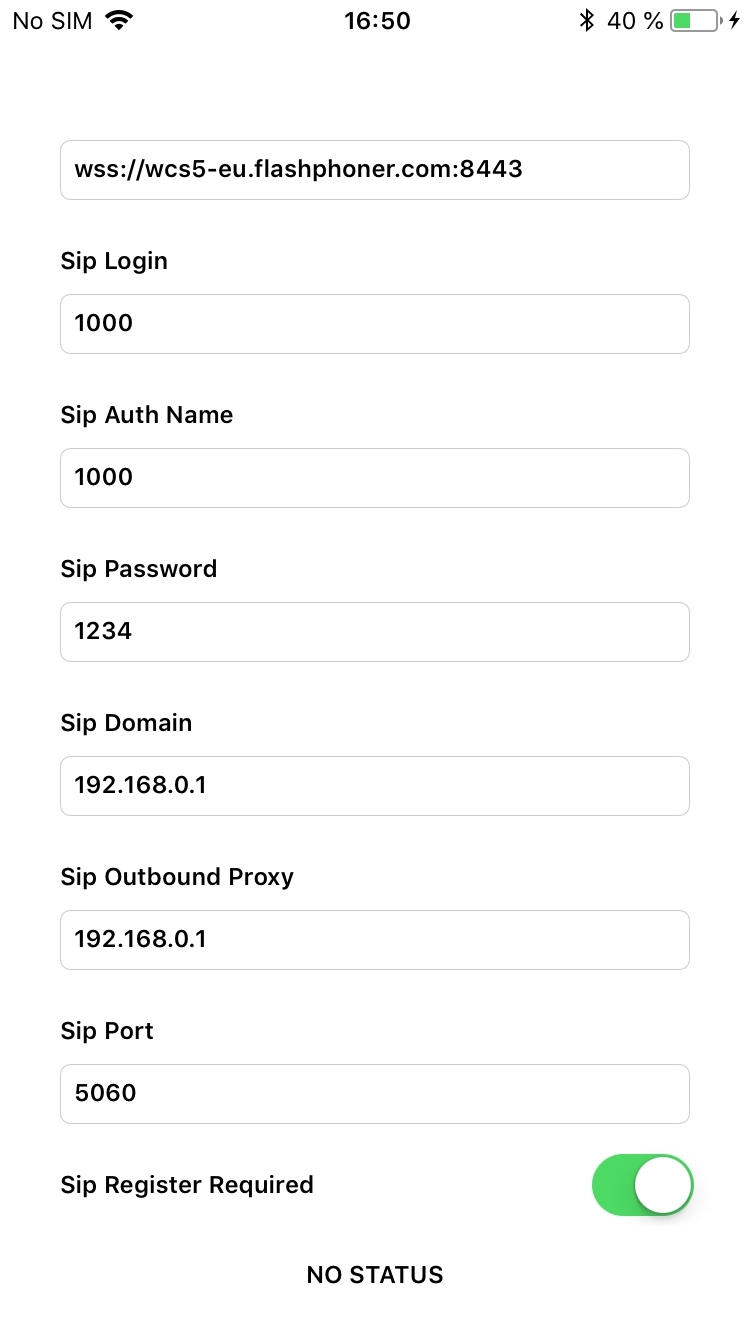
Build and install the Phone app to the iOS device. Start the app, enter the URL of the WCS server to connect to it via Websocket and the data of the SIP account making a call:
-
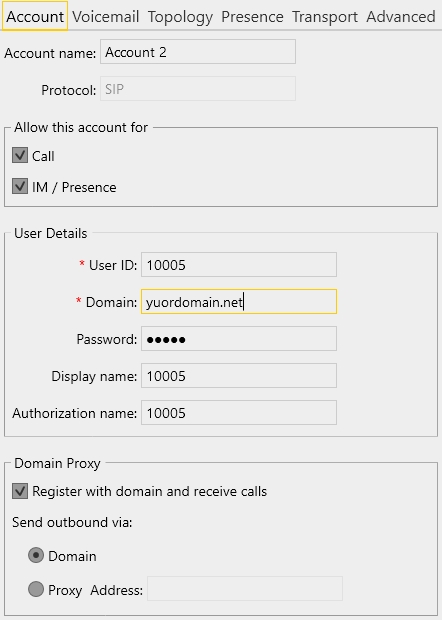
Run the softphone, enter the data of the SIP account that receives the call:
-
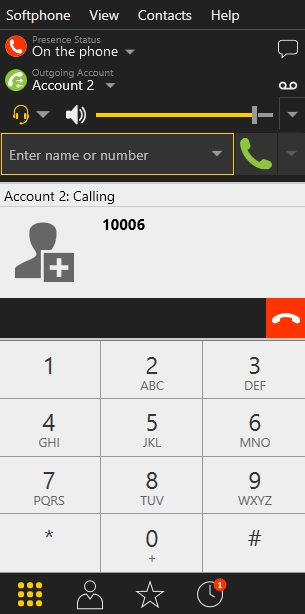
Tap the
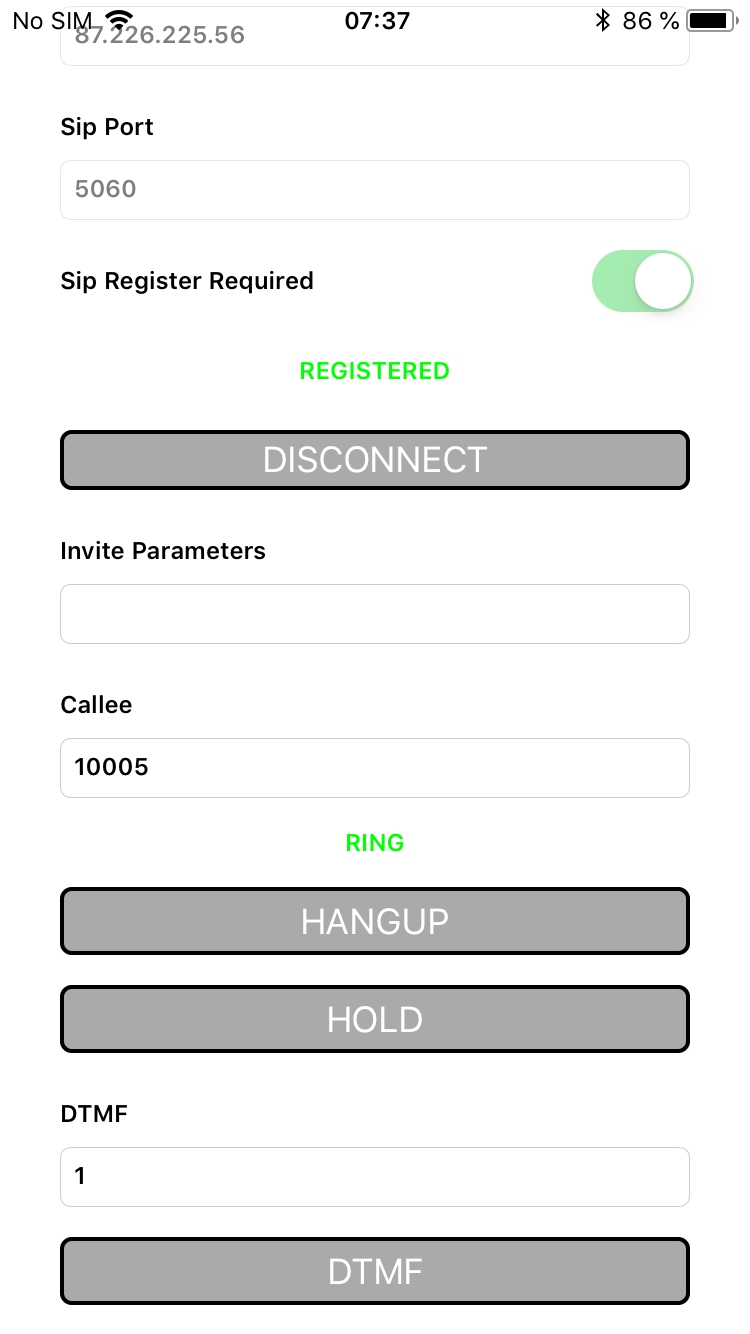
Connectbutton in the app, a connection will be established to the server. Then enter the identifier of the SIP account that receives the call and click theCallbutton:
-
Answer the call in the softphone by clicking the answer button:
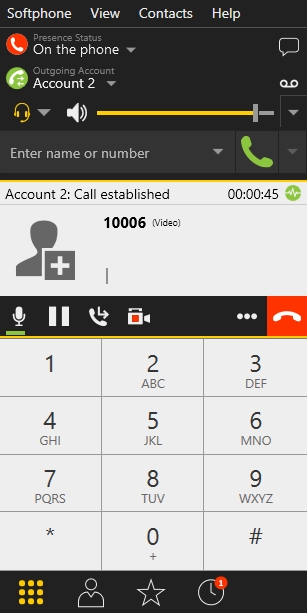
-
To terminate the call, tap the
Hangupbutton in the application, or click the end call button in the softphone.
Receving an outgoing call from a SIP device to iOS
- For the test we use:
- two SIP accounts;
- a softphone to make a call;
-
the Phone application to answer the call.
-
Build and install the Phone app to the iOS device. Start the app, enter the URL of the WCS server to connect via Secure Websocket and the data of the SIP account that receives the call:
Tap theConnectbutton in the app to establish a connection to the WCS server -
Run the software phone and enter the data of the SIP account making the call:
-
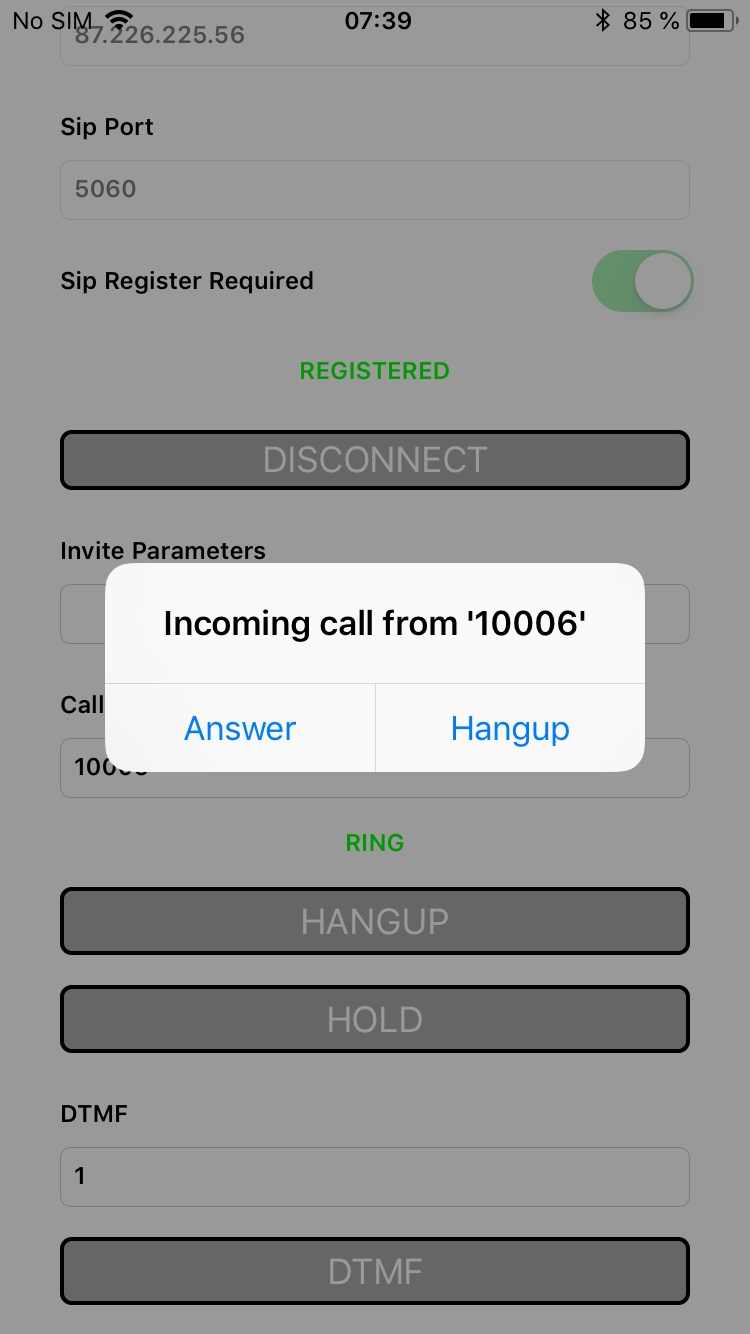
In the softphone enter the identifier of the SIP account that receives the call and click the call button:
-
Answer the call in the application by tapping
Answer:
-
In the softphone make sure the call has started:
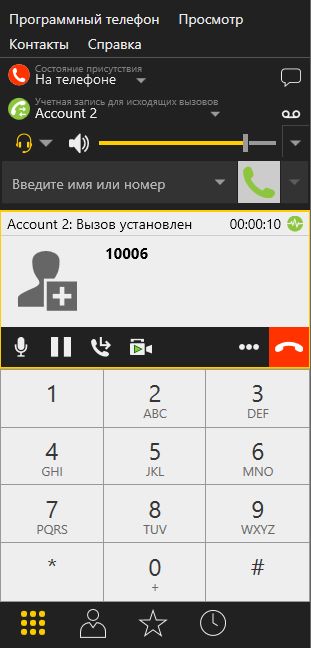
-
To terminate the call, tap the Hangup button in the app, or click the end call button in the softphone.
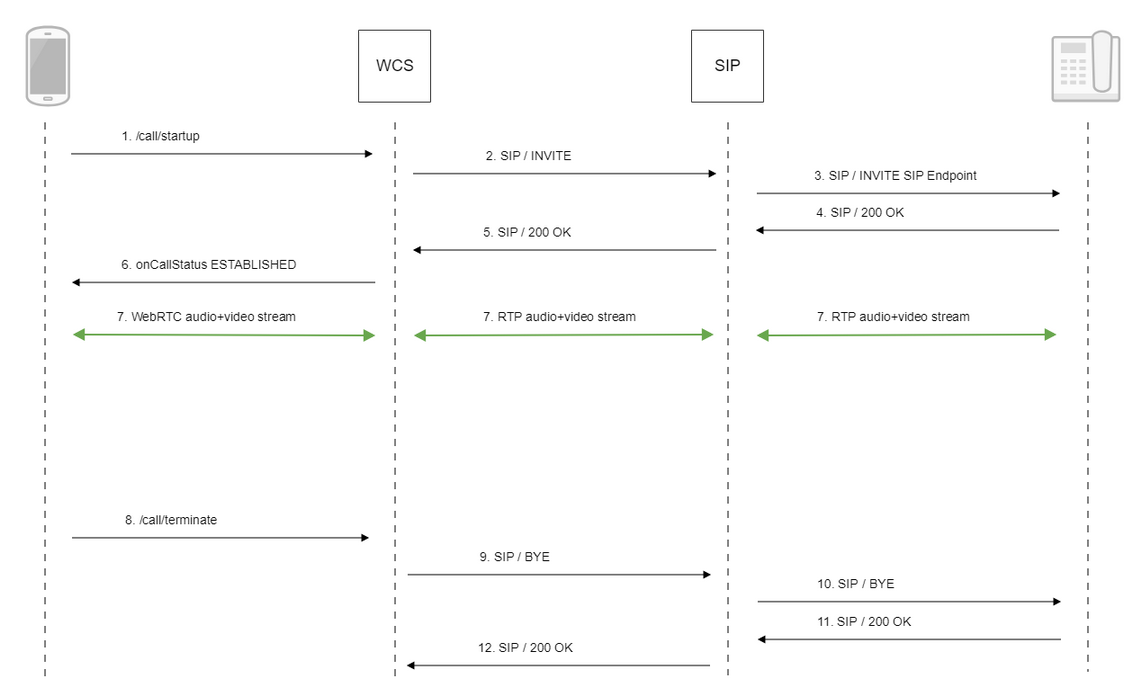
Call flow
Below is the call flow when using the Phone-min example to create a call
View class for the main view of the application: ViewController (header file ViewController.h; implementation file ViewController.m)
-
Creating a call
FPWCSApi2Session.createCall(),FPWCSApi2Call.call()code
- (FPWCSApi2Call *)call { FPWCSApi2Session *session = [FPWCSApi2 getSessions][0]; FPWCSApi2CallOptions *options = [[FPWCSApi2CallOptions alloc] init]; NSString *parameters = _inviteParameters.input.text; if (parameters && [parameters length] > 0) { NSError* err = nil; parameters = [parameters stringByReplacingOccurrencesOfString:@""" withString:@"\""]; NSMutableDictionary *dictionary = [NSJSONSerialization JSONObjectWithData:[parameters dataUsingEncoding:NSUTF8StringEncoding] options:0 error:&err]; if (err) { NSLog(@"Error converting JSON Invite parameters to dictionary %@, JSON %@", err, parameters); } else { options.inviteParameters = dictionary; } } options.callee = _callee.input.text; ... NSError *error; call = [session createCall:options error:&error]; ... [call call]; return call; } -
Sending
SIP INVITEto the SIP server -
Sending
SIP INVITEto the SIP device -
Receiving a confirmation from the SIP device
-
Receiving a confirmation from the SIP server
-
Receiving from the server an event confirming successful connection
-
The caller and the callee exchange audio and video streams
-
Terminating the call
FPWCSApi2Call.hangup()code
-
Sending
SIP BYEto the SIP server -
Sending
SIP BYEto the SIP device -
Receiving a confirmation from the SIP device
-
Receiving a confirmation from the SIP server
Known issues
1. It's impossible to make a SIP call if SIP Login and SIP Authentification name fields contain unappropriate characters
Symptoms
SIP call stucks in PENDING state
Solution
According to RFC3261, SIP Login and SIP Authentification name should not contain any of unescaped spaces and special symbols and should not be enclosed in angle brackets <>.
For example, this is not allowed by the specification
sipLogin='Ralf C12441@host.com'
sipAuthenticationName='Ralf C'
sipPassword='demo'
sipVisibleName='null'
and this is allowed